
DIY Clay Pot Graduation Cap Centerpieces
Decorate tables with fun little graduation caps! These Graduation Cap Centerpieces are a fun DIY you can make in an afternoon. It’s one of my favorite graduation party ideas because it’s so easy (and cheap!).
You don’t have to spend a ton of money to decorate for a graduation party. All you need are a few supplies from the Dollar Store and a little bit of time.
As you make these little graduation caps, keep the DIY fun going! Print out some free grad party decorations next! Saving money can be fun and look good at the same time.


This tutorial will show you how to make a basic black cap with a yellow tassel, but there are a bunch of ways to customize your graduation cap centerpiece.
Change the tassel color to match the color of your graduate’s school. Or, decorate the top of the cap with a personal message.
This is such an easy graduation craft that anyone can make it! Grab your family and friends and get crafting together.
This post contains affiliate links. Read my full disclosure.
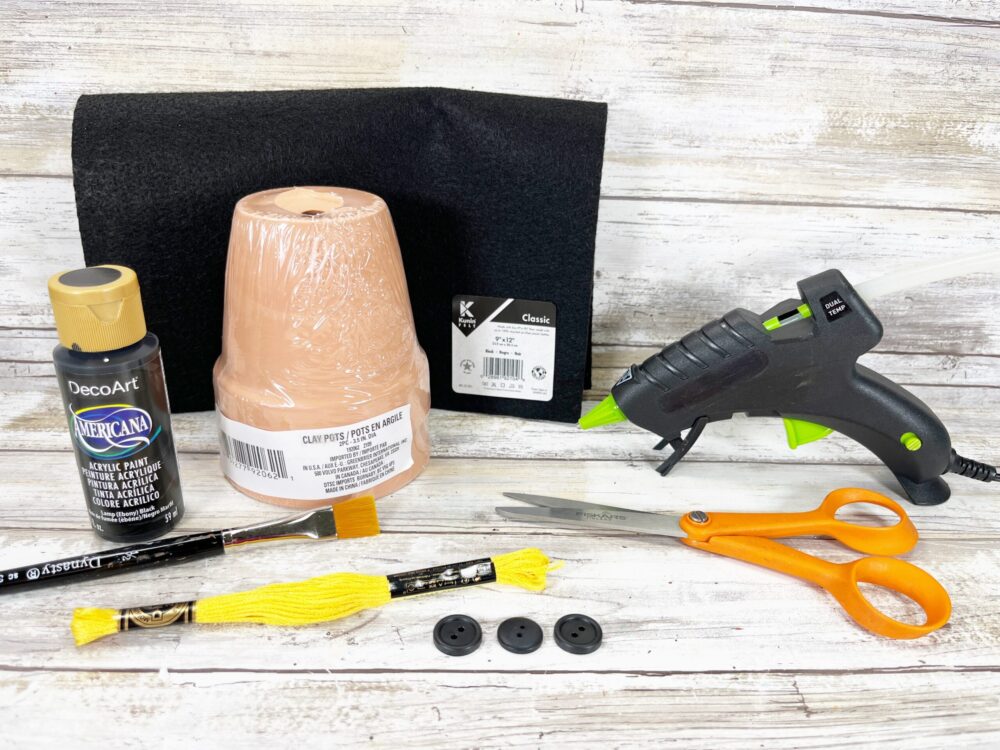
Clay Pot Centerpiece Supplies
You can get all of your supplies at the dollar store. When you save so much money on craft supplies, you’ll have more left over to give the graduate in cash!
Here is what you’ll need when you make a clay pot graduation cap centerpiece.
- Clay Pots, 3.5” – Amazon
- Felt Craft Sheet – Black
- Embroidery Floss Skein – Yellow
- Button, Black – Dollar Store
- Glue Gun and Glue Sticks – Dollar Store
- Acrylic Craft Paint – Black
- Paintbrush
- Scissors
- Ruler
- Pencil
- Recycled Cardboard Box (think crackers or cereal)
- PATTERN GRAD CAP
Either save money and buy it all at your Dollar store or buy all your clay pot centerpiece supplies from Amazon.
Download the Graduation Cap Pattern
To make it easier, I created a free graduation cap template. These will fit easily on a 3 1/2-inch clay pot.
Download and print the free template below.

Once you have all your supplies, you’re ready to get crafting! All the exact steps are in the printable craft card below.
How Many Centerpieces To Make
How many clay pot centerpieces should you make for a graduation party?
This depends on how many tables you will have. I suggest placing one or two graduation cap centerpieces at each table.
If you’re hosting an open house and won’t have tables for all of the guests, then use these centerpieces for the gift and dessert tables.

They are so easy to make that you won’t mind making extras! Place them all around the party. They will also look perfect near the guest book.
More Graduation Party Ideas
Are you looking for more graduation party ideas? I have a bunch of articles that will help you out. Check these guides for some easy graduation party ideas that won’t break the bank.
- Graduation Brunch Ideas
- Graduation Candy Buffet
- 30 Graduation Party Ideas For Guys
- Outdoor Graduation Party Ideas
- Graduation Party Ideas For Girls
Throwing a graduation party can be fun and stress-free! Keep things relaxed and make the decor yourself. You can’t go wrong!

Want to know how to make a Graduation Cap centerpiece out of a clay pot? Here’s the easy tutorial.
Graduation Cap Clay Pot Centerpiece

Using simple supplies from the Dollar Store, create these quick and easy Grad Caps in just 30 minutes.
Materials
- • Clay Pots, 3.5” – Dollar Store
- • Felt Craft Sheet - Black
- • Embroidery Floss Skein - Yellow
- • Button, Black – Dollar Store
- • Acrylic Craft Paint – Black
- • Recycled Cardboard Box (think crackers or cereal)
- • PATTERN GRAD CAP
Tools
- • Glue Gun and Glue Sticks
- • Paintbrush
- • Scissors
- • Ruler
- • Pencil
Instructions
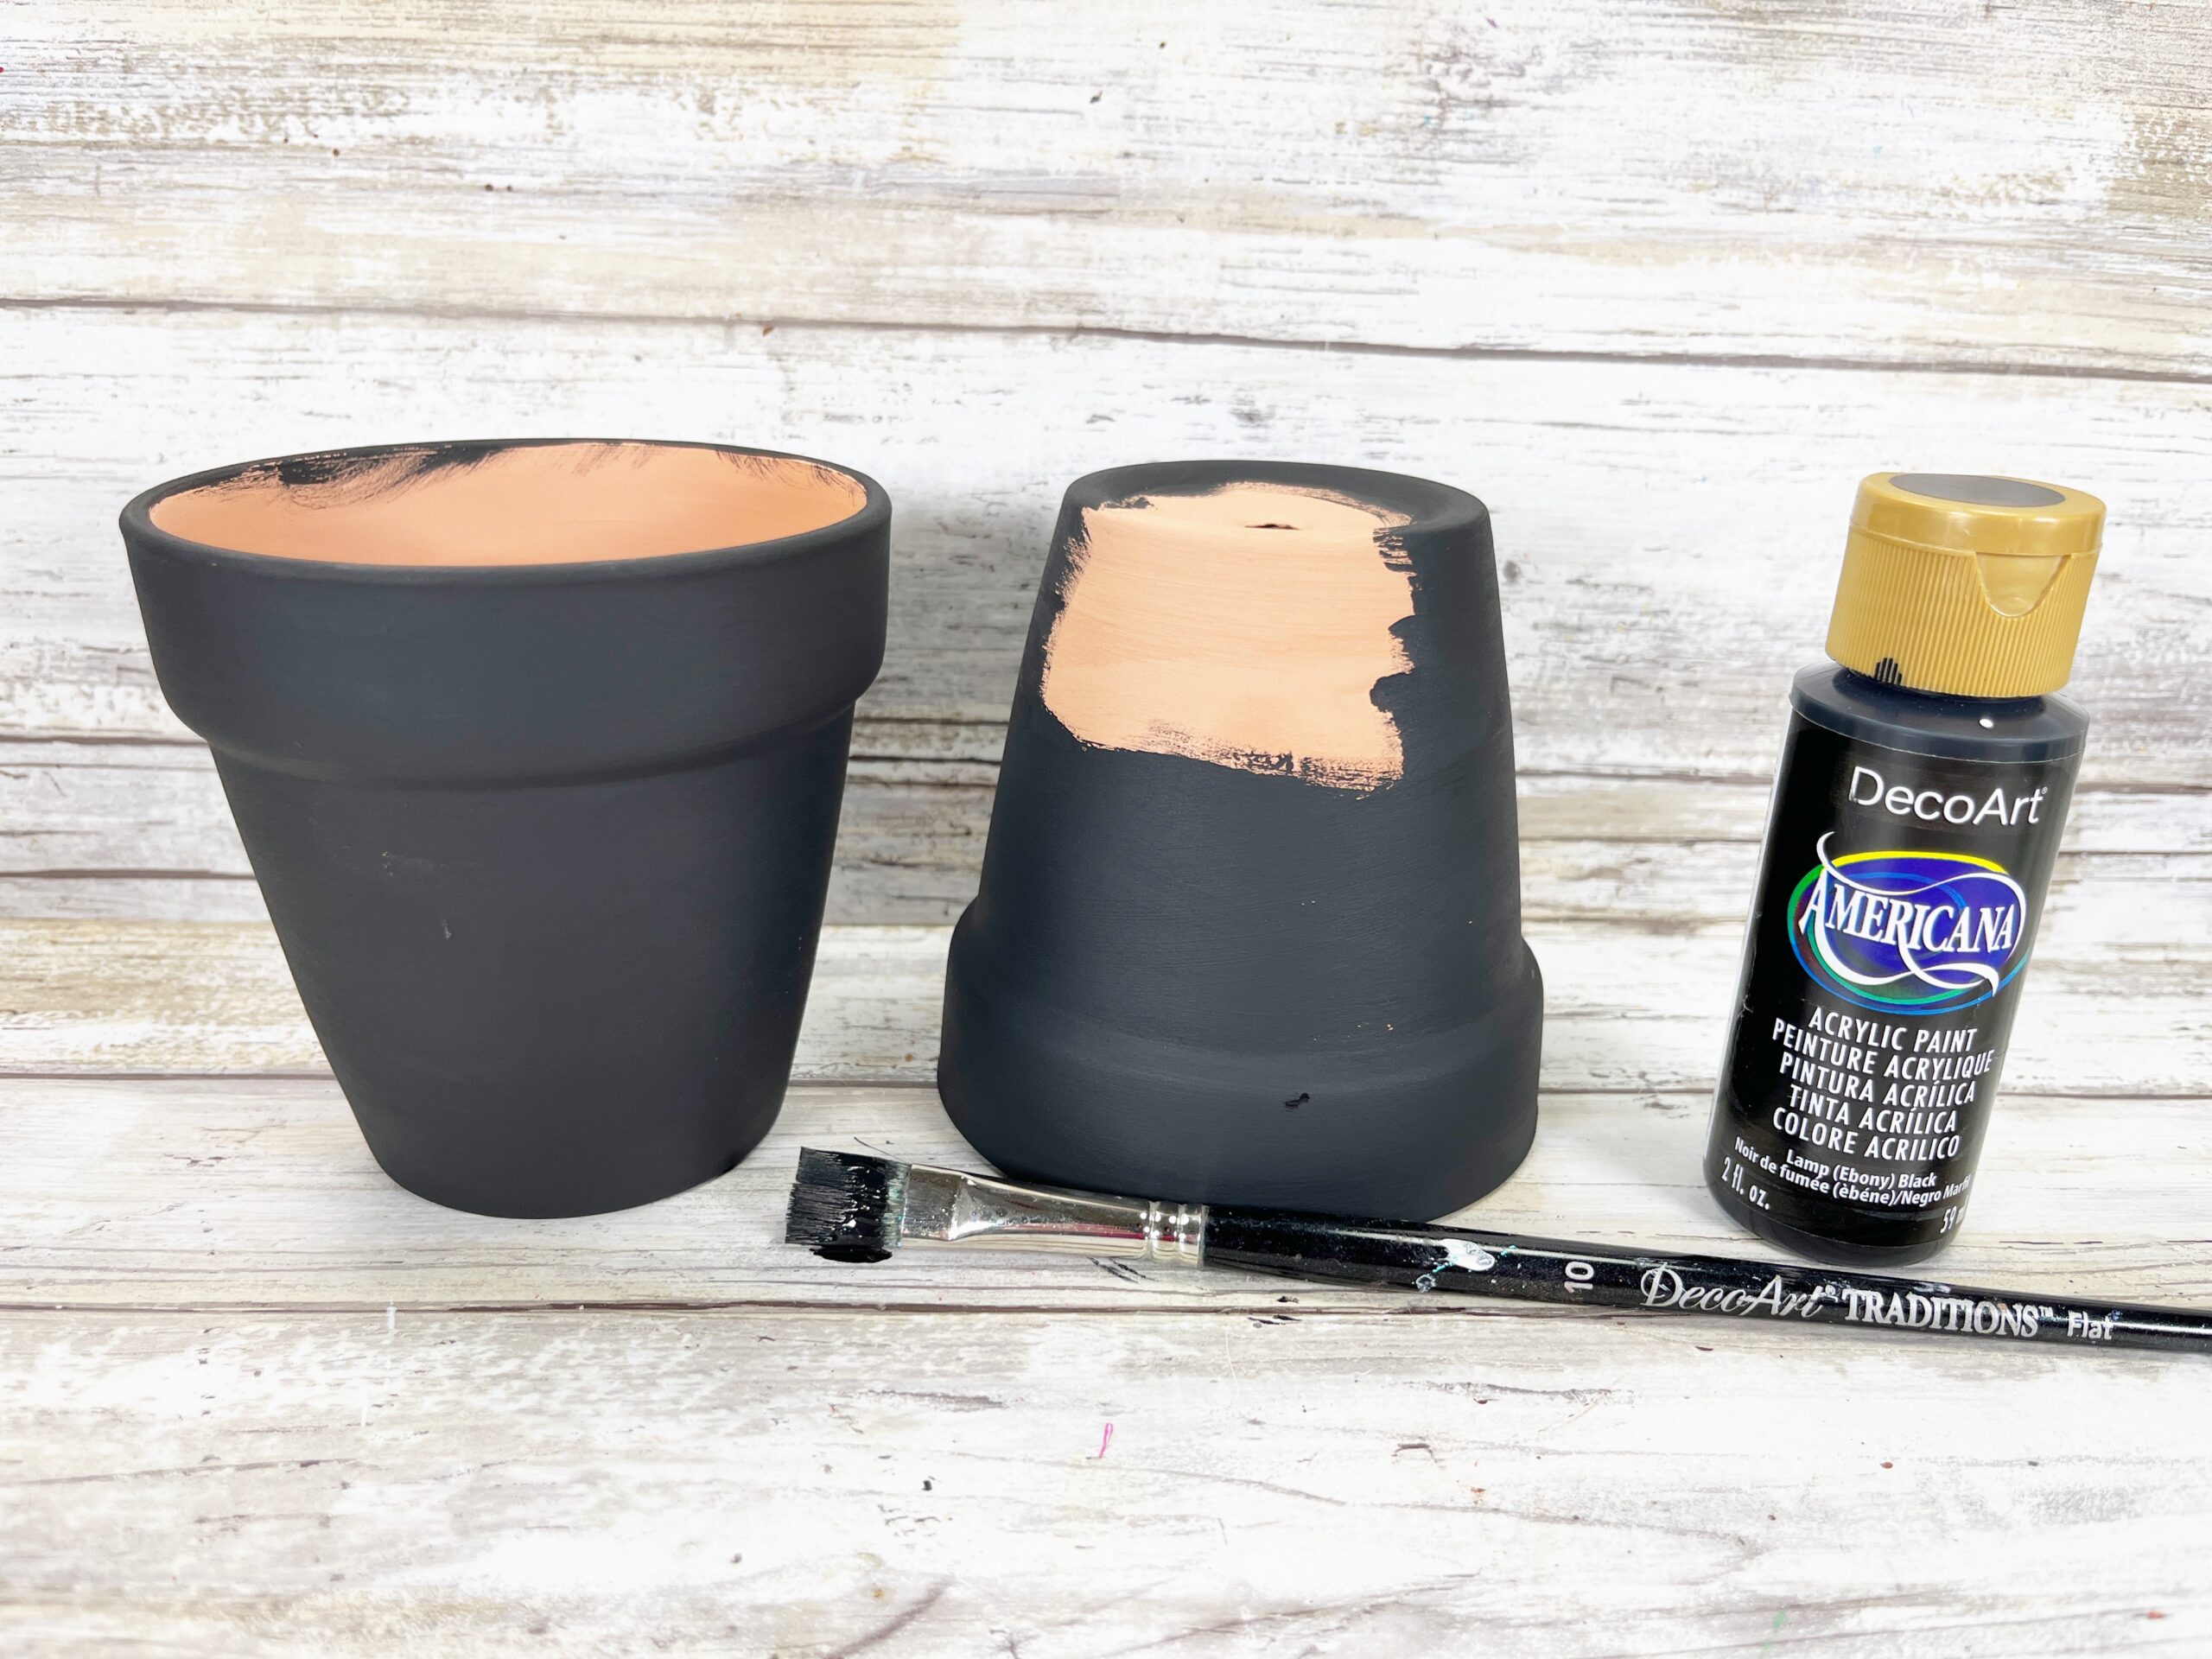
- Gather all supplies. Remove the labels and packaging from the supplies. Basecoat the terra cotta clay pots with black acrylic craft paint. Let dry, and apply a second coat, if necessary.
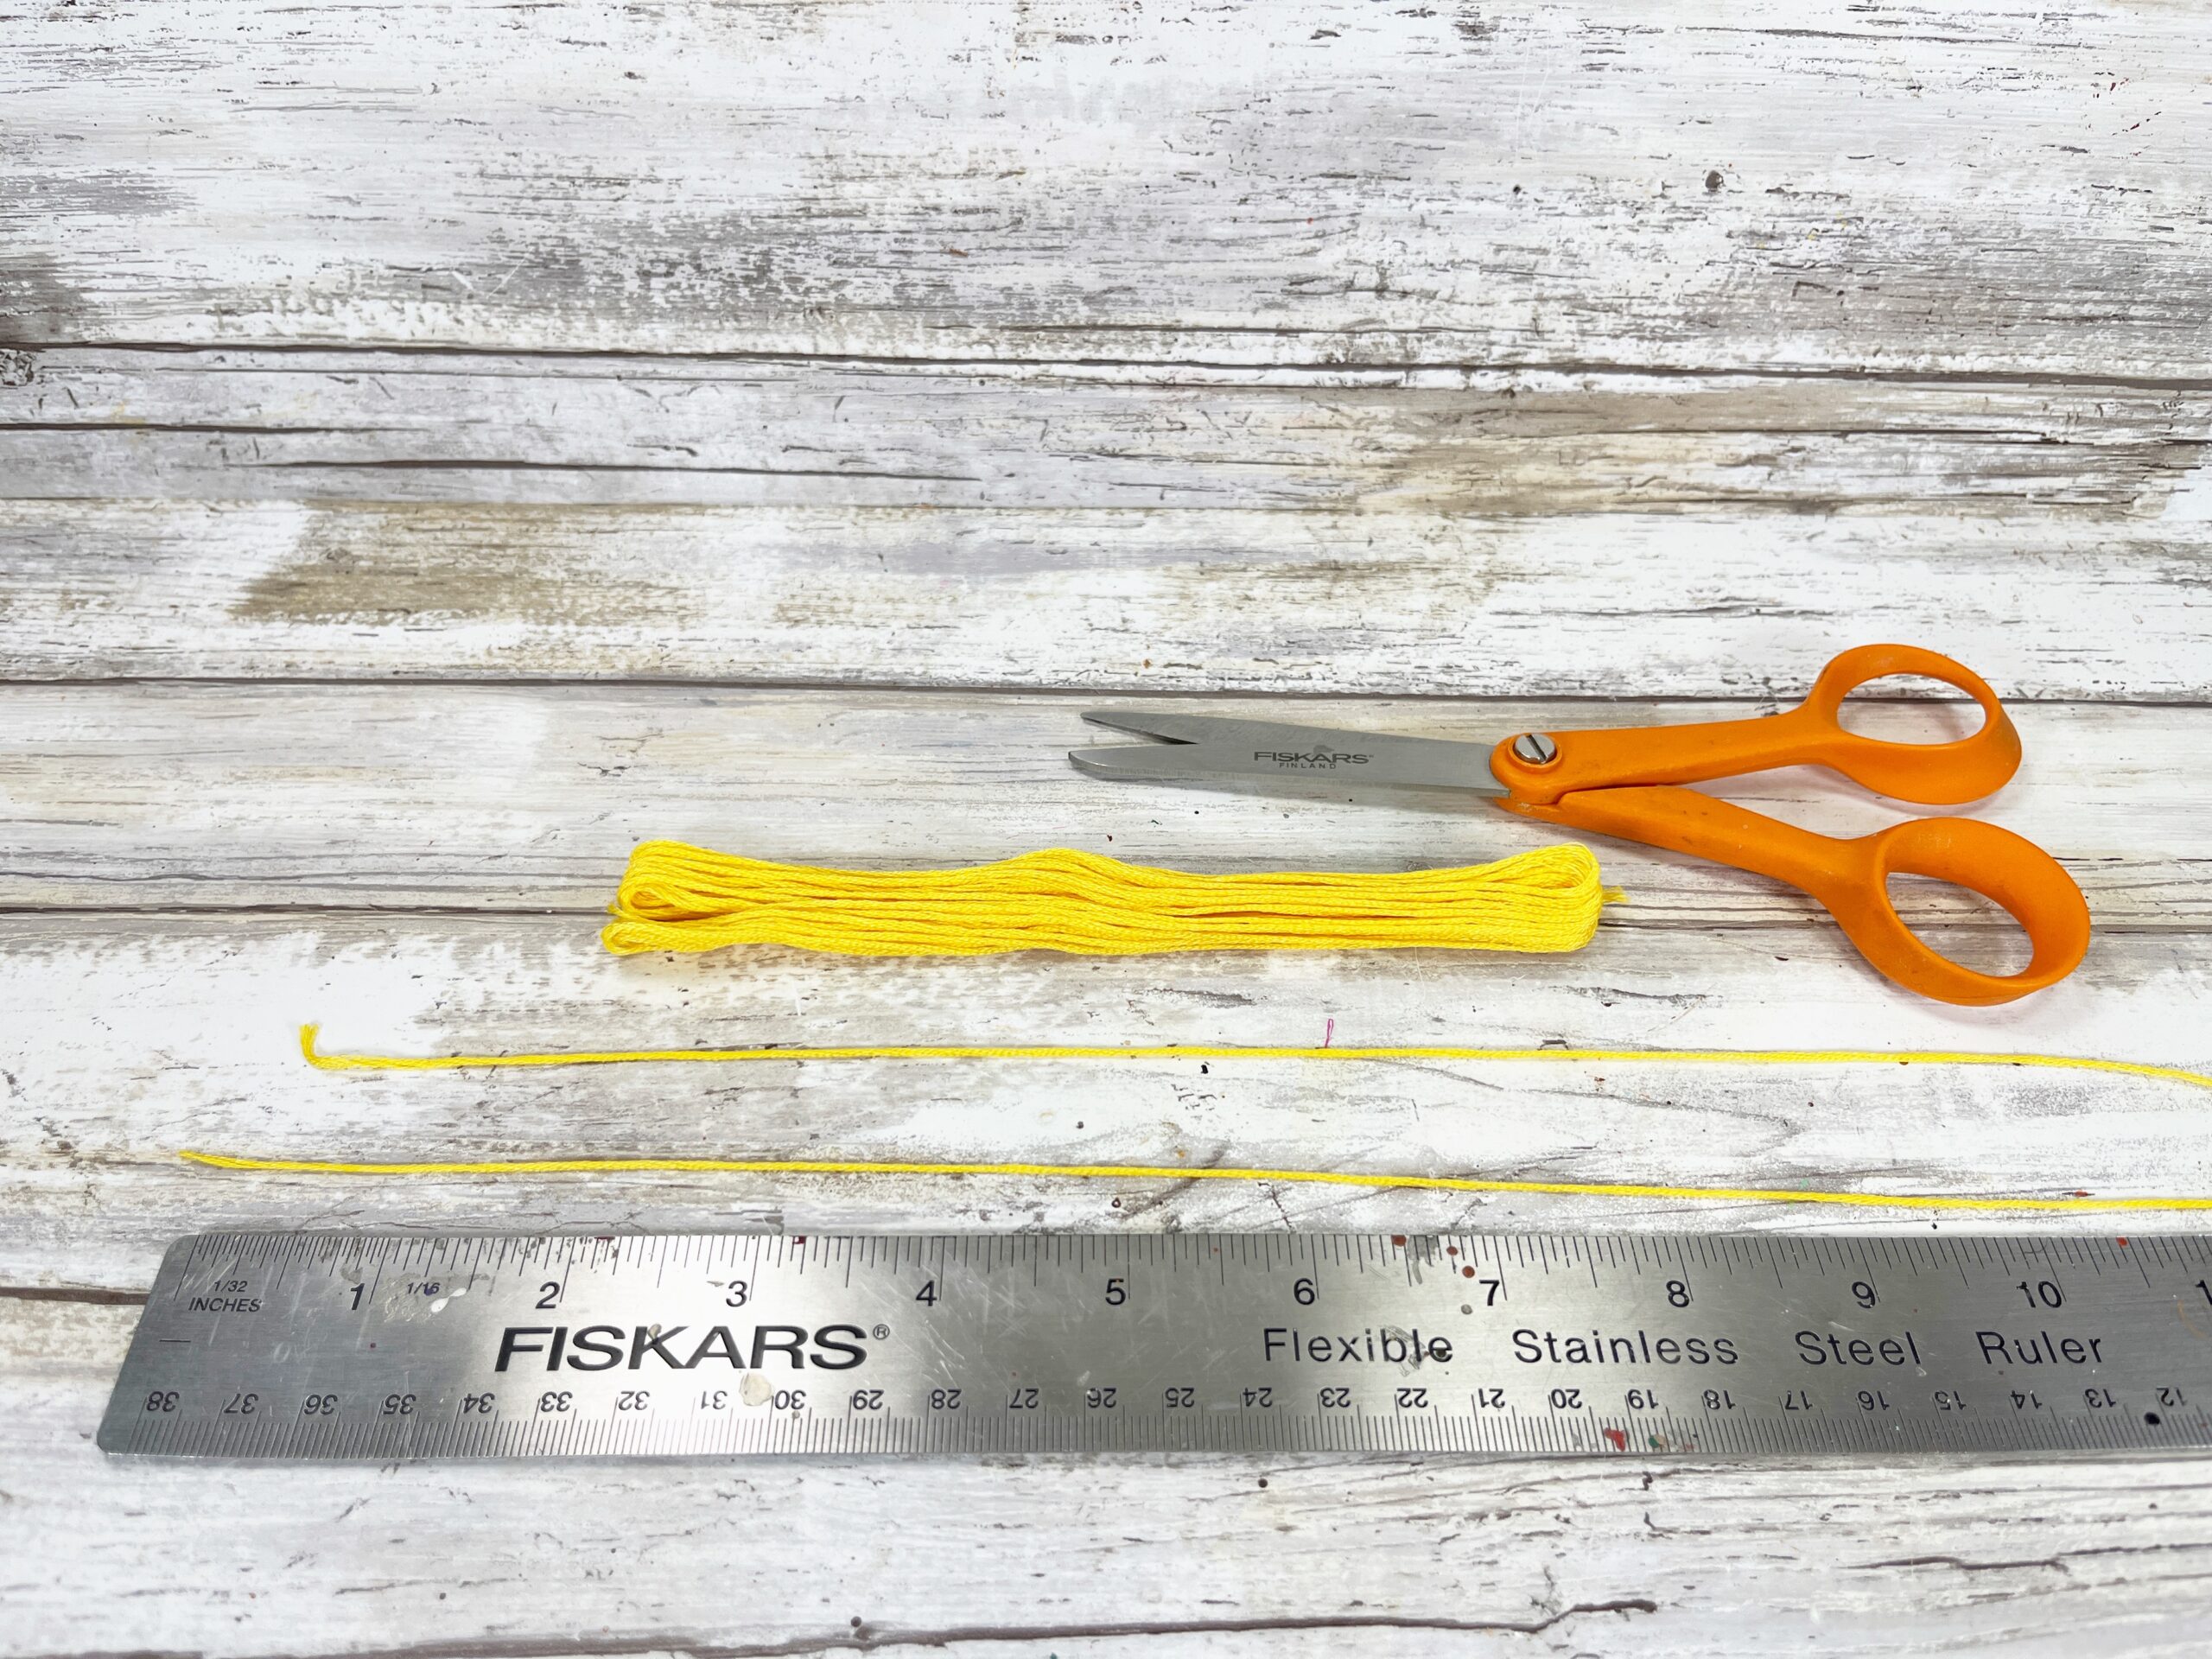
- Remove the labels from the embroidery floss skein, then measure and cut four lengths that are 12 inches each. Open the middle of the skein of floss. Tie and knot one of the embroidery floss lengths through and around each of the loops at the ends of the skein.
- Approximately three quarters of an inch down from the top knot, tie one length of embroidery floss around the skein, securing with a knot. Wrap each end around the skein three times. Wrap one to the left and one to the right. Secure again with a knot. Repeat on the opposite end of the skein.
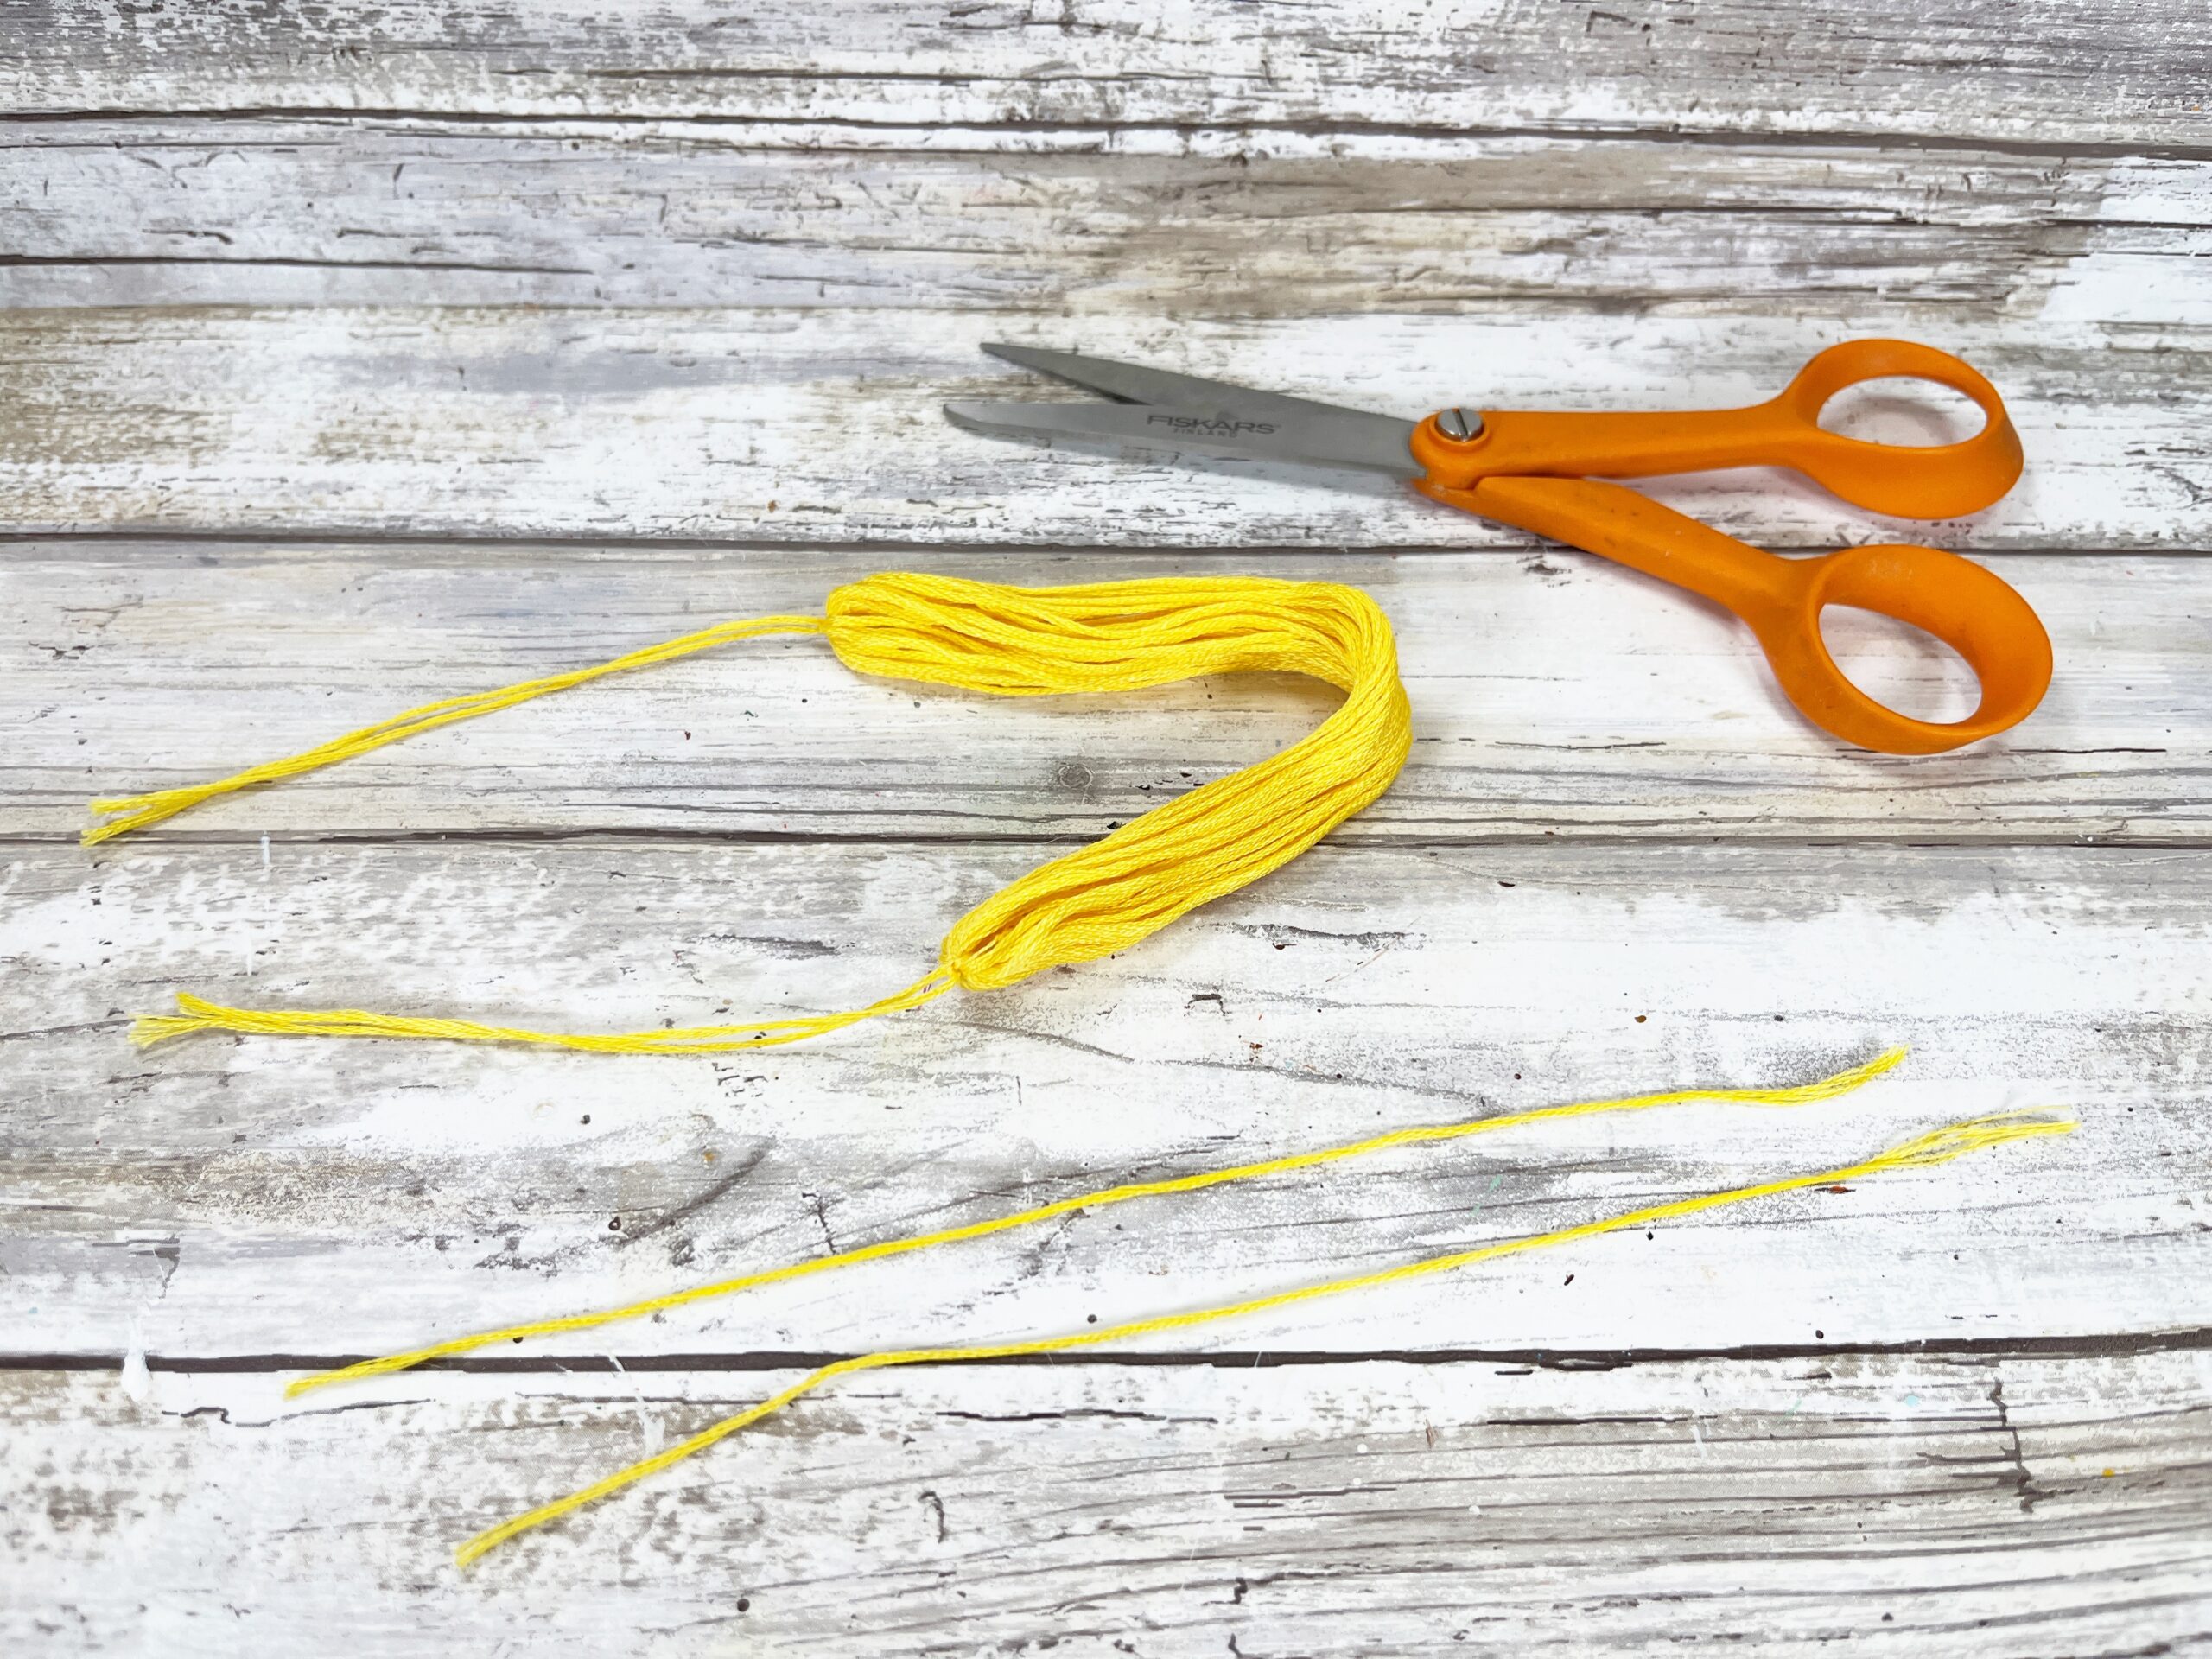
- Trim the longs ends of the wrapped embroidery floss with scissors. Measure and cut the skein of embroidery floss in half at the three inch mark with scissors. Secure the knots with a small dot of glue from the glue gun.

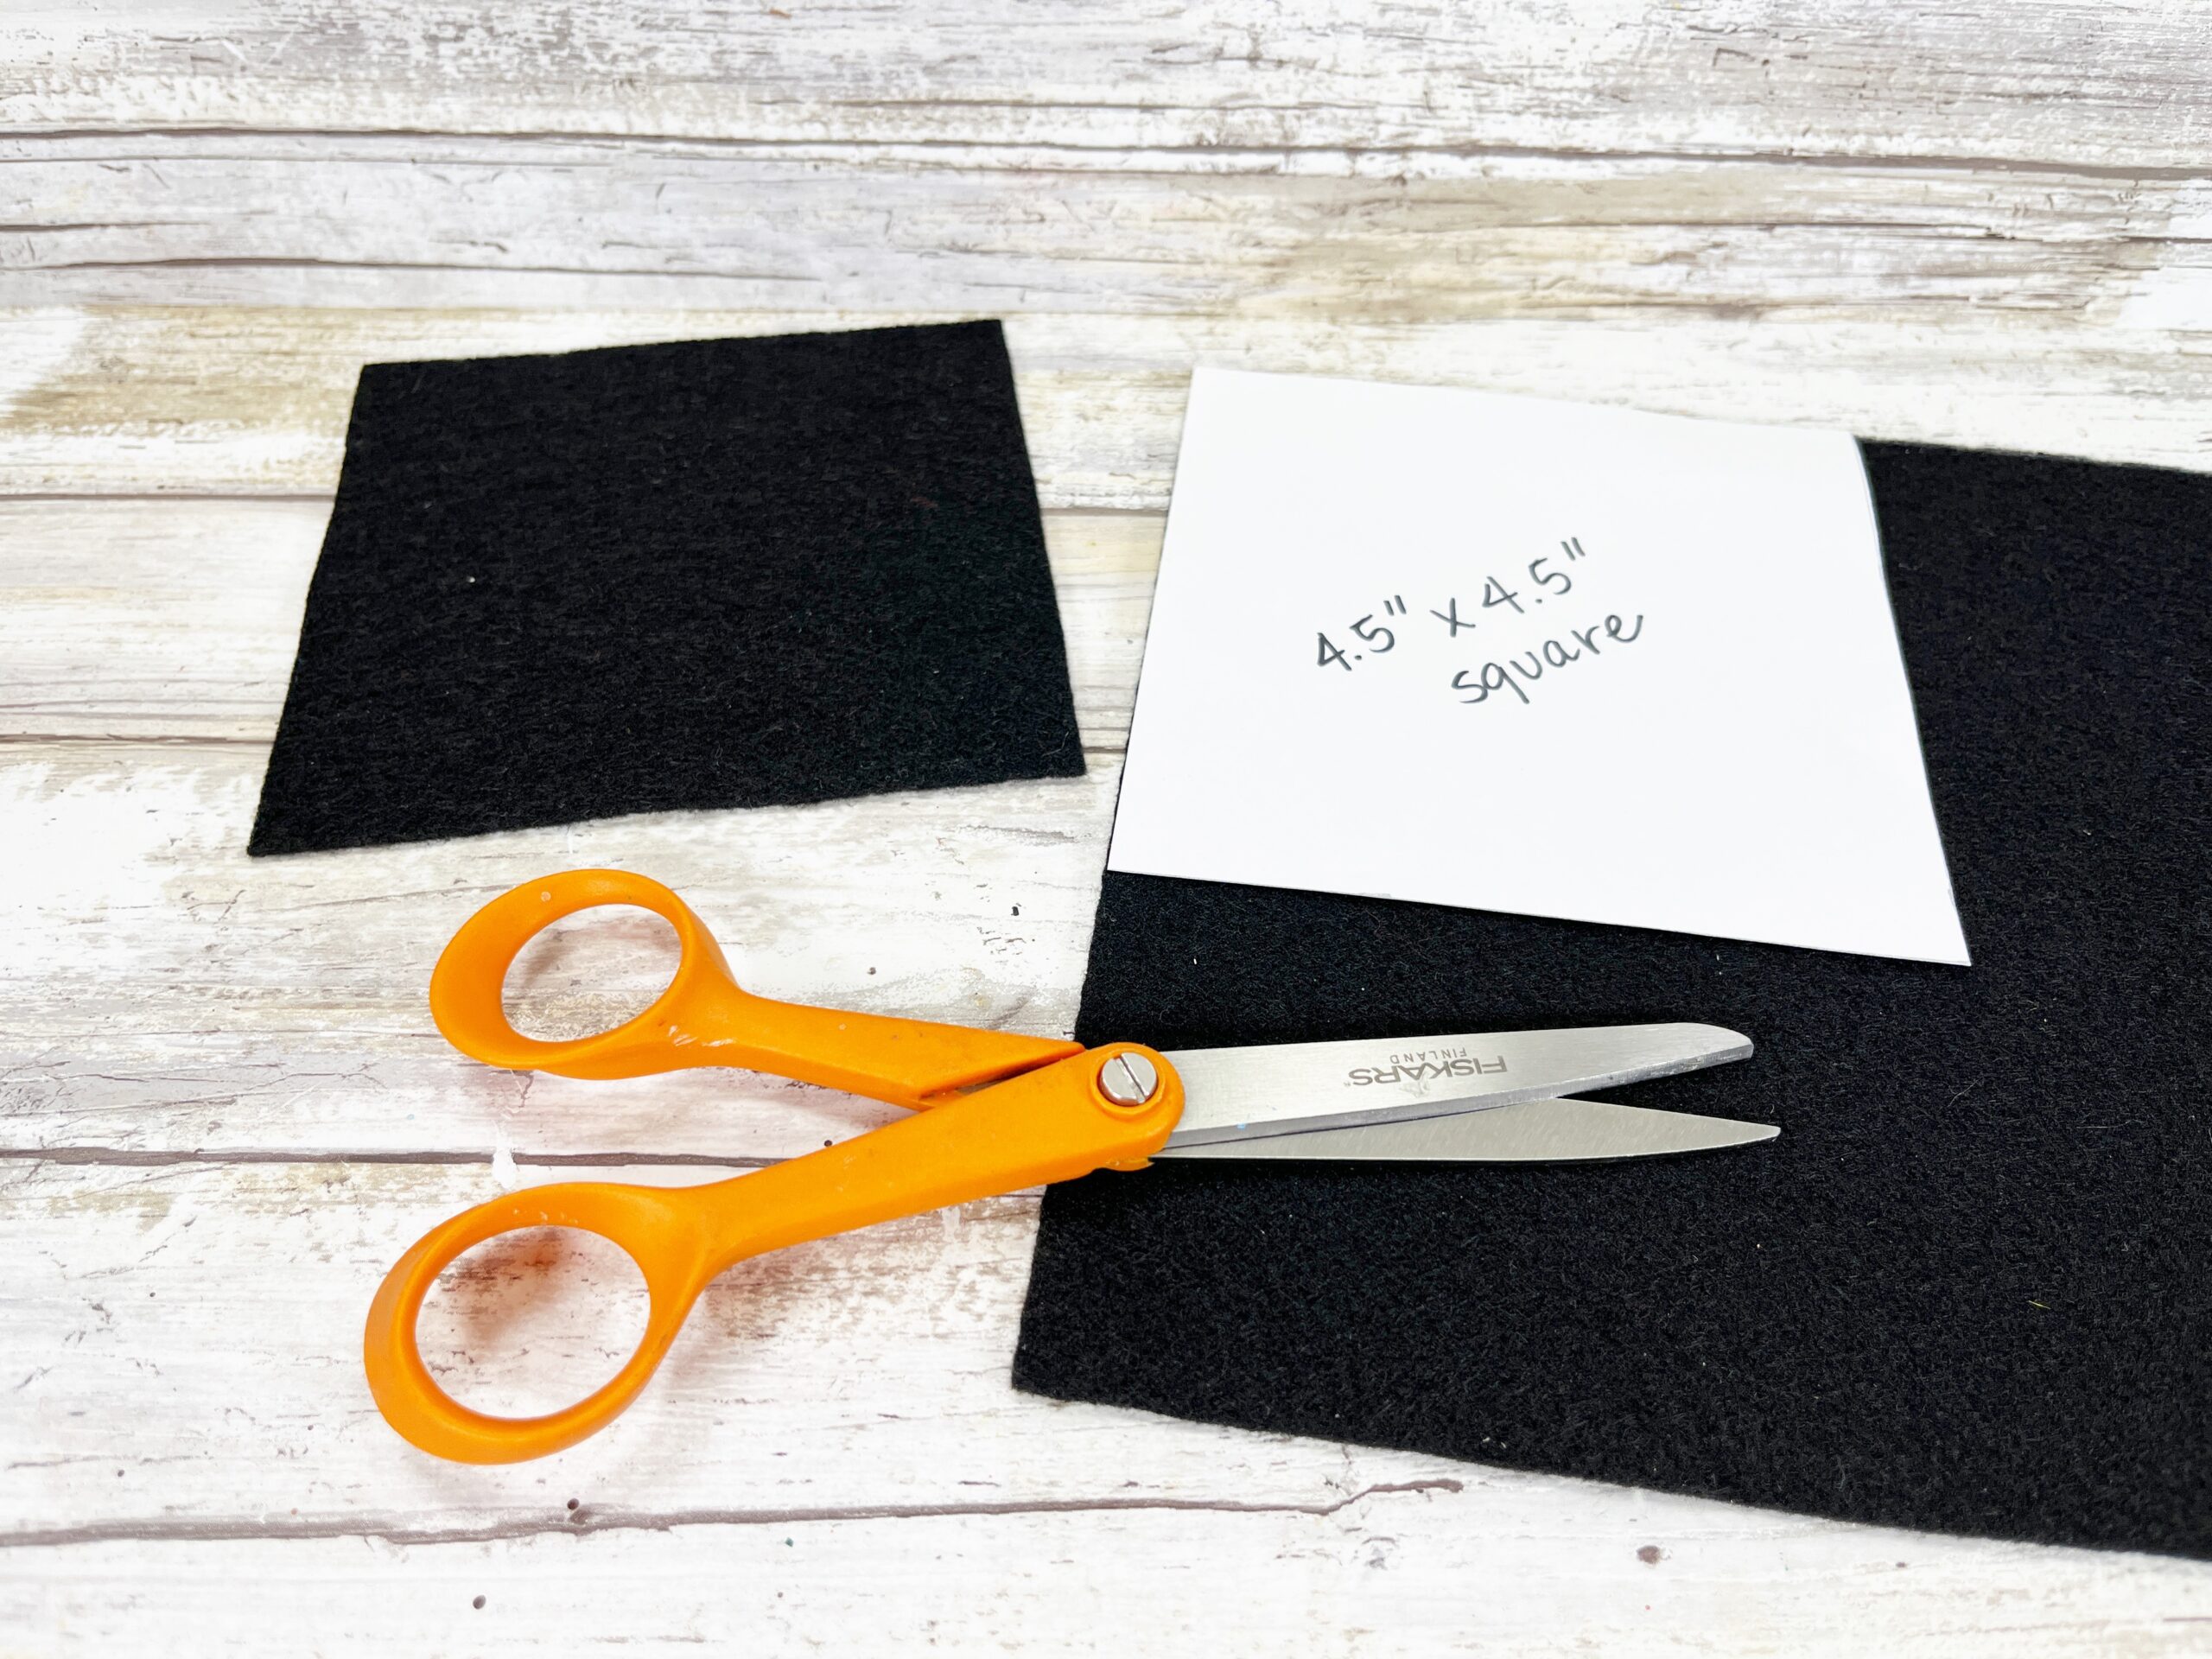
- Download and print the grad cap pattern. Cut out the pattern with scissors. Trace twice onto a cardboard cereal box with a pencil, and then cut out with scissors. Trace twice onto black craft felt, and the cut out with scissors.
- Attach the craft felt squares to the top of the cardboard squares with a glue gun and glue sticks. Glue the felt and cardboard squares to the bottom of the clay pots.

Notes
You can use liquid craft glue for this project, but you will have to wait for it to dry.


Annie
Latest posts by Annie (see all)
- DIY Clay Pot Graduation Cap Centerpieces - July 13, 2023


I love this idea for graduation centerpieces! It’s so creative and unique.