
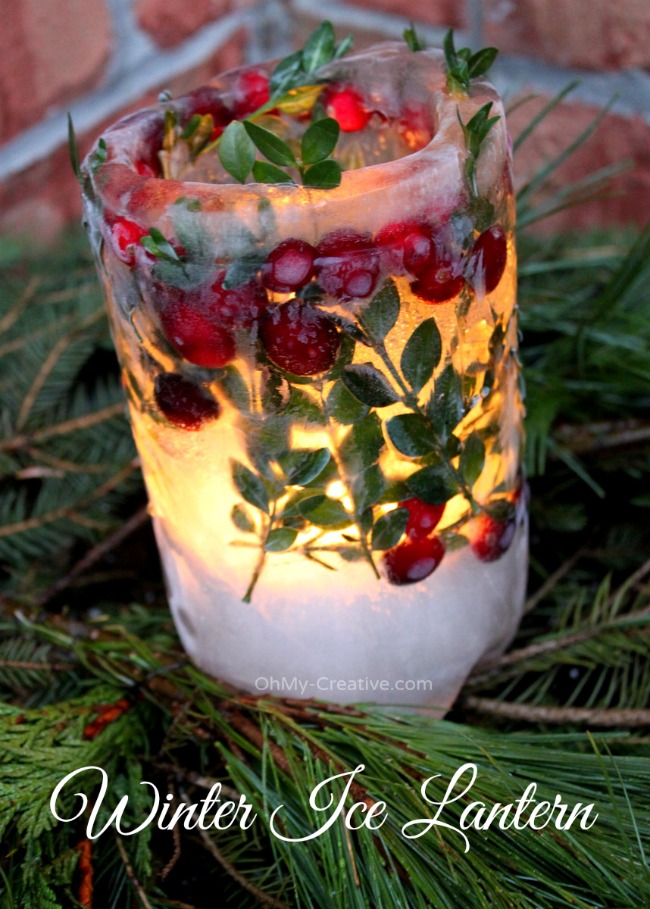
DIY Holiday Ice Lanterns
I had always wanted to make these beautiful DIY Holiday Ice Lanterns for a winter party, so this was my chance! As the night of our Ugly Christmas Sweater Party approached, I realized that the temperature was going below freezing.
I had always wanted to make these beautiful DIY Holiday Ice Lanterns for a winter party, so this was my chance! They turned out to be beautiful and were welcoming on a crisp, cold night!
More Winter Crafts:
- Snowball Wreath
- 15 DIY Ugly Christmas Sweaters
- How To Make Snowman Wood Slice Ornaments
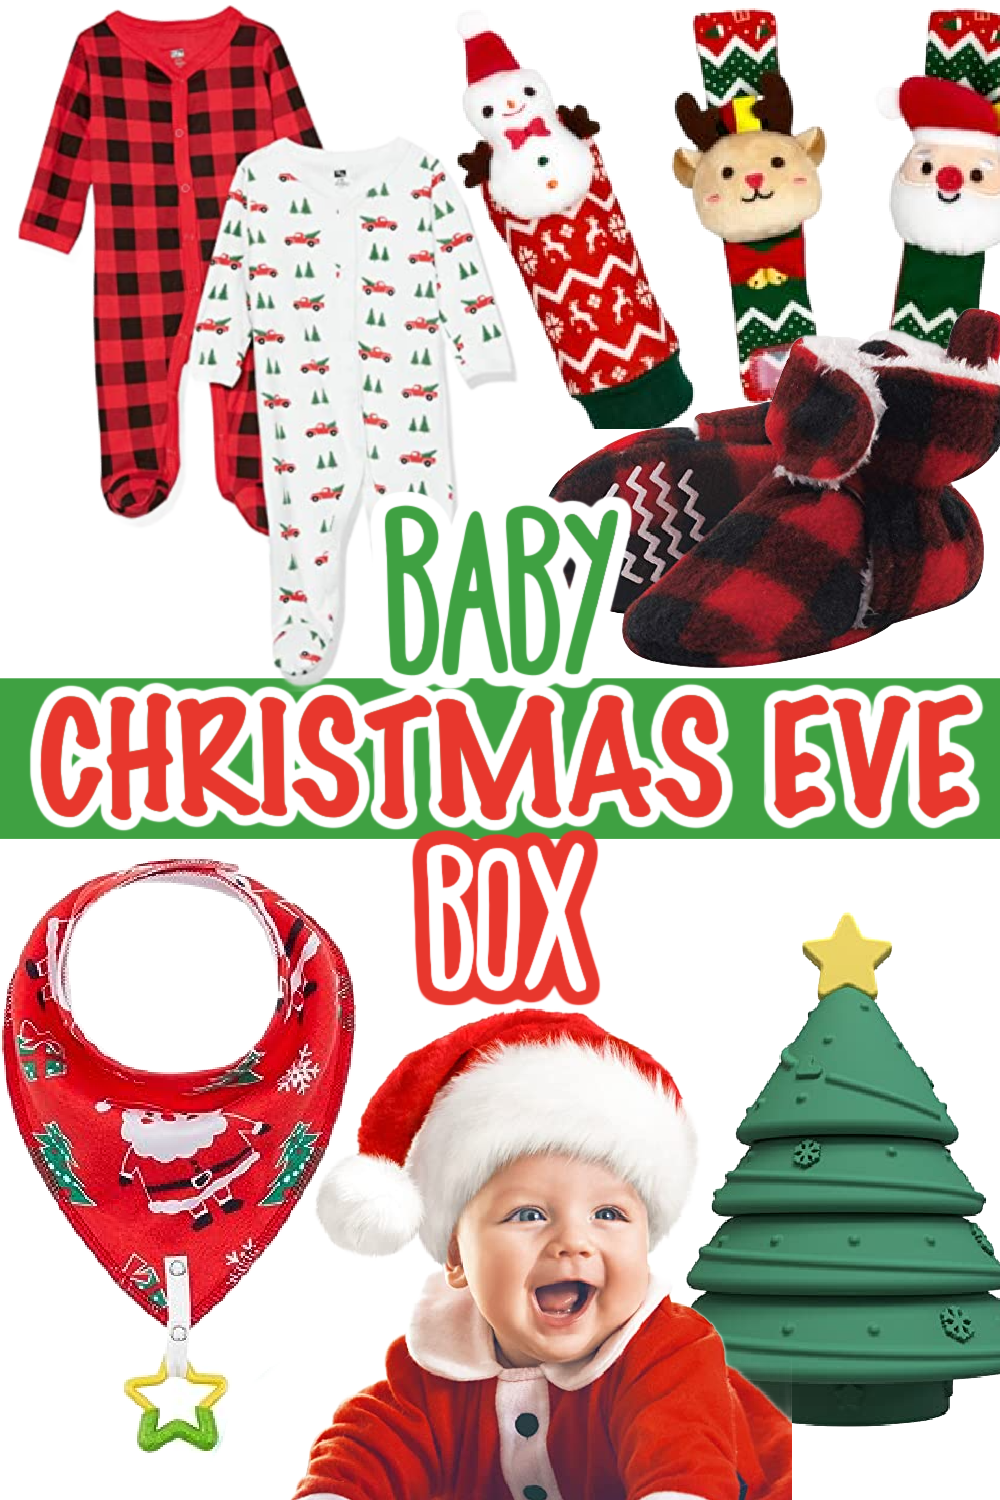
- Christmas Eve Box Ideas: Everything You Need
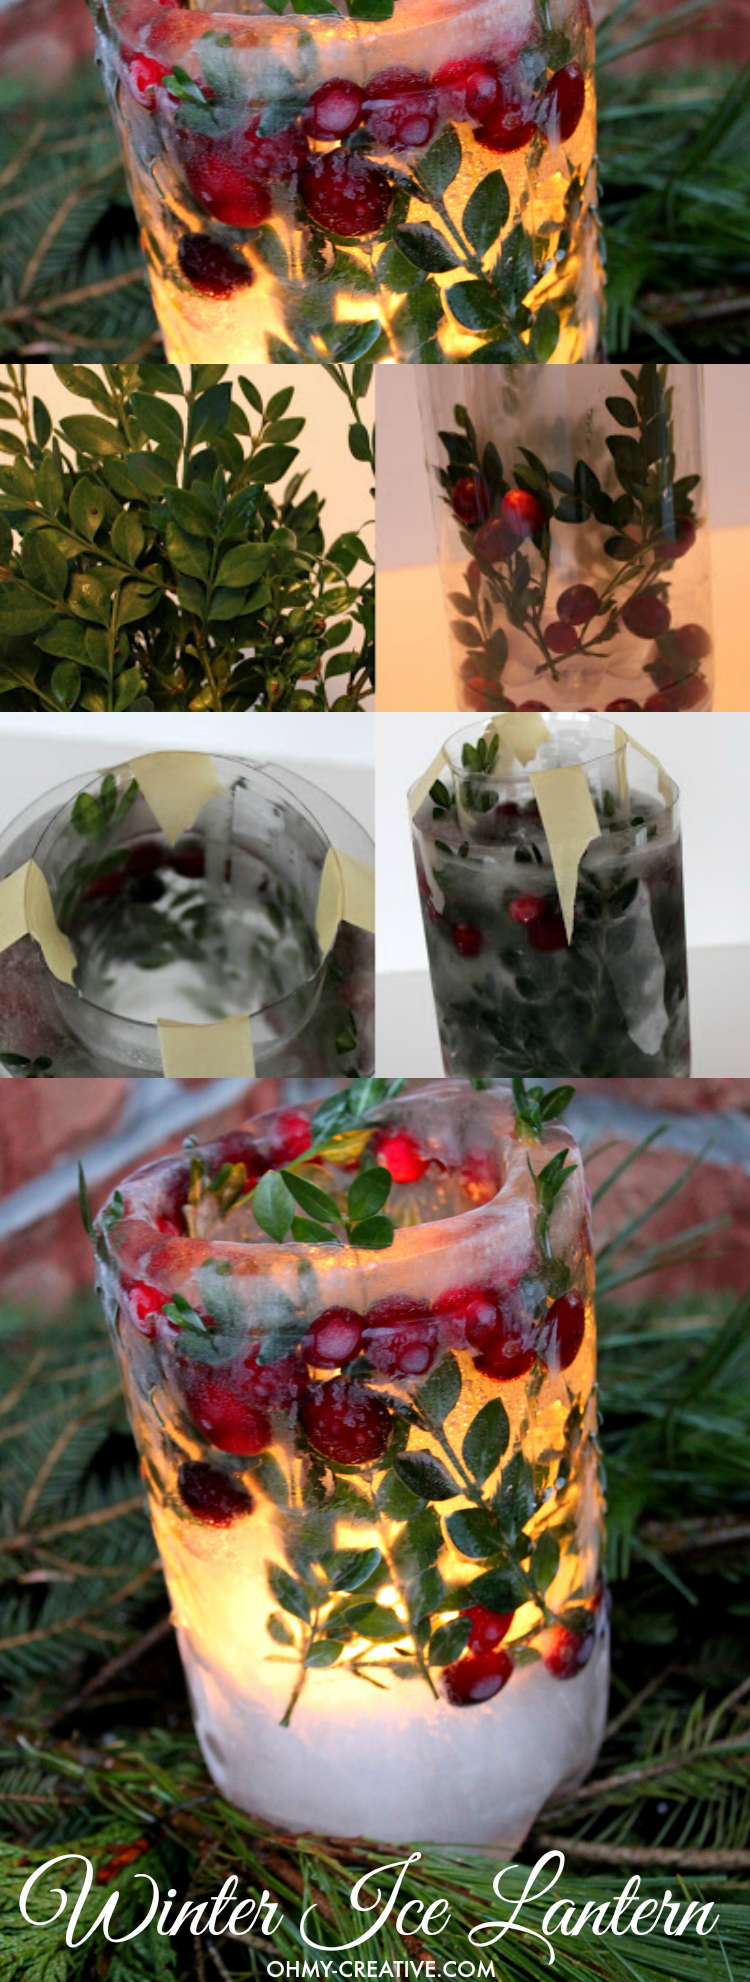
How To Make A Winter Ice Lantern:
Use a 2-liter plastic soda bottle and a 24 oz plastic bottle for the inside – cut tops off.
1. Fill the 2-liter bottle with about 1 1/2 inches of water and freeze.
2. Remove from freezer and place 24 oz bottle inside resting on the ice. Center the 24 oz bottle in the 2-liter bottle and use masking tape to secure it in place. Make sure the space between bottles is even all the way around.
3. Cut greens from the yard (I used Boxwood) and cranberries to fill the sides. Cranberries float, so place some in the bottom first and then add green on top. Add a few additional cranberries on the sides. When you fill the container with water the cranberries will rise to the top.


When it’s frozen, remove it from the freezer. Lift the tape and add hot water into the center of the bottle. As the ice melts a little, pull out the center bottle.
This gets a little tricky as the plastic bottles have larger bottoms than the sides. You have to work it! Run hot water over the outside of the bottle to loosen the large bottle.
I had great difficulty pulling the ice lantern out of the 2-liter bottle due to the larger bottom. I recommend cutting it down the sides to remove it.
Be careful – the plastic can be sharp! I also recommend having a set of bottles for each ice lantern you wish to make.
I highly recommend using a battery-operated candle inside – the flame melts the ice! Make a couple of days ahead and store it in the freezer.


In the end, I was pleased with how the ice lanterns turned out. I also made smaller ones to line the walk as guests approached the door! For these, I use cottage cheese containers and small disposable food storage containers.
These were so much easier to separate as the cottage cheese containers had a smaller bottom and the ice slid right out.

Susan B
Latest posts by Susan B (see all)
- How to Make Grape Jello Shots - March 28, 2026
- The Best Strawberry Cake With Whipped Cream Cheese Frosting - March 13, 2026
- Lemon Drop Jello Shots - February 2, 2026


I love this idea! I love the rustic berries and greenery, but I might try doing this with gold and silver branch/feather things from the craft store and tiny baubles and glitter for New Year’s!! Great idea and a really great tutorial. Thanks!!
Thanks Megan! I think the gold and silver accents would look fantastic for the holidays!
This is such a neat idea and they turned out Beautiful! Love the wreath door too 😉
Thanks Beckie! I loved how my ice lanterns turned out -they look so inviting on a cold winter night!
Does it have to be freezing outside? Or will they survive in the general wintercold?
I’m sorry it has taken so long to respond to your question. Yes, it needs to be below freezing or they will melt!
That is so beautiful! I love it. I just pinned your post to my Fall board. I do not think I am in a cold enough climate for this to last…but maybe for a trip to the snow in the future.
This is so beautiful. To use soda bottles is a great idea.
If you want to use candles (I always do) I do not put water at the bottom, instead I just make the candle holder with a hole through (like a donut).
To make the ice more glasslike and see-through you boil the water first (preferably twice) and cool it. That is necessary if you want to have the sides thicker – for example using bundt cake pan.
Thank you for posting this, it is one of the most beautiful example of ice candleholder I have seen.
Thank you, Margret! I like the idea of boiling the water first…I will give it a try!
I love this! I’m thinking of trying this even though it probably doesn’t get cold enough here for it to last very long. It’s gorgeous! And you did a great job explaining every step of the process. Thank you.
Gorgeous!
I love how you used pop bottles. I was trying to come up with the perfect containers this year and now I don’t have to! I think I will use pop bottles too! Very pretty. Cheers!
The bottles do make a nice tall lantern, but are a little hard to get apart! Be careful of the sharp plastic!
these turn out beautiful! thanks for the idea.
I haven’t made these in years…yours are gorgeous!! Visiting from Hometalk! 🙂
Thank you, Tanya! Happy Holidays!
Do you mind if I quote a few of your posts as long as I provide credit and sources back to your
website? My blog is in the very same area of interest as
yours and my users would really benefit from some
of the information you present here. Please let me know if this okay with you.
Thanks a lot!
so cool, I’ve always wanted to make these too.
Love this and I have pinned to my christmas board………..thank you so much andi thewednesdaybaker.blogspot.com
Thank you so much for pinning my the Ice Lanterns!
These are beautiful!! I cannot wait to try this out-perfect for Christmas!
Thanks for stopping by…perfect for Christmas!
What a gorgeous and creative idea! I can’t wait to try this. Thank you for sharing.
Wow! How pretty!
KC
I am having a party at my house this weekend and making these! I made an ice wreath with my bunt pan to put in the punch bowl for a party last weekend, but this is so awesome! Our porch light is out (dang complex hasn’t fixed it yet) which might actually be a good thing so these stand out more! Thanks for sharing, newest follower via Lil’ Luna’s link party!
Thanks for stopping by! These will be perfect for your party! Good luck with making them!
This is a great idea! I’ve seen it done years ago but I forgot all about it…thanks for sharing and reminding me, I’m pinning this one. I’m now following you, thanks!
Saw you sharing at Whimsy Wednesdays.
Debbie 🙂
Welcome as a new follower Debbie! Thanks for pinning my ice lanterns too!
This is just beautiful!! Congrats on your Hometalk facebook feature. I shared this to my very largest pinterest board 🙂 I hope you get many new visitor 🙂 Happy Holidays!!
Thanks for pinning Shannon! I became a follower and have been pinning from your boards…lots of inspiration there! Happy Holidays to you and your family!
Beautiful idea. I’m going to attempt to make these this week. I have an annual Christmas Italian dinner and of course the colors of these lights go right along with the theme. I do have a question, what did you use for the center to help freeze it. I need all the help I can get!!
Thanks again for sharing
Liss
Hi Lisa, I am not following your question. There is nothing in the center…the small soda bottle is empty. The water with the cranberry and boxwood with freeze in the freezer. Someone suggested spraying pam around the outside of the small bottle to help them slide appart when frozen. Let me know if you need anything more?
These are beautiful!! I’ve seen ice wreaths, but not lanterns I love it!
Thanks for linking up! I featured your post in my wrap up http://tidymom.net/2012/christmas-holiday-ideas/
Happy Holidays!
That’s such a beautiful idea! Love it. 🙂 Megan
Oh, I love this idea! These are absolutely gorgeous! I wish my front door looked like yours 🙂
Thank you, Becky!
I made some using the square milk jugs they worked well and were easy to remove. Now will try with some greenery and cranberries as that is beautiful.
what a great idea!! It looks beautiful lit up too!! Thanks for linking up to Tasteful Tuesdays at Nap-Time creations. Your project is being featured this week. Link will go live Monday night at 8:30 central time! http://www.nap-timecreations.com/2012/12/b-inspired-mama-guest-post-delightful.html
oh and I would LOVE to be added to your party list :o) Pretty please…
Fantastically gorgeous!!! This is a pinner 🙂
<3 Christina at I Gotta Create!
Wildly Original linky party is open
Beautiful!
Hey Susan, Lisa Rees again. In the middle of the 2liter bottle what type of bottle did you tape in it before putting the cranberries, fern and water to freeze it. Sorry. I promise I’m not a ditz. Lol. Lisa
Hi Lisa, Sorry I wasn’t sure what you were asking. The center bottle is a 24 OZ soda bottle…the size that comes in a six pack with the plastic holding them together at the top. Hope this helps! Good Luck!
Susan
Amazing! It is freezing where I am at and this would be perfect for an upcoming party we are having. Thank you so much for sharing. 🙂
Julie
Sounds like you need to make them for your party – good luck!
These are gorgeous. So cozy for a cold winter night.
Thank you, Mel! Happy Holidays!
I am featuring this tomorrow! Soo pretty Love it!
Kim
This is such a pretty & unique idea I love it! I am pinning it to try sometime,if I don’t get to make one this year. I am going to look around some more. Visiting from DearCreatives.com
Love this idea. I pinned it, tweeted it, and now I just have to get organized and make some!
Oh gosh…these ice lanterns are just gorgeous! Thanks for your great instructions. Your idea of using a battery candle is great to help make the lanterns last longer. I saw your post over at “The Girl Creative” blog.
This is wonderful! I love finding new, fun crafts this nice! Thanks!
Beautiful
Wonderful publish. I really like DIY Holiday Ice Lanterns
I have read a handful of content and am discovering
increasingly more as I go together. Some working day I would wish to get started my own website to
talk about my unique standpoint on a variety of subject issues
which can be desirable to me. Keep up the great work
and i appear forward to examining far more. Numerous occasions I’ve felt that i could aid other people fully grasp my perspective with a individual subject matter issue.
I know that it is the middle of summer, but I just discovered your wonderful blog! I have been making similar lanterns for quite some time. I really appreciated the tip to make clear ice and thought that maybe someone might benefit from my two cents worth. My process is similar, but I don’t bother to remove the inner bottle. This helps the light source stay dry, and also helps the lanterns last through temperature fluctuations. After the water and decorations are frozen I add a little more water and top with crushed or small-cubed ice. This gives a nice finish and helps hide the bottle ends. You have made me anxious for the cold weather again! Thank you for all of your time and ideas. Keep up the good work!!
Thanks for sharing your great tips! I like the idea of not removing the inner bottle…it was hard to remove and I agree it would help hold it all together longer! Good to know at winter will be here before we know it! Thanks!
Oh I love these ice lanterns! Such a great idea and beautifully festive. Stopping by from Whimsy Wednesday!
Thanks Raquel! Happy to have you at Whimsy Wednesday!
Hey! I just wanted to ask if you ever have any problems with hackers?
My last blog (wordpress) was hacked and I ended up losing months
of hard work due to no data backup. Do you have any methods to protect against hackers?
What an awesome idea! I think I’ll be saving containers to make these for New Year’s Eve!
New Years would be perfect time to make these Ice Lanterns, Katie! Make sure you use battery operated candles so they last through the night!
These are sooo lovely! I will use them in a few weeks for a Christmas Party we are hosting. I can’t wait! Thak you!
Awesome! Remember to use battery operated candle so the ice doesn’t melt the ice lantern!
Absolutely LOVE this!
love your ideas Becky , have to try them all out
Hi there! Let me start by saying you are very talented ! AND, I’m not the most Pinterest savvy.. ?
I love it, but do not have as much time as I’d like to spend on it…so I apologize for my ignorant/elementary question,,,if I’d like to print your project pics, tutorial, etc, do you have a printer friendly button somewhere, or just on a select few…I saw the access to free printable, but I didn’t browse through it… I’m talking specifically about the ice mold. Thank u!
I’m thankful there are such talented people in the world such as you that are generous enough to share your wisdom!
Thank you!,
I really love this idea. Thank you so much for sharing with us?
I was looking forward to making these for the Super Bowl this Sunday because they look so awesome ? However, my dilemma is that I’m in Canada and it’s impossible to find Candiquick here….any suggestions on a replacement?
Oh how positively magical!!!! I love them!!
SUSAN,
THANK YOU SO MUCH FOR SHARING WITH ME.
WINTRT ICE LOOKD BEAUTIFUL.
Thank you – I loved them too!
As the night of our Ugly Christmas Sweater Party approached, I realized that the temperature was to go below freezing. I had always wanted to make these beautiful DIY Holiday Ice Lanterns for a winter party, so this was my chance! They turned out to be beautiful and were welcoming on a crisp, cold night!