Personalized Gifts For Dad – Adventure Gift Bag
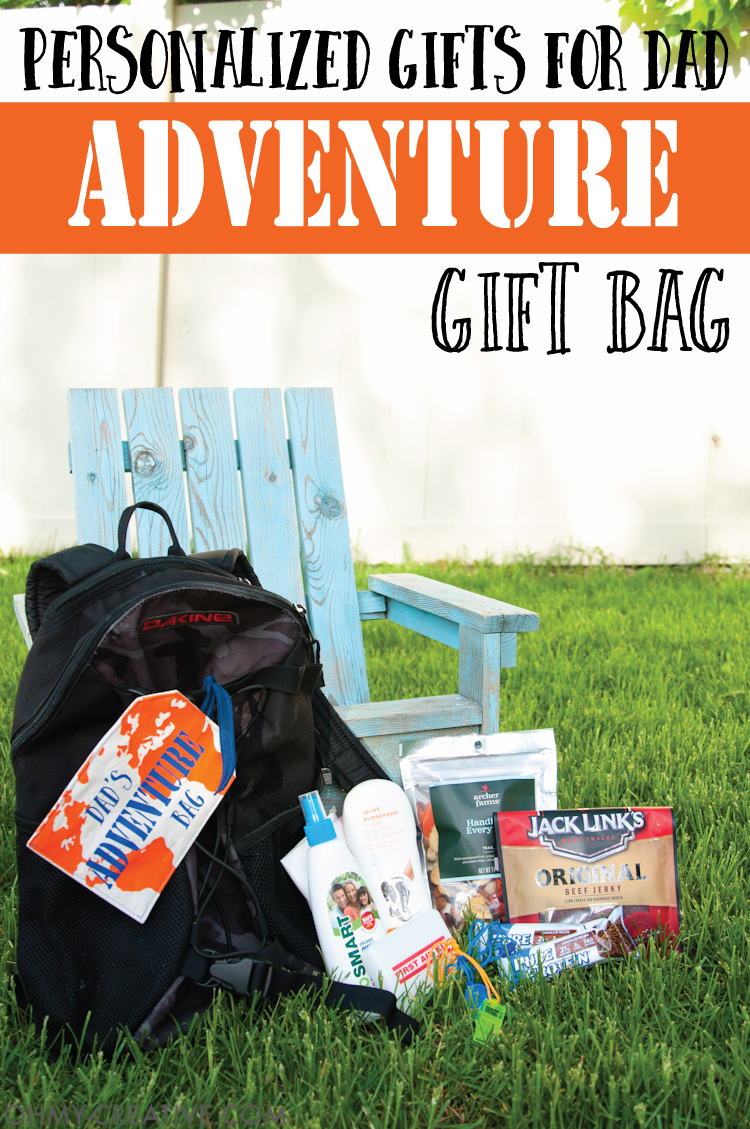
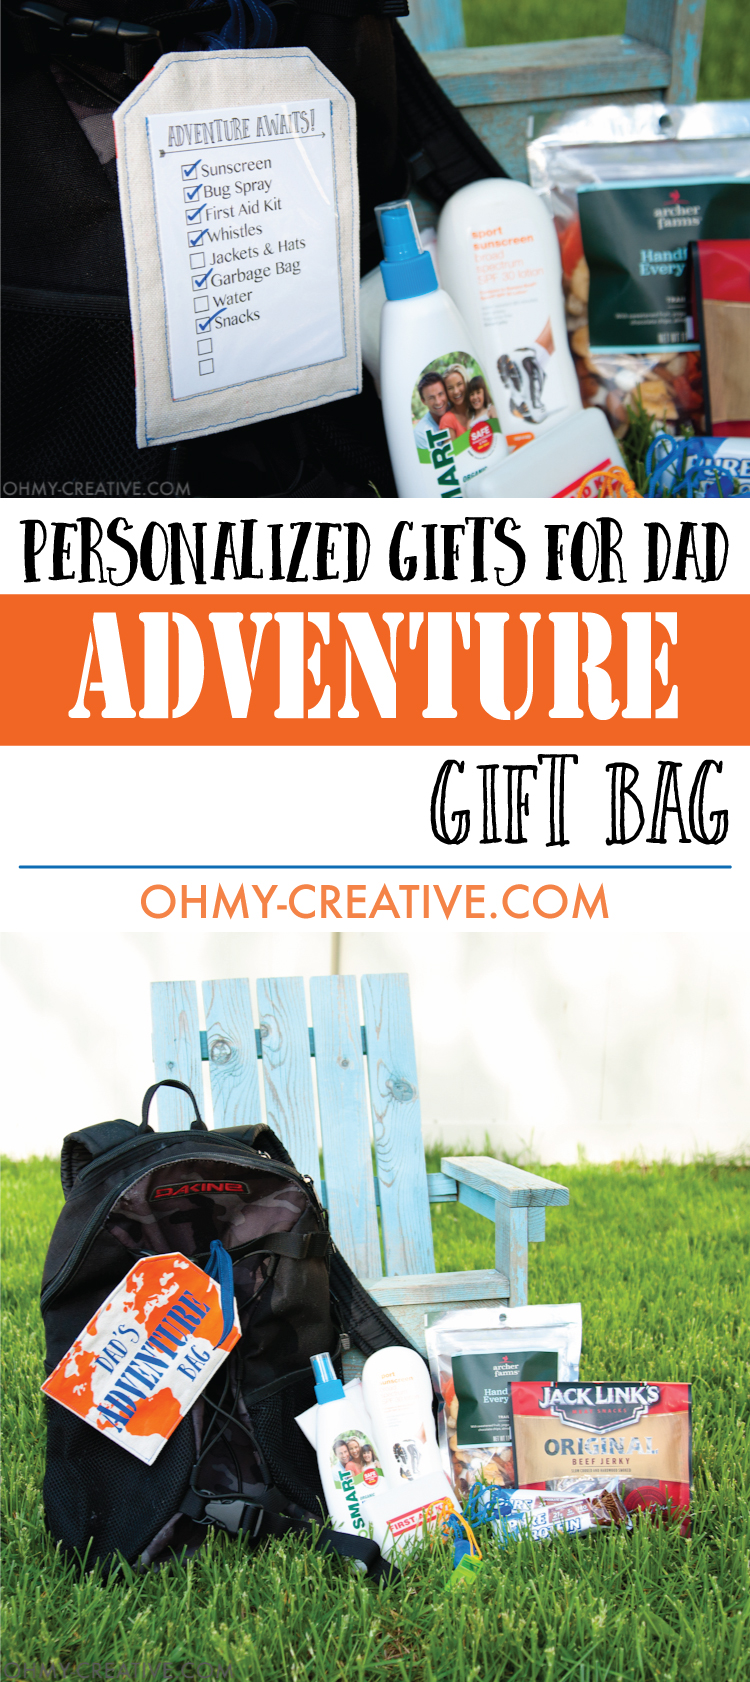
I am sharing a fun idea for Personalized Gifts for Dad: an Adventure Gift Bag. I don’t know about you, but I always have a hard time coming up with ideas for Father’s Day gifts.
My sweet husband tells me that he doesn’t need anything and would just love to do something fun as a family. Then he makes sure to tell me not to spend lots of money on a gift because we could use it elsewhere.
Such a great man (hence the reason we want to celebrate him), but not helpful when it comes to gift giving.
These Father’s Day Handprint Art Printables are super easy and fun for the kids to make!
Well, a couple of years ago he actually gave me the idea for this gift. June marks the beginning of summer and one of our favorite summer activities is hiking and exploring the beautiful mountains we live by.
We love to jump in the car and head off on an outdoor adventure whenever the mood strikes, but halfway up the side of a mountain, we would realize we forgot something.
And now that we have kids, forgetting something can be a huge pain. So as we were driving home after one of these adventures, my husband said we should pack a hiking bag to have all the essentials we would need and then we wouldn’t forget.
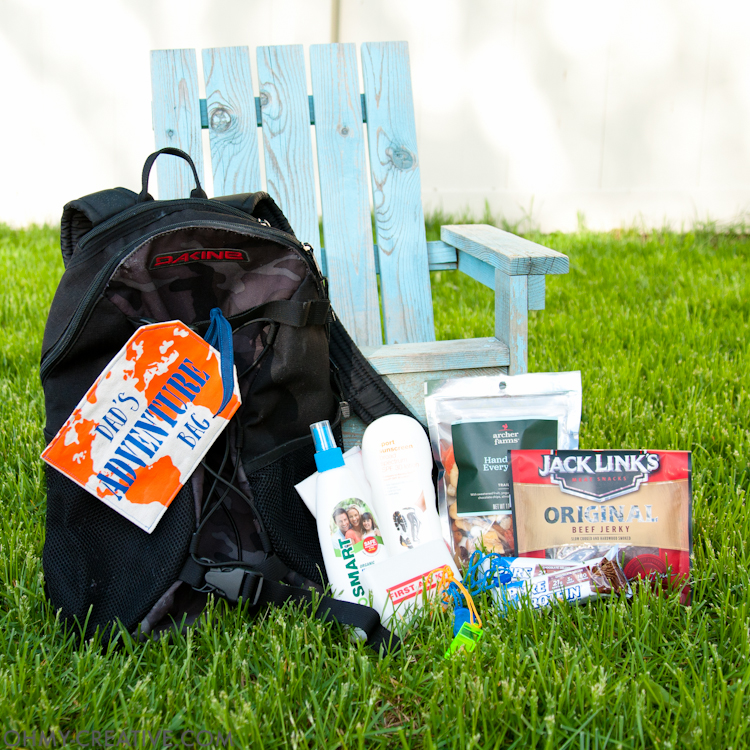
Skip ahead a couple of years, and I finally got around to it! At least I didn’t forget, right? So this year for Father’s Day, I thought it would be the perfect time to make him an outdoor adventure gift bag so we would always be ready to go.
My first idea was to buy a backpack to decorate, but then I realized we had a lot of backpacks already (my husband might be a backpack hoarder).
And one of these backpacks is the perfect hiking backpack because it’s big enough to hold enough supplies for a few hours but not too big that you are carrying extra weight.
So instead of starting from scratch, I decided to just make a tag for his current hiking backpack. Then to make things extra organized, I put a little pocket on the back of my tag to hold the perfect adventure checklist.
That way we can quickly check off our supplies as we stock our bags after each adventure. It’s the perfect gift for Dad!
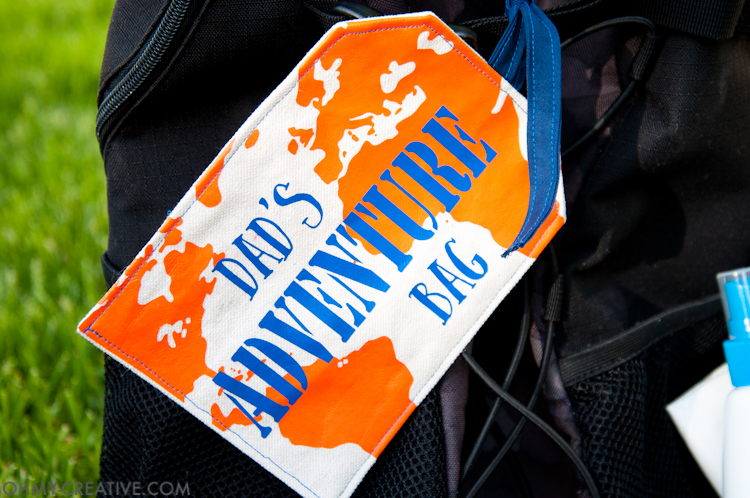
So first I needed to make a fun tag. I happen to have a lot of drop cloth scraps left over after making my drop cloth purse for spring. So figured it would make the perfect tag material.
And what says adventure more than a world map because the world is our adventure! Well someday it will be, but for now, we’ll explore the adventures in our own backyard.
To make the tag, I started with a rectangle of drop cloth that was 6″ x 15″, a piece of clear vinyl that was 4 1/4″ x 5 1/4″, and 12″ of ribbon or bias tape.
You can buy the clear vinyl at fabric stores (I got mine at Joann’s) and it comes in lots of different gauges (thicknesses), I had mine left over from putting windows in some play tents I made for my kids a few years ago for Christmas.
If you don’t want to buy some for such a small square, you can use a plastic sheet protector or a vinyl zipper bag that sheets are packaged in at the store (I never throw these away because they can come in very handy).
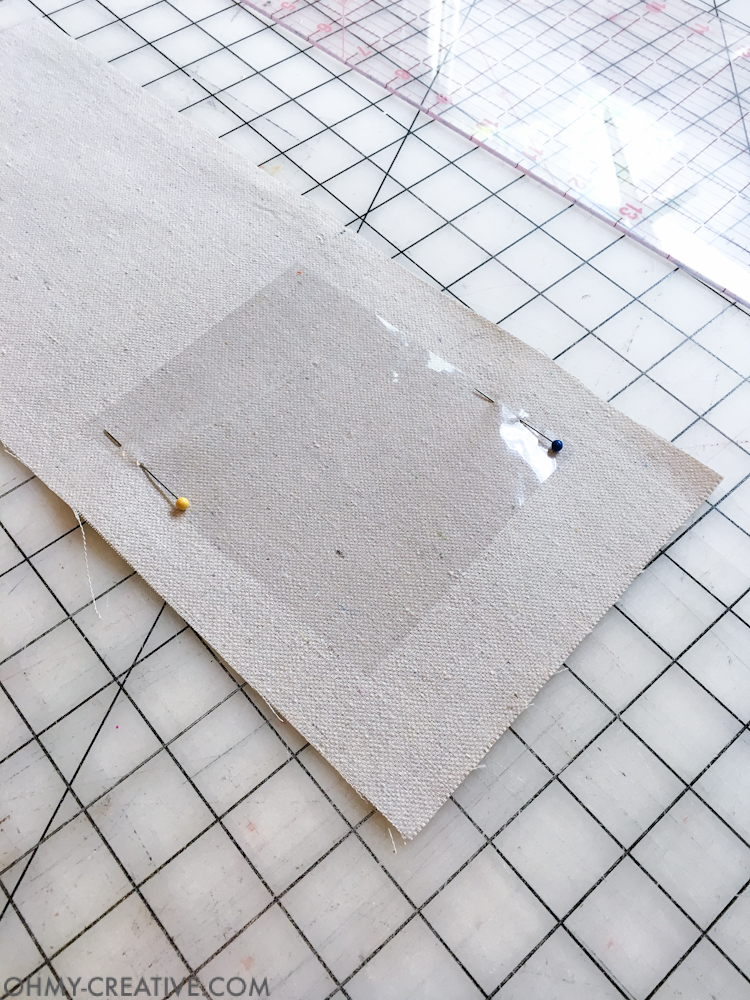
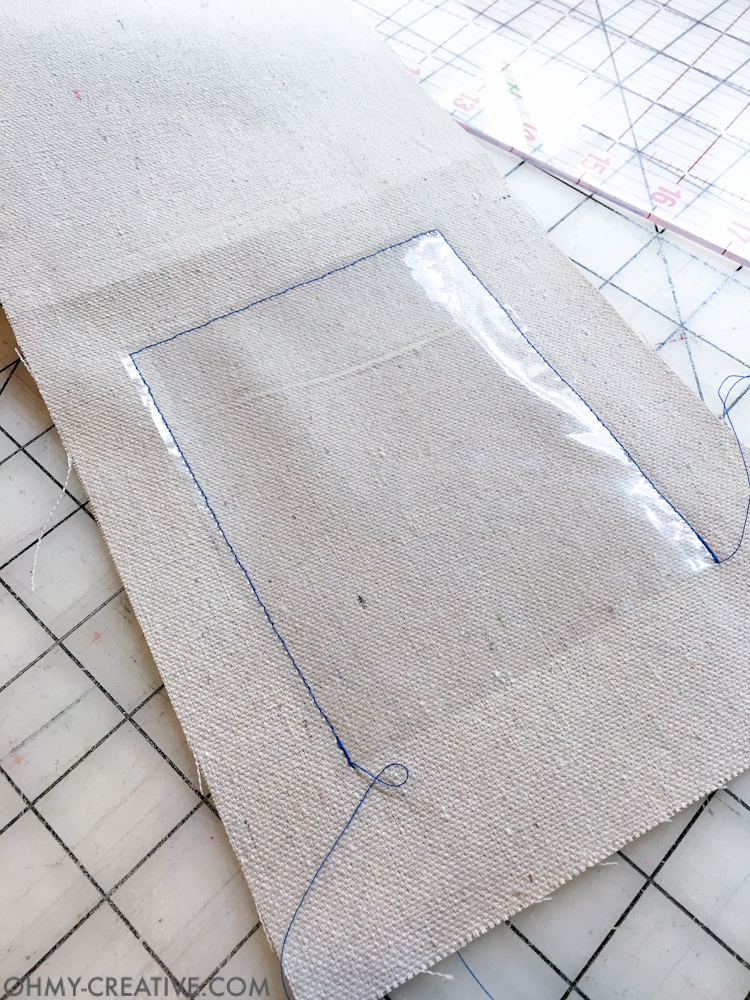
Line the square of clear vinyl up on one side of the drop cloth rectangle. You can pin it together, but those holes will not go away, so I like to pin along the seam line so they are not noticeable.
Then sew around 3 sides 1/4″ in from the edge. Now you have a pocket that is 3 3/4″ by 5″ to hold your checklist.
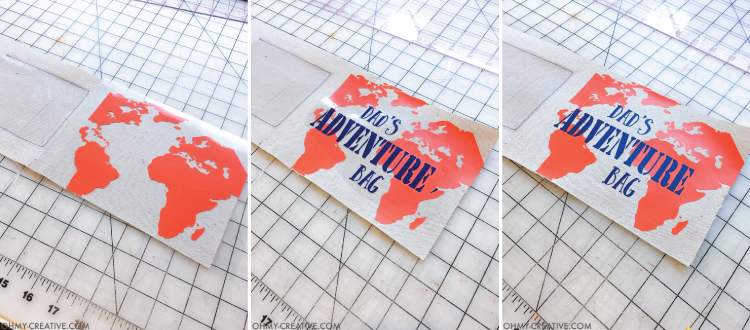
To decorate the front of the tag, I used my Silhouette cutting machine to cut out a piece of heat transfer vinyl that looked like a world map. I originally wanted to use green vinyl (it’s the standard map look) but I didn’t have any more green heat transfer vinyl.
I did, however, have orange, and I’m a huge fan of orange so I went with it. I am so glad I did cause it’s just fun and bright and still looks like a map to me. I also cut out the words, but this time on Royal Blue heat transfer vinyl.
You can download the .studio file of the designs here or the .svg file here if you want to make one too. If you don’t have a cutting machine, you could paint it or color it on with a Sharpie.
When cutting out heat transfer vinyl, make sure to mirror the design before cutting (in the .studio file I already mirrored it for you). Next, it was time to layer it on the tag. I started with the orange world map.
I made the design so it went all the way to the edge of the fabric, not just the seam line. Place a pressing cloth over the vinyl and iron it with a dry iron for 45 seconds.
Be careful not to iron the clear vinyl pocket you sewed on. Remove the plastic backing. Then place the words on top of the world and iron again for about 60 seconds using your pressing cloth. Peel off the backing again and you are done.
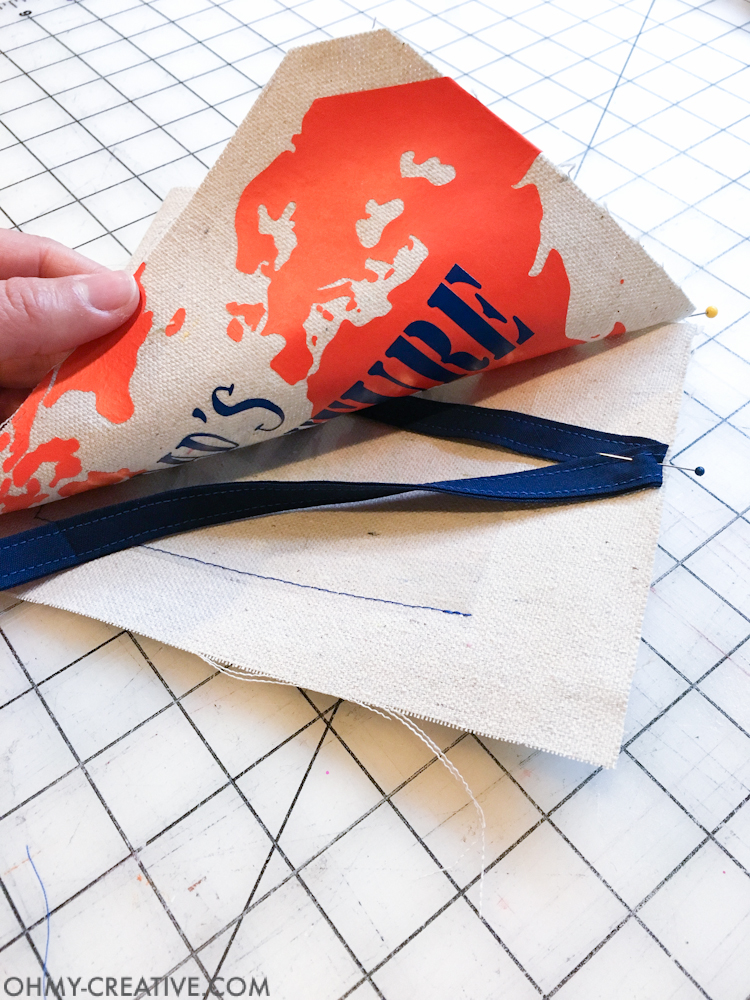
Now fold the tag in half with the right sides out. Fold your piece of ribbon or bias tape in half and pin it to the center of the top of the tag with the ends of the ribbon pointing inside the tag. Cut a little angled on your top corners.
Sew around the three open sides with a 1/2″ seam allowance (be careful to only sew the ribbon where you pinned it to the top), but leave a 3″ opening on one side so you can turn it right-side out.
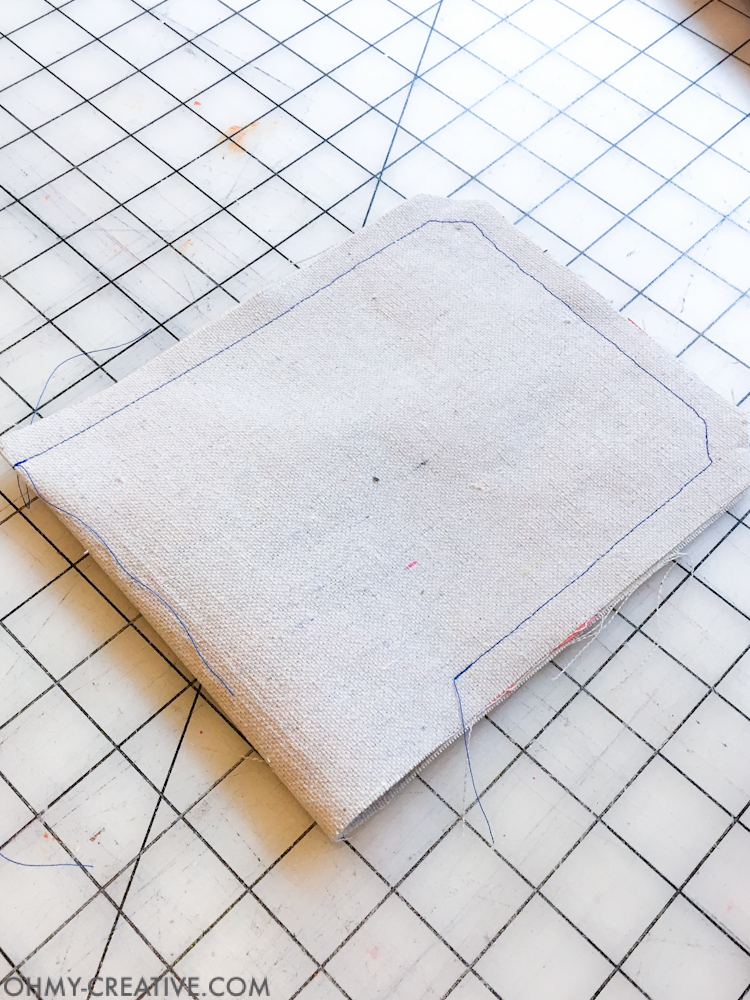
Turn everything right side out in through the opening. I realized I didn’t cut my corners enough, but I didn’t want to have to turn it again, so I just tucked the corners in a little bit until it looked like I wanted. I knew it would be fine after I did my topstitching.
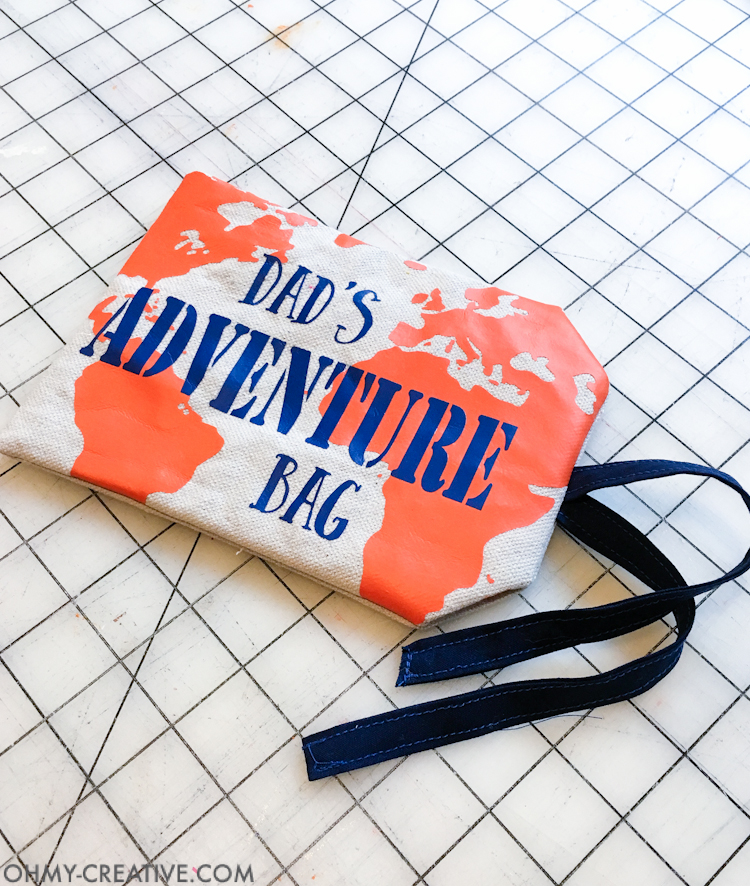
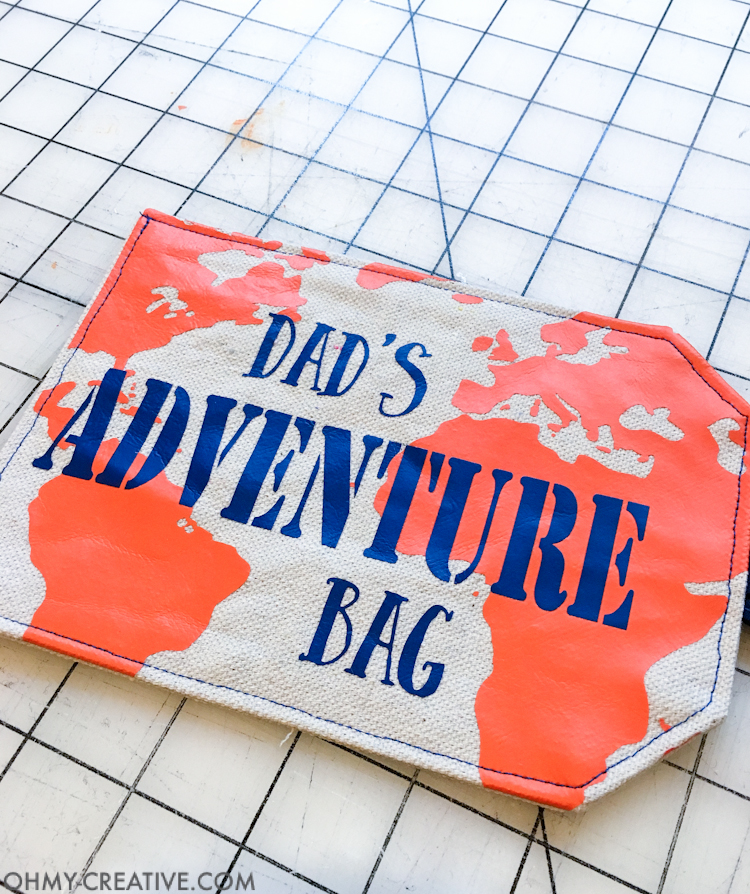
Then I topstitched all around the tag to close up the opening and help flatten everything out nicely.
Next, I printed the checklist and started filling the bag with all our goodies! You can download your own printable checklist here. I started by grabbing some of Dad’s favorite hiking snacks and then went on to the supply list.
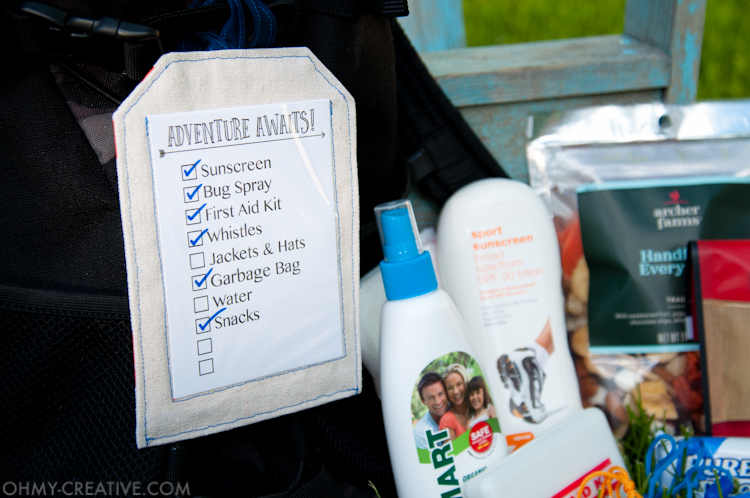
Some of the supplies are obvious: sunscreen, bug spray, first aid kit, and water. Others are ones that we have learned we needed over the years. A garbage bag is a multitasker for hiking.
You can use it to carry out the trash or soiled clothing as needed, or if it starts to rain or you end up in a wet situation, you can use it to keep your belongings dry.
Put all your stuff (including cell phones) in your backpack and cover it with the garbage bag and you will save yourself a huge headache later! Whistles help keep the kids safe, if they are ever out of your sight, they can blow their whistle and you can find them quickly.
Jackets are not always needed, but we are always glad when we have them when we need them. And then I left a couple of empty spots for you to add any other supplies you need for your own adventures.
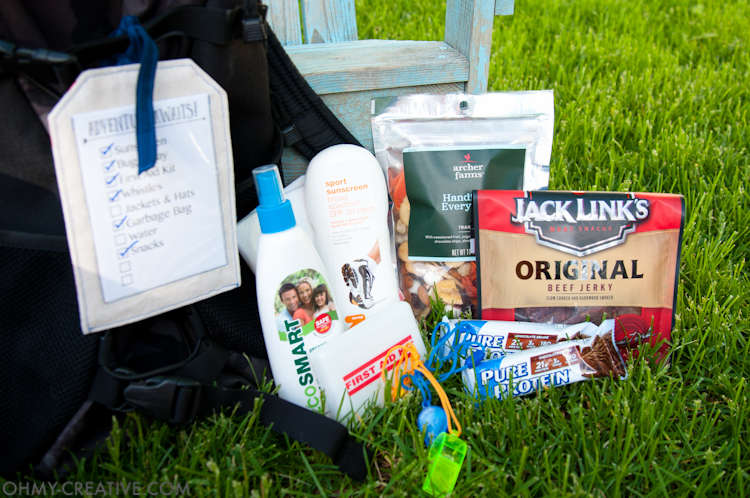
Now we have the perfect Personalized Gift for Dad this year. He is going to love our outdoor adventure bag and I know we will be going on lots of adventures this year.
Creating adventures at Houseful of Handmade.



Oh man, how stinkin’ cute is this?! IMy husband would love it!
Fantastic idea! We used to keep a bag packed for the pool (back when we lived in a neighborhood with a pool where we would spend multiple days each week) and it came in so handy! I’m going to have to remember this one (famous last words right?).
Oh that tag came out great! I love the orange and blue together 🙂
Really great idea for a dad who “has it all”!
I love this idea and I think I will make one for father’s day!
Thanks for the inspiration!
Michelle
I love this idea. We go hiking a lot in the summer, too, and it would be nice to not have to worry about packing things every time!
Some genuinely prize content on this website, saved
to favorites.