Water Bottle Holders
Hi everyone! My name’s Autumn, and I blog over at It’s Always Autumn, where I share craft ideas, sewing tutorials, photography tips, and (mostly chocolate) recipes. Today I’m sharing a handy little project that only costs a few dollars and can be completed in under ten minutes: O-ring water bottle holders.
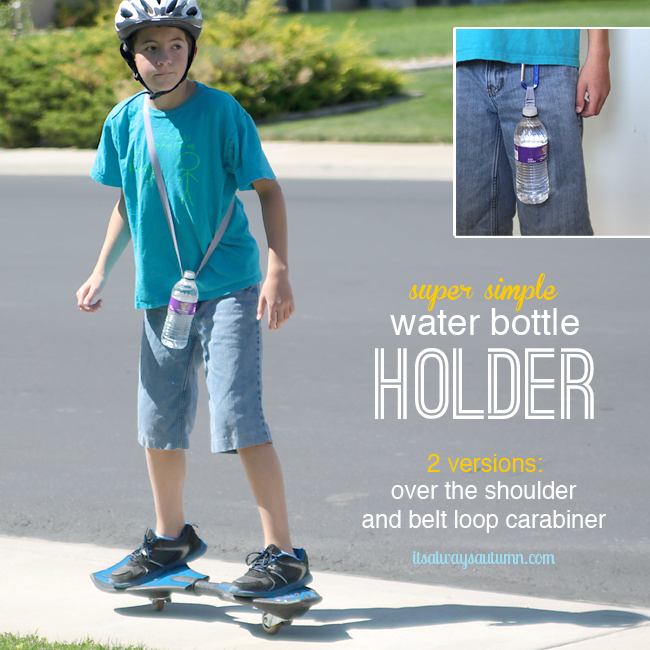
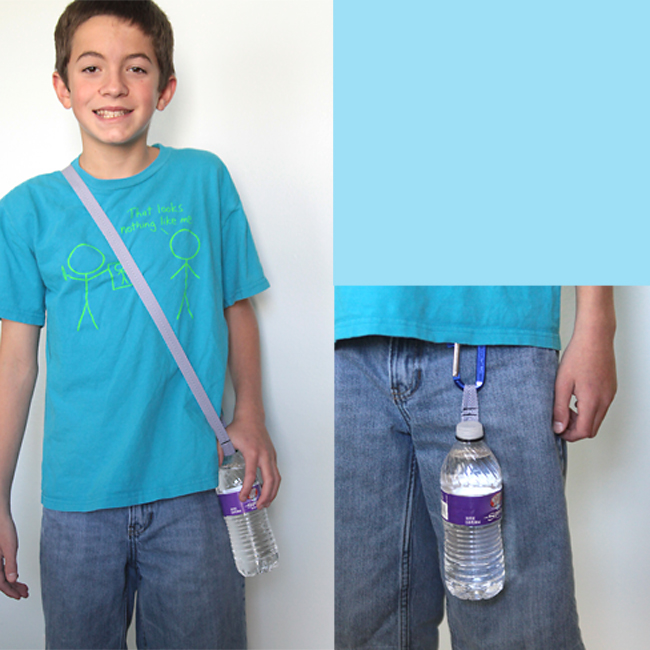
A friend of mine tipped me off to these handy little water bottle holders, made with ribbon and a rubber O-ring (found in the plumbing department of any hardware store). The right size O-ring snaps perfectly onto the top of a water bottle while ribbon that’s been sewn to it goes up and over the shoulder for easy hands-free carrying (there’s a belt loop carabiner option as well!). I know we’re heading into the end of summer, but that means it’s perfect weather for hiking and other outdoor activities. I hate carrying a backpack full of water bottles for everyone when we hike as a family, so this is going to be the perfect solution for us all.
You can make one of each for each person in the family, using different colored ribbon, so no one gets their bottles mixed up. Everyone can carry their own water – no more sharing bottles and hoping you aren’t also sharing flu germs. These carriers also work well for kids heading out on bike rides. My kids walk home from school every day and it’s still so hot that they always wish they had water with them – now they can.
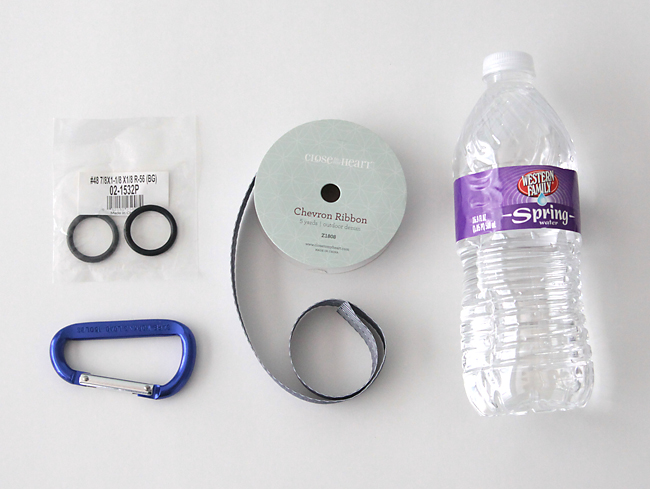
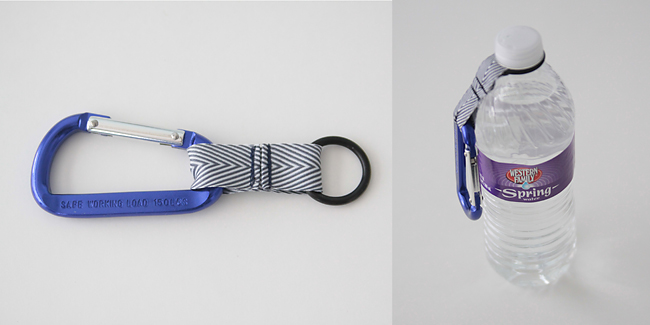
All you need is some ribbon and an O-ring. Your ribbon should be sturdy and around 3/4 inch wide. (You could also use belt webbing for an even sturdier carrier.) Your O-ring needs to be this size: 7/8 x 1-1/8 x 1/8. You’ll find it in the plumbing section. Mine were 89 cents each. If you’d like to make the carabiner verson, which can hook onto a belt loop or backpack strap, you’ll also need a carabiner – I found mine by the rope at Home Depot for about a dollar each.
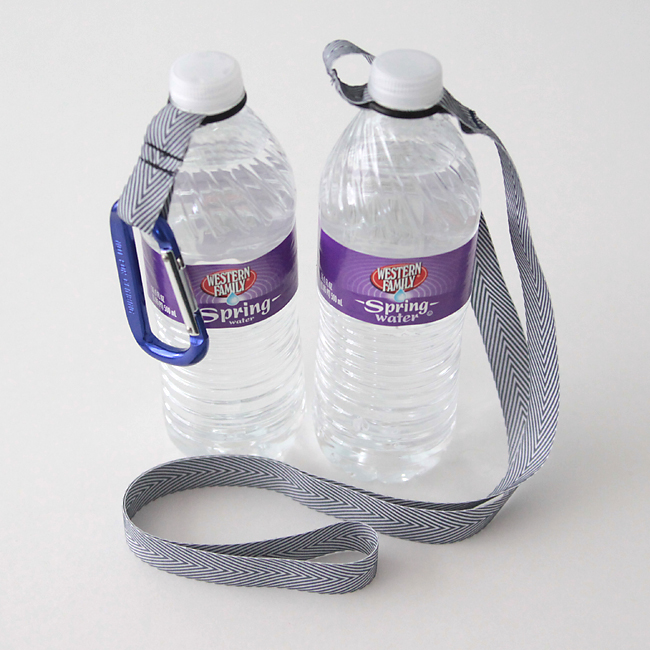
For the over the shoulder carrier, cut 4 feet of ribbon, then loop one end into an O-ring and sew to secure as shown. I sewed back and forth five or six times to make sure it was secure. (If you really don’t want to sew, you could probably use hot glue.)
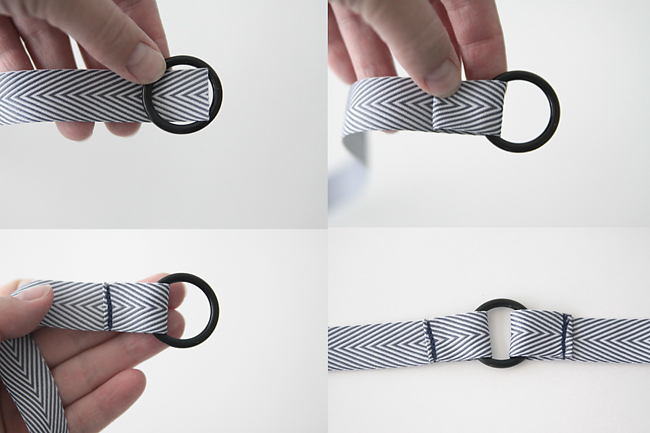
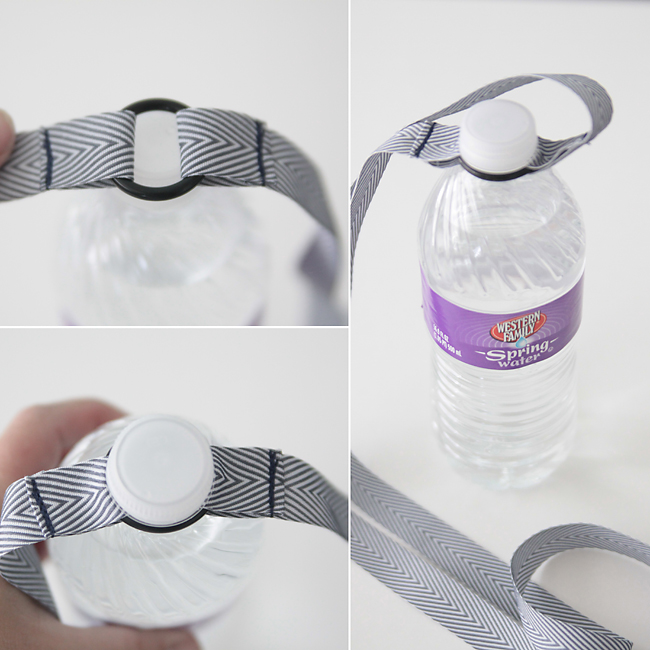
Loop the other end of the ribbon into the O-ring and sew as well, making sure the ribbon isn’t twisted up. Slide the O-ring down over the cap of a water bottle and you’re all set!
NOTE: 4 feet of ribbon was just right for my 12-year-old son, but you’ll want to make it shorter for younger children.
The carabiner version is almost simpler. Cut a 5 inch length of ribbon and sew on end around an O-ring as shown above. Then sew the other end around a carabiner. Done!
Easy, practical, and cheap: it’s the perfect project.
For more kid projects, check out my marshmallow catapults, mix’n’match felt monsters, or easy twig and yarn spiderwebs. Or if you want one more delicious summertime treat, learn to make {semi}homemade peanut butter fudge icecream or chocolate raspberry cookie tarts. I hope you’ll visit at It’s Always Autumn.
Thanks!
Susan B
Latest posts by Susan B (see all)
- Free Printable 4th of July Word Search - July 2, 2026
- 4th of July Barbeque Ideas - June 28, 2026
- Best Luau Birthday Party - June 17, 2026