{Faux} Leather Striped Clutch … Anthropologie Style
Hello! Katie from View From The Fridge back here again this month to share a fun {and very useful} DIY project … A {faux} Leather Striped Clutch … Anthropologie Style. This clutch just so happens to be inspired by one of my favorite stores … Anthropologie! I love pretty much everything about it … the clothes, the shoes, the housewares, and … THE HANDBAGS!! I especially love accessories right now since Baby #3 is due to make an arrival in 17 days (eek!!), and therefore none of the clothes are appealing (or will fit right now).
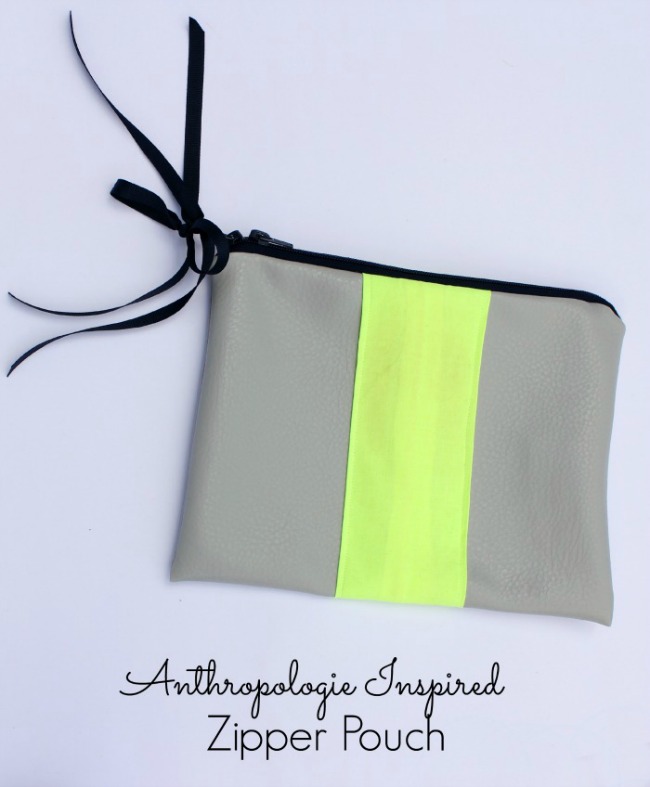
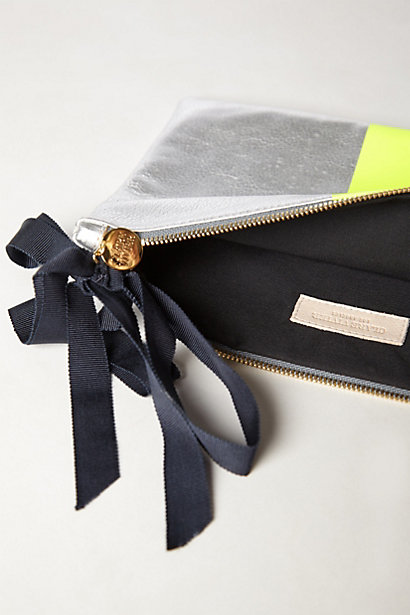
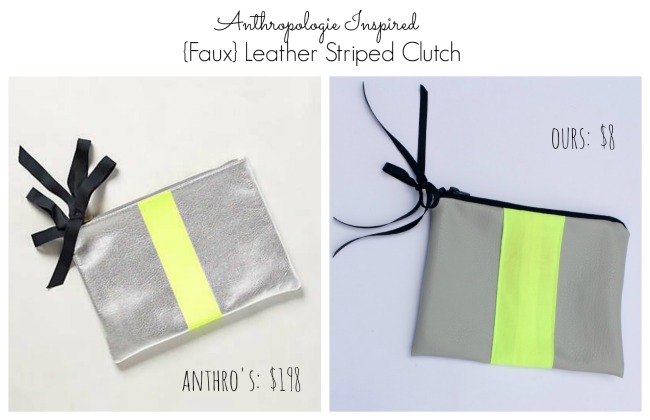
Now … back to the subject clutch. Here’s the Anthro version:

And here’s my {$190 cheaper} version:
Anthro’s:
Mine:
Okay … so mine is not leather like Anthropologie’s, but you could replace my faux leather used here with REAL (shiny) silver leather (like this fabric) and only add about $5-$6 to the total price of the DIY. I just used what I already had on hand from another project (thus the more ‘pewter’ look than shiny silver).
Other than that … they’re pretty much the same (besides the fancy designer tag inside Anthro’s).
I’ve always been a little afraid of sewing handbags … and anything with zippers. This project has both, and I’m here to tell you … it really was simple and quick!!
Here’s what you’ll need:
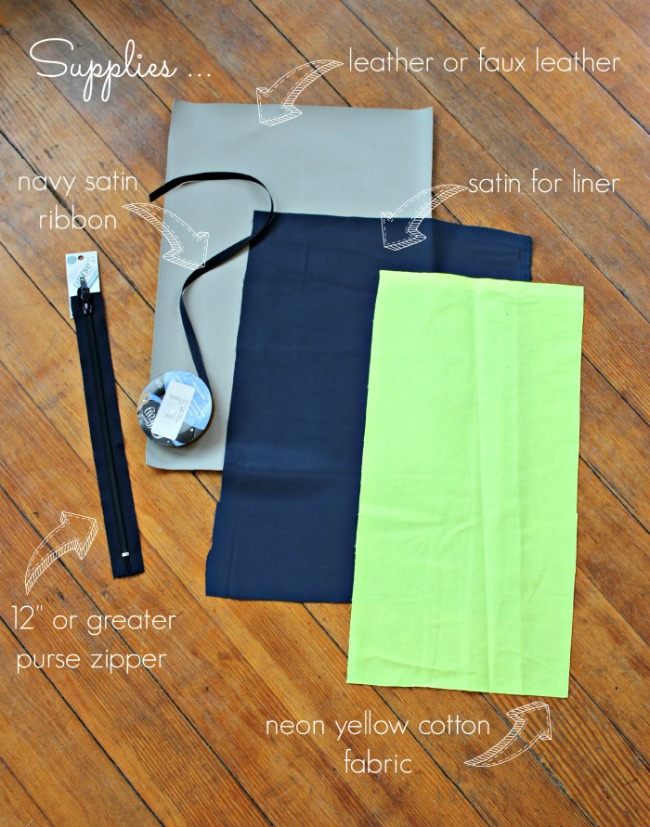
- 1/3 yard of your leather or faux leather fabric. I used this fabric (on hand from a previous project)
- 1/3 yard of navy satin fabric for lining. I used this fabric.
- 1/4 yard of neon yellow cotton fabric (or neon yellow ribbon). I used this fabric.
- 12″ or longer Purse Zipper.
- Thread to match neon yellow OR invisible thread (which is what I ended up using)
Steps:
First step: Cut fabric to the following sizes:
- Leather or faux leather: 12″ x 17″
- Satin for lining: 12″ x 17″
- Neon yellow stripe: ~6″ x 17″
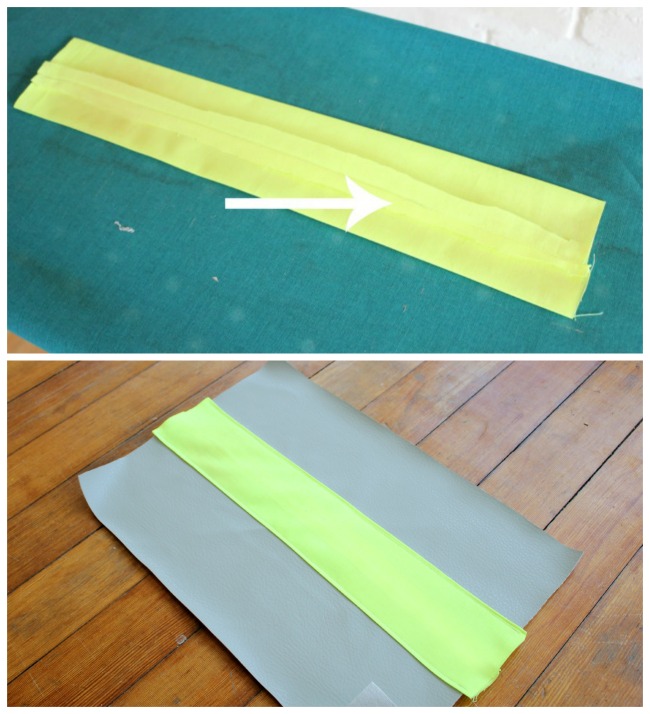
Second step: Create neon band and sew it down the center of leather piece.
- Fold your strip of neon fabric in half lengthwise with right sides facing (to make a 3″ x 17″ rectangle)
- Sew edges together with 1/4″ seam allowance
- Lay flat and iron seams flat (see top picture below)
- Flip strip right side out (pulling through hole in one end)
- Center of neon strip on leather, and sew down each edge of the neon (as close to edge as possible).
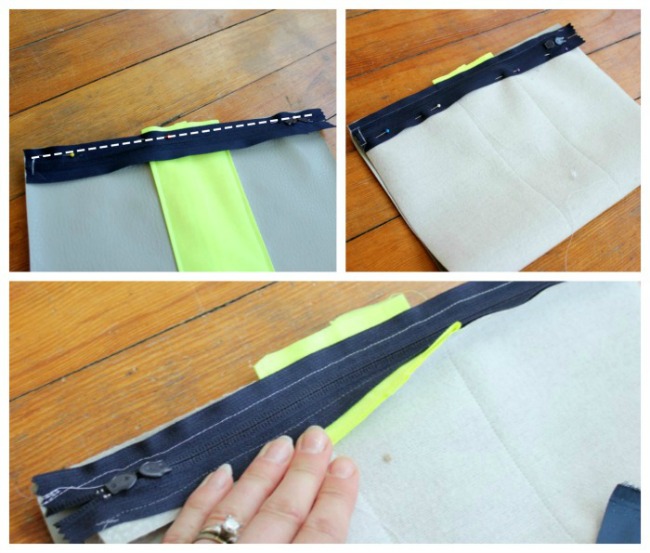
Third Step: Attach zipper to leather
- With leather right side up, place zipper face DOWN onto one edge.
- Sew top edge of zipper to leather
- Fold bottom of leather up (now right sides are facing), pin to other side of zipper and sew into place (see bottom picture below for end result)
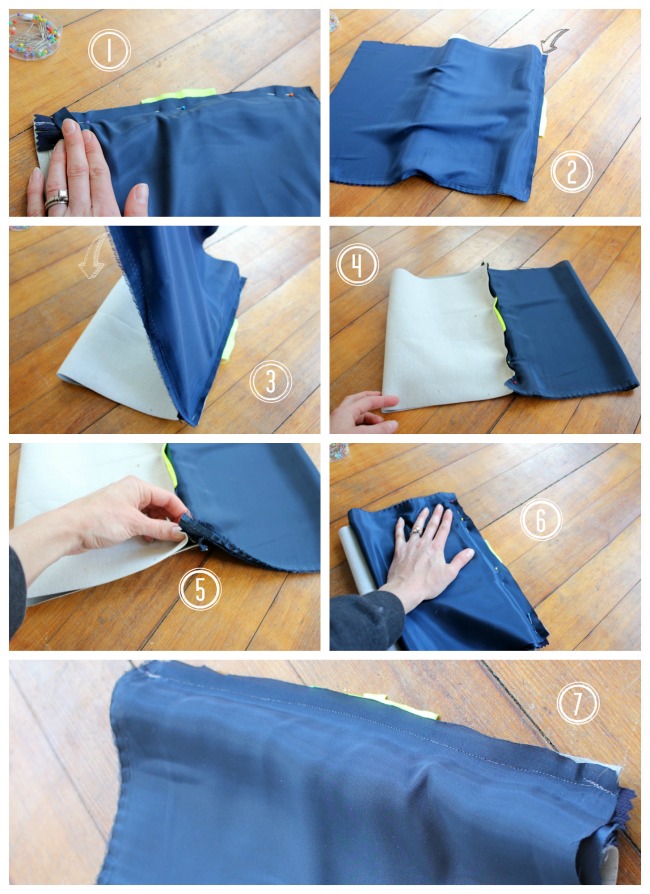
Fourth Step: Attach liner to zipper
- Place satin fabric right side DOWN onto top of purse.
- Pin along top side of zipper and sew
- Fold satin fabric in half
- Pull other side of zipper up, and pin in place.
- Sew in satin to other side of zipper
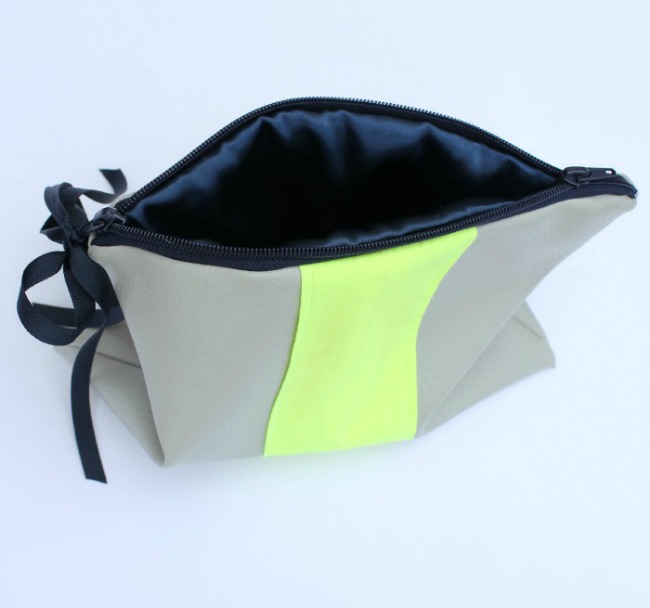
- End result should look like last picture below
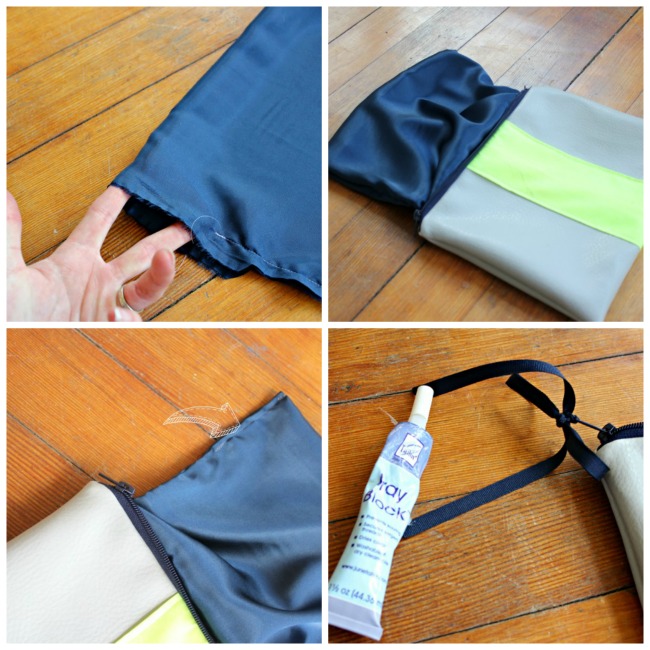
Fifth Step: Sew edges of leather and lining closed
- With leather separate from lining, sew each side closed with 1/4″ seam allowance. Trim excess from edges if necessary
- With lining separate from leather, sew one side closed with 1/4″ seam allowance. Sew the other side closed, but leave ~3″ gap where you will flip clutch right-side out through.
- Flip clutch
- Top stitch hole in lining closed
- Tie two bows through hole in zipper and apply fray block to cut ends to prevent fraying. (I also used just a very small dab of glue to hold the knot tight).
That’s it! An easy, quick DIY project that leaves you ready for a night on the town! You can use this same method to create your own style of clutch, too! Use whatever fabric you like best, add whatever embellishments to the front you like (ruffles, anyone???), then sew the same way as above to create a fully lined zippered clutch! Maybe a makeup bag? Or, more applicable in my case, a diapers and wipes case for on the go?
And one more comparison (I like the price comparison most of all!):
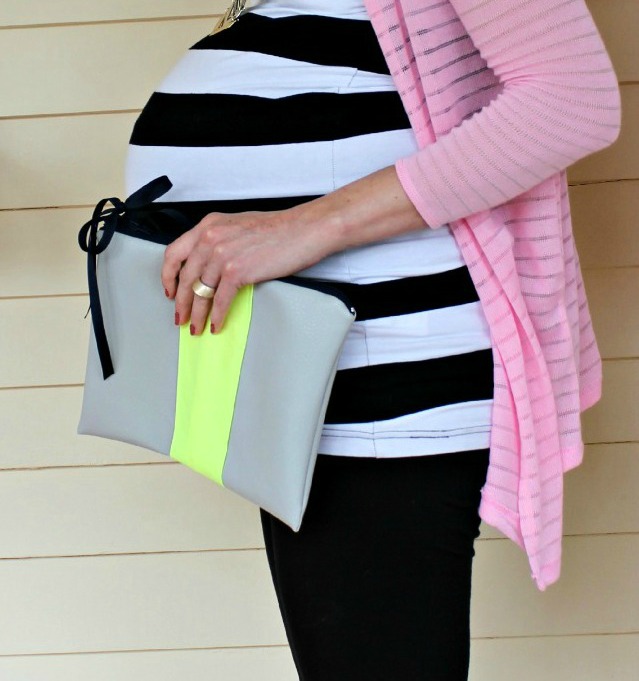
Now … what do you think … hides my full term baby belly?? (Ha!)
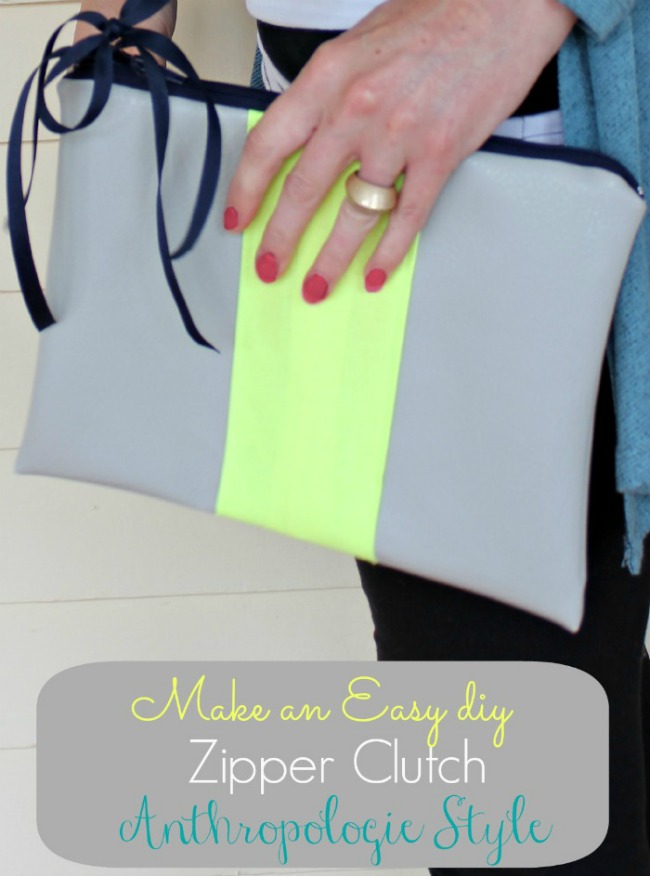
Not even close … I’d need a suitcase for that! 🙂
A big thanks to Susan for having me here today to share this project! I’m actually participating in a week long Anthropologie Knock Off Challenge with several other very talented bloggers. If you have a minute, I’d love for you to stop over and check out all the madness (and some fabulous knock off DIY projects!).
Until next month …
Happy crafting!
XO.
Katie




You are toooo cute with your prego belly! I love that you are rocking it out in the picture, that is fabulous and I love love love this clutch. These colors are awesome!
Not sure if “cute” is the right word, but thanks, Sonnet! I really do like the clutch … I feel like it looks better in person than in the pictures (maybe I should work on my photography skills…)
Great clutch and tutorial! And look at your cute belly!
Ha! Thanks, Bette! Happy Friday … have a great weekend!
Your sewing skill never cease to amaze me Katie. I can’t even believe you made this clutch looks so pretty.
Thanks, Courtney! Sewing is your next ‘craft’ to take up, right? Tell Clyde you need a sewing machine in your new house! 🙂
Fantastic job. I am jealous of your zipper skills.
Thanks so much, Carmody! Turns out … zippers ARE really easy! Have a great weekend!
adorable! this is too cute and your belly is just as cute. what a lovely model. so glad you posted and shared on C&C! have a great week!!
You’re too sweet, Trish! Your ‘model’ comment made me laugh out loud! Thanks for a great party! Enjoy your week!
XO,
Katie