
Rustic DIY Shelf
This Rustic DIY Shelf is a fun and easy way to add a bit of easy decor to your living space. You can utilize this for knick knacks, books or even to add a vase of flowers to your wall. This one is for the bathroom, but it could easily be used in an entryway! I love using scrap lumber to create great pieces, and this DIY shelf is an ideal project for that!
Rustic DIY Shelf Tutorial
This post may contain affiliate links.
Hi! It is Mindi again from MyLove2Create. I am glad to be back at Oh my! Creative today! I am sharing a cool Rustic DIY Shelf that is super cute and useful. I made it for my main bathroom and it is making me happy!

This DIY shelf is ideal for hanging towels on in the bathroom, but I love the idea of adding it to an entryway for jackets and your wallet and keys to be stored easily when you walk into your home. Before we get started, let’s take a look at some much-needed materials to make your own!
Materials Needed:
- Scrap lumber (I used a 5 1/2 inch wide reclaimed fence board and cut two pieces at about 18 1/2 inches long.)
- Wood Glue
- Basket for storage (can make your own using the tutorial below)
- Hooks or other hardware for hanging items
- Paint
- Stencils
- Nails & Hammer
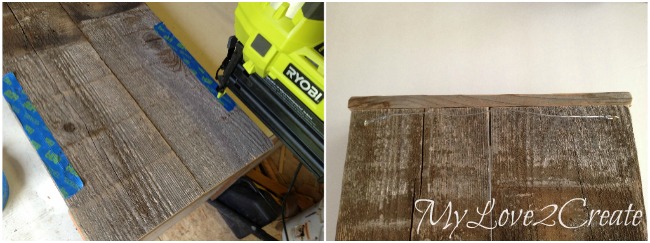
So let’s see how I did it! First I started with a 5 1/2-inch wide reclaimed fence board and cut two pieces at about 18 1/2 inches long.
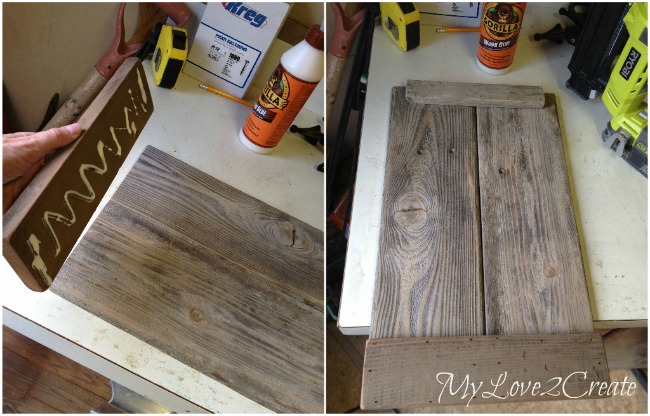
Then with some scrap reclaimed fence wood, I cut, glued, and nailed them onto the two wide boards. This secured the boards together to make the lower half of our DIY shelf. I choose to nail from the front because I like the rustic look of the nail holes, but you could nail from the back too.
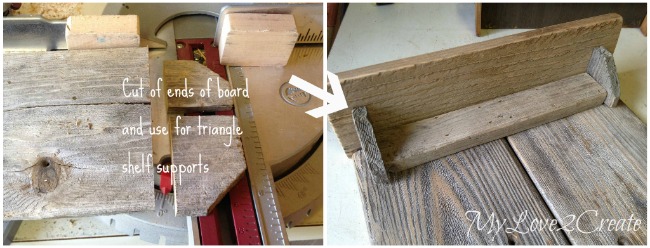
Next, I cut the end of the fence board off so I could make some triangle shelf supports, then I glued and nailed them on, and added a top shelf piece. You can have this measured and cut in your local hardware store, or use your own saw at home to create these pieces.
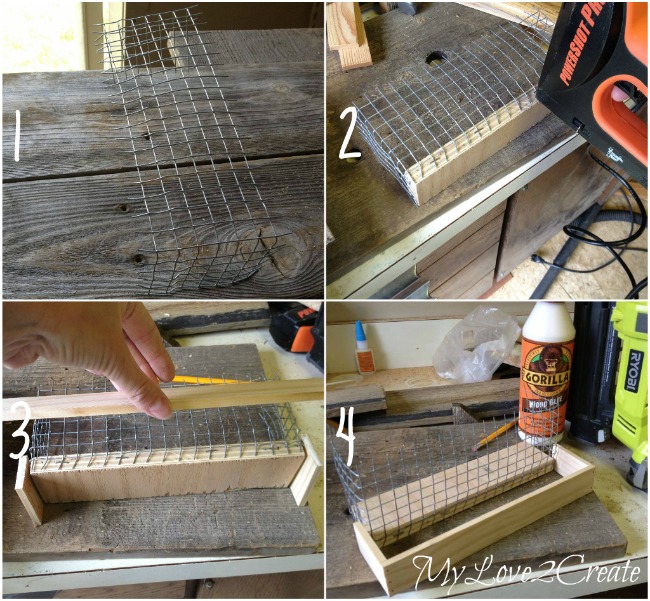
- 1- I bent it to the shape I wanted.
- 2- Then cut a scrap piece of plywood to make a bottom, and stapled the hardware cloth to it.
- 3- Then I cut some free 5-gallon paint sticks from Home Depot and glued and nailed them together to make a frame around the box.
- 4- The frame is ready to be secured to the box.
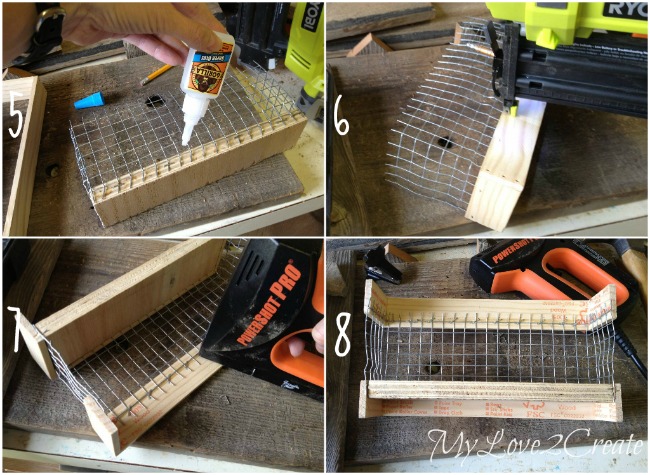
5- I added some gorilla super glue for good measure.
6- Then I nailed the frame onto the bottom plywood piece. 7- I made another frame for the top and glued and stapled the hardware cloth onto the frame. 8- All done, here is a shot from the back.
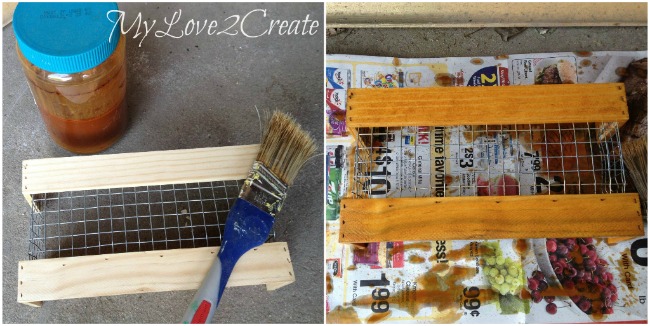
I had some leftover steel wool and vinegar solution from previous projects, which serves to darken the wood and make it look aged…but the finished color didn’t match the wood I was using so I decided to just paint over it instead. This isn’t something you have to do for your DIY shelf, but it definitely adds another purpose and makes it more functional in your home.
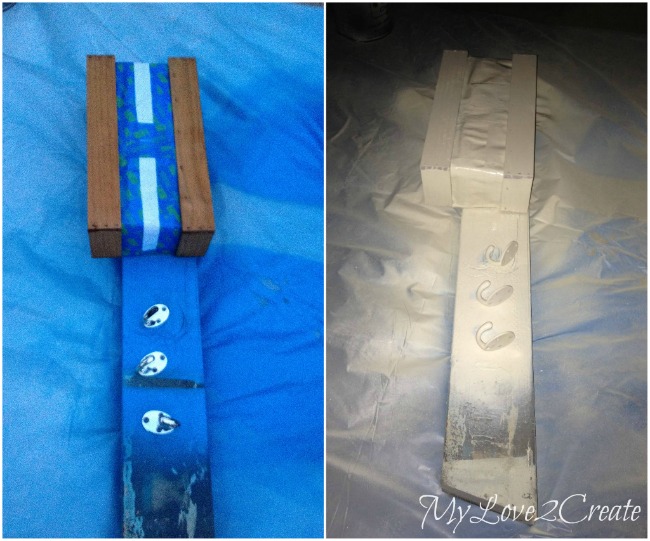
I taped off the hardware cloth and found some hooks that I wanted to use, and spray painted them in Rustoleum’s Heirloom White. Sorry for the bad photos, it was getting dark.
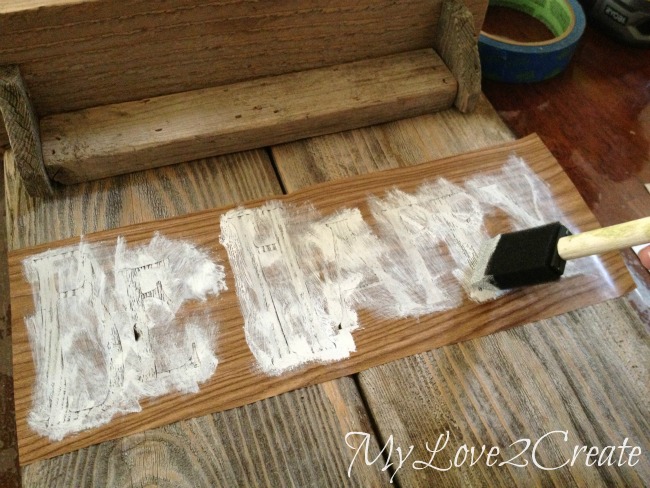
I also made a quick stencil out of contact paper on my Cricut and brushed on some white paint. You could easily use some inexpensive stencils or even put vinyl decals on for a message you prefer.
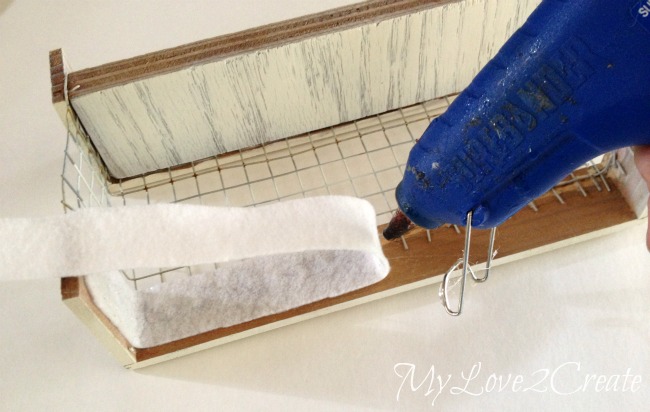
To attach my hardware cloth box, I added gorilla wood glue to the ends and placed it where I wanted it to go. Then I flipped it over, used tape to mark where I needed to nail from the back, and nailed it on! I also added eye hooks and wire to the top back for hanging.

And that is it! Oh yeah, I did pre-drill holes and add the hooks to the bottom.
I figured since this was in the bathroom that my kids use, they needed a good subliminal message…Being happy seemed perfect, and it makes this DIY shelf complete!

I now have a great place to hang the hand towels and store some essential accessories, like nail polish, and such. It is nice to be able to see inside it too, I love the wire box thingy! (if you think of a better name, I am all ears!)

All the supplies were things I had on hand, and so this shelf cost me nada. I think I love it even more!

If you have any leftover fence wood you should build your own, or you could just buy some fence wood it is pretty cheap! Making a fun rustic DIY shelf is simple with some scrap lumber, ingenuity and a great idea!
If you built one where would you put it?
For more great projects check out my blog MyLove2Create.
Don’t miss out on some of our other favorite craft ideas!

Mindi
Latest posts by Mindi (see all)
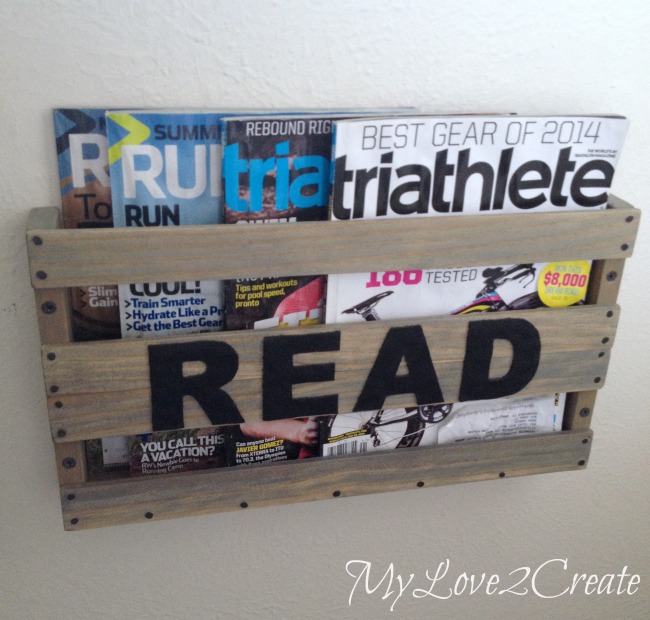
- DIY Magazine Rack - August 25, 2014
- Easy Painted Burlap Wooden Sign - July 17, 2014
- Rustic DIY Shelf - June 26, 2014
I love Mindi’s work. She is so creative
Yes, she is Daniela! Not afraid of power tools either 😉
This is a great project Susan and your tutorial is very helpful. I think the shelf being painted white adds more visual interest to the unit.
love this simple shelf Mindi! Be Happy is my favorite saying… it’s the first line of my subway art I made years ago! SMILE is at the bottom. I still love it after all this time.
really love how your rustic shelf turned out. After making all my Etsy wedding signs, I have scrap fence boards laying everywhere! I need to start using them up for simple projects for Glendale. Thanks for the inspiration!
gail
I love this idea, Mindi! Such a great solution to towel rings. I also love PureWorks foam hand sanitizer. haha
I love this shelf idea so much, little different, lot versatile, lot useful, lot cute as all get out. Great job. I am going to have to make one of these, great tutorial. Think we most likely have all the stuff we need to make this except for the 5 gallon paint sticks. Shucks were right by Home Depot today on way to Goodwill. Maybe I can get some at our new True Value.(It’s closer to us and I love the paint sample cans, get a quart for $3.99. Now that’s a heck of a deal) A quart goes pretty far. Love that your put Be Happy on your shelf. Gives it great personality. This next week would be good time to get hubs to make it for me. Glad you shared this project, love different ideas for shelves to make, one of my favorite things. Can you ever have too many shelves? Happy weekend/summer days
low cost, practical, very useful and looks amazing
Hi! Thanks…I love this too. Very clever. How about “attached catch-all” for the
basket- box thing? Or “boxed-basket catch-all”? All I can think of is how perfect
it would be for a hair dryer! Keep up the good work!