
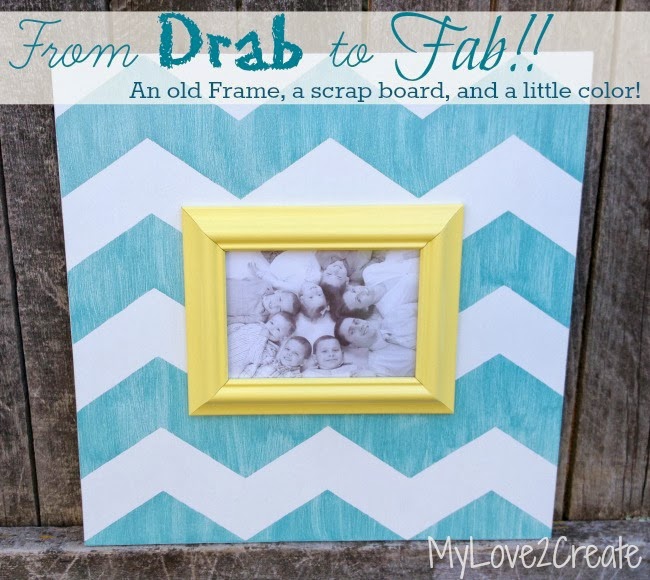
Chevron Picture Frame Ideas – Drab To Fab
We love these Chevron Picture Frame Ideas that take them from Drab to Fab in no time! Upcycled picture frame ideas are always needed since they are so easy to find for just a few cents at thrift shops and yard sales!
Hello! This is Mindi from MyLove2Create, and I am SO excited to be contributing here at Oh My! Creative! Susan does such a wonderful job and I was thrilled when she asked me to share with you! I do all sorts of DIY and crafty projects, and I love making picture tutorials because I am a visual learner. I hope you like what you see!
Today, I am sharing a fun project that will help you bring new life to your old unused frames – my Chevron Upcycled Picture Frame – Drab To Fab!
Chevron Picture Frame Ideas
This is just one of many great upcycled picture frame ideas that used my favorite pattern ever – CHEVRON! With a few simple steps, you can take that old ugly or plain picture frame and turn it into a beautiful piece of wall art!
Super fun right?! It really is super easy to do and makes a great statement!
Materials Needed:
- Picture Frame
- Scrap MDF Board
- Mitter or Jigsaw to cut MDF board
- Paint
- Tape
- E6000 Glue
- Sandpaper
Let’s see how I made it.

I have been wanting to use some of my old frames. So, when I recently saw a framed mirror mounted on a board at Hobby Lobby I knew just what to do. The result is this chevron upcycled picture frame!
I grabbed some frames out of my closet and found a piece of scrap board (MDF) from my shed. I had fun trying different arrangements and came up with the idea to use one 5×7 frame on a square board. (Do you like how I used a curtain rod to “see” the square!).

I used a Miter saw to cut my board, but you could use a circular or jig saw as well. Or, if you buy MDF or plywood at Home Depot they will cut it for you for free (most stores don’t charge). It can be any size you like, mine is 17 1/2 inches square. In the photo above you can see I measured and drew lines to find my center mark.

Once that was done it made it easy for me to center my old frame on the board to really get started on this fun new chevron upcycled picture frame idea. I traced around the frame, and then measured an inch towards the middle on all sides. This box is where I will eventually be gluing my frame down. The width of the frame measures 1 1/4 wide and so the inch margin was perfect. I marked the middle portion with the words cut, to make sure I didn’t cut in the wrong place.

I started by drilling holes on all for sides, so my jig saw blade could start the cut, but they were too small. So I just drilled one bigger hole, and cut from there!

Now do you see why I wanted a hole? It is for my frame, so when I want to switch out the picture, I have easy access! That 1/4 inch gives me just enough space. A perfect fit.

Very happy that the hole was the right size, I brought the board in to be painted. I gave it two coats of an oops sample size, in white. I got at Home Depot for 50 cents! Gotta love the oops paint section! I did sand in between coats of paint with a fine grit to make it smoother finish.

At this point I had a hard time deciding what type of pattern to do on my board. I wanted it to be a fun decorative pattern, and since I love chevron and don’t have much in my home, I went with it. There are so many upcycled picture frame ideas, but chevron is a totally fun and classic look I can’t get enough of.
You could do any pattern you want! I used my cutting machine to cut the chevron out onto some white contact paper to make a stencil. You could also use painters tape to make the pattern. I grabbed another can of oops paint from my garage (can you tell I am cheap, I hate to buy things full price!) and did one quick coat with a foam brush.

I removed the stencil and ta-da…clean crisp lines! Sorry for the bad in progress photos, it has been raining and overcast, and all my kids were underfoot so I was in a hurry.


I decided to use E6000, it is found in craft stores and if you use a coupon it is not a bad price. I placed it on the back of my frame and then centered it onto my board, over the cut out area, and waited for it to dry.

Not bad for a project made from stuff I had on hand, it really was pretty easy!
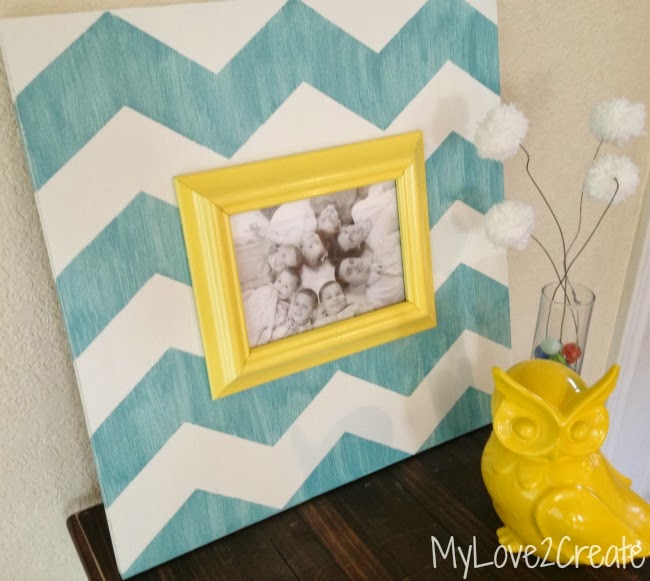
For now it is sitting on my entryway table, but I could easily add a picture hanger to the back and hang it on the wall.

I lightly distressed the board when the chevron pattern dried. I love the textured look it gives.

When I finished my “new frame”, I kept thinking it would be super cute to have a grouping of three on the wall! Maybe I could make more…I do have two more frames the same size!
![]()
So what do you think? Do you want to make your own? I hope so! What are your upcycled picture frame ideas?
Thank you so much for reading! I would love it if you came to visit me at MyLove2Create! And again a big thank you to Susan for this great opportunity!
Hugs,
Mindi
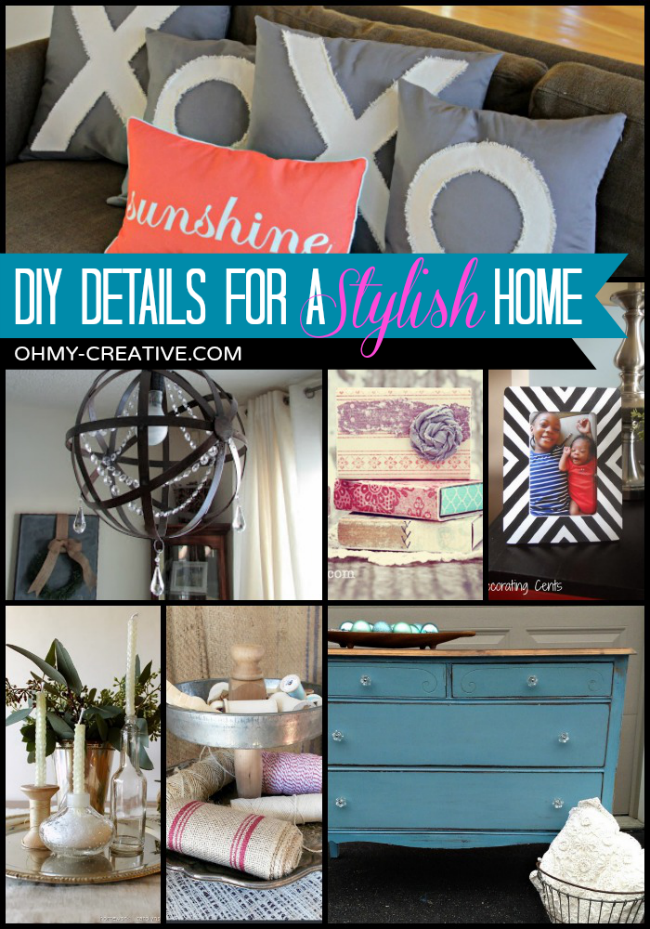
Check out some of our other favorite DIY picture frame ideas and crafts!
DIY Monogram Frame with Family Quote
10 DIY Made From Wood Projects

Linking to these wonderful parties!
Susan B
Latest posts by Susan B (see all)
- How to Make Grape Jello Shots - March 28, 2026
- The Best Strawberry Cake With Whipped Cream Cheese Frosting - March 13, 2026
- Lemon Drop Jello Shots - February 2, 2026


What a great idea! It would be the perfect solution to cover a big empty space on a wall. I love the chevron pattern and the color. Thanks for the great tutorial, Mindi!
Thank you Cristina! It would be a good solution to cover a big empty space on a wall, so smart!
Oh Mindi! I have often thought about making these (or something similar) and have puzzled over how exactly to do it… I am so thrilled that your brilliant builder/creator brain figured it out and shared it! Pinned:) Love it!
Krista, you are so sweet, I am sure your crafty brain would have figured it out! Thank you so much!
I love how your frame turned out! Very pretty! Thanks for the tutorial!
Thank you so much Ritchil! I hope you make one!
This is SO cute! Pinning this project now 🙂
Awww, thank you so much Chelsea!!
I love this frame updo!! I have seen these all over at hobby lobby too….and am too cheap to buy them knowing they could be made. I hadn’t thought about cutting a hole in the back for swapping out a pic….I was trying to fugure out a way to put a hinge on the frame to swing open…..yours is much easier! Woo Hoo. Thanks!
Yippee! Now you need to make one!! Thanks for your comment!