
DIY Beaded Bobby Pins
Summer is wedding and party season, and I always like dressing up and doing my hair. Try making your own DIY Beaded Bobby Pins in a few easy steps!
One easy way to add flair to your ‘do is to throw in some cute decorative bobby pins! And you don’t even have to go buy some – you can make them yourself with leftover beads and some old bobby pins!
These are super easy and quick to make and I love how you can customize them to go with any outfit you’ll be wearing this summer based on what color and style of beads you choose! Let’s get started, shall we?
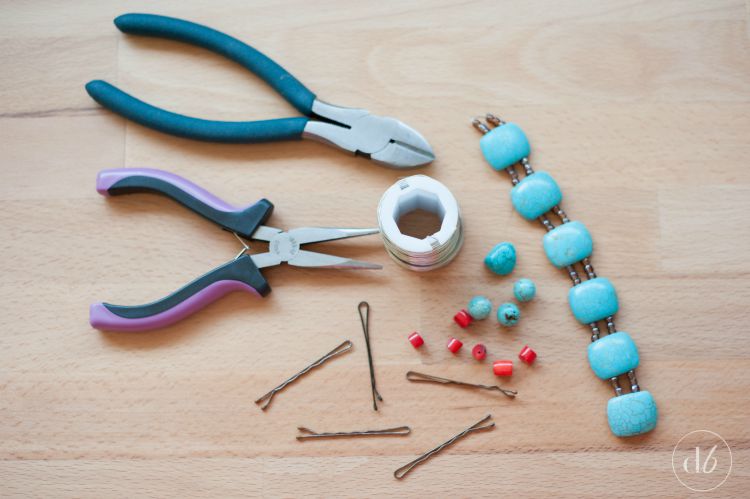
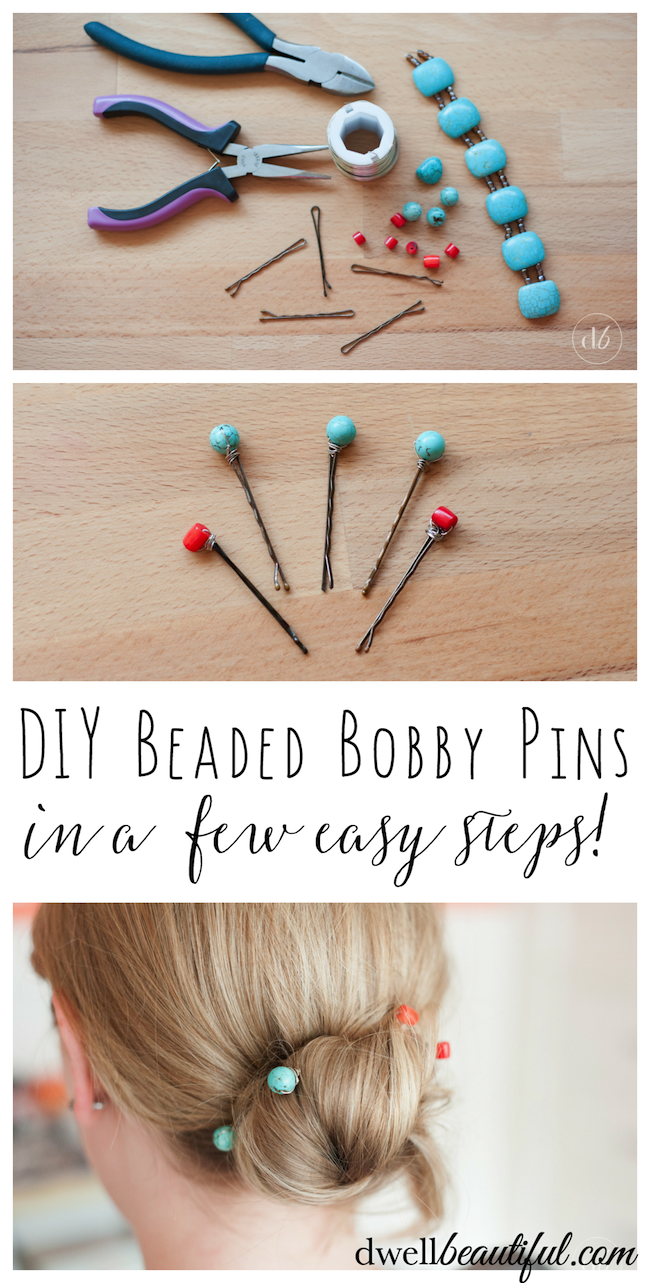
Beaded Bobby Pin Materials
– Beads in your choice of color and style
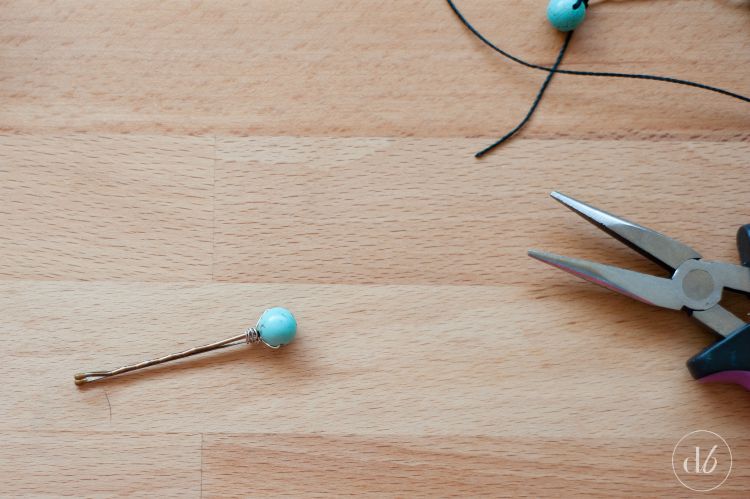
Step 1
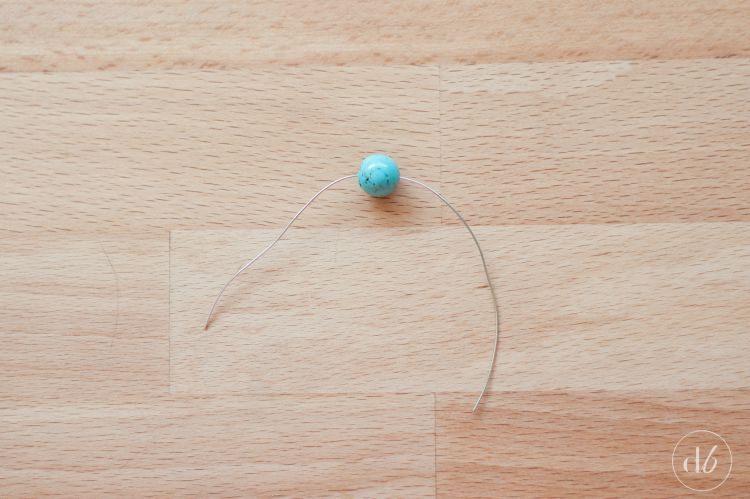
Cut a short piece of jewelry wire (probably about 3-4 inches) and thread a bead of your choice onto the wire, press down the sides of the wire on either side of the bead to keep the bead in place in the middle.
Step 2
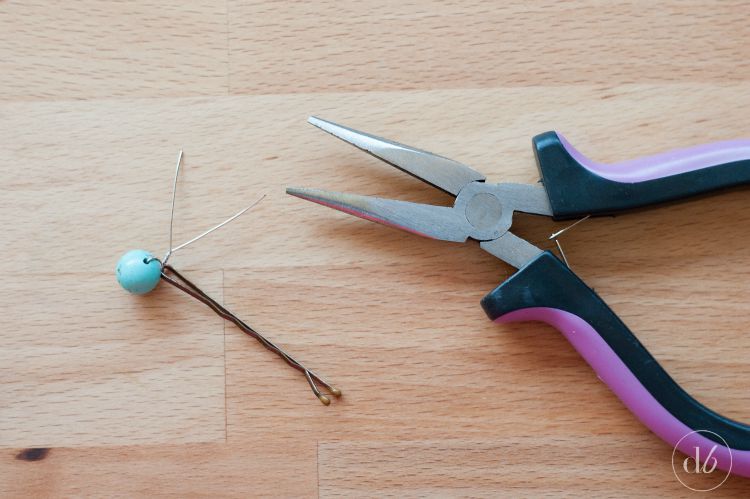
Loop your wire through the top of the bobby pin and then use your jewelry pliers to grab both pieces of wire right underneath the bead and then twist. By twisting the pliers you create a twist-tie effect under the bead, which holds it in place to the head of the bobby pin.
Step 3
Take the remaining wire, clamp the very ends of both pieces in the jewelry pliers and then wrap the wires in the same direction around the top of the bobby pin right underneath the bead.
This adds extra stability and keeps the bead from jiggling around. Push the ends of the wire in towards the center so they don’t stick out and snag your hair! Repeat for as many bobby pins as you want.
And here are mine all finished!
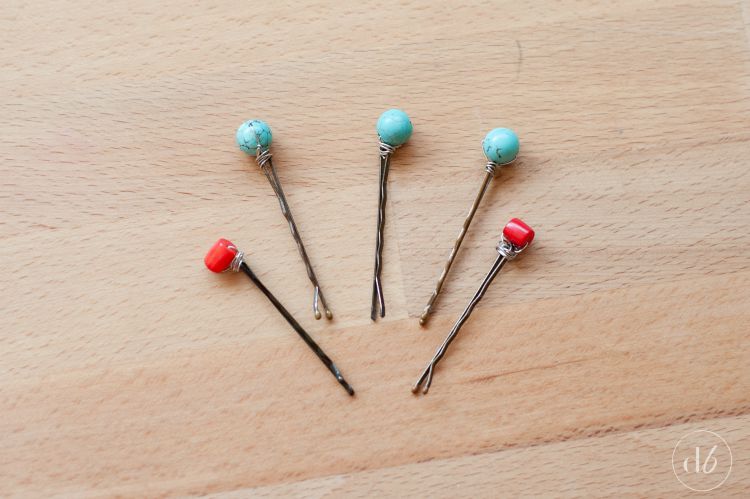
I picked aqua and red since they were my wedding colors and looking at them just makes me so happy! I also love the different styles and shapes of the beads. You can mix and match for truly endless combinations!
I had my hubby snap a few pictures of the back of my head with the bobby pins in (as it’s basically impossible to take a picture of the back of your own head!) and I really like how they look.
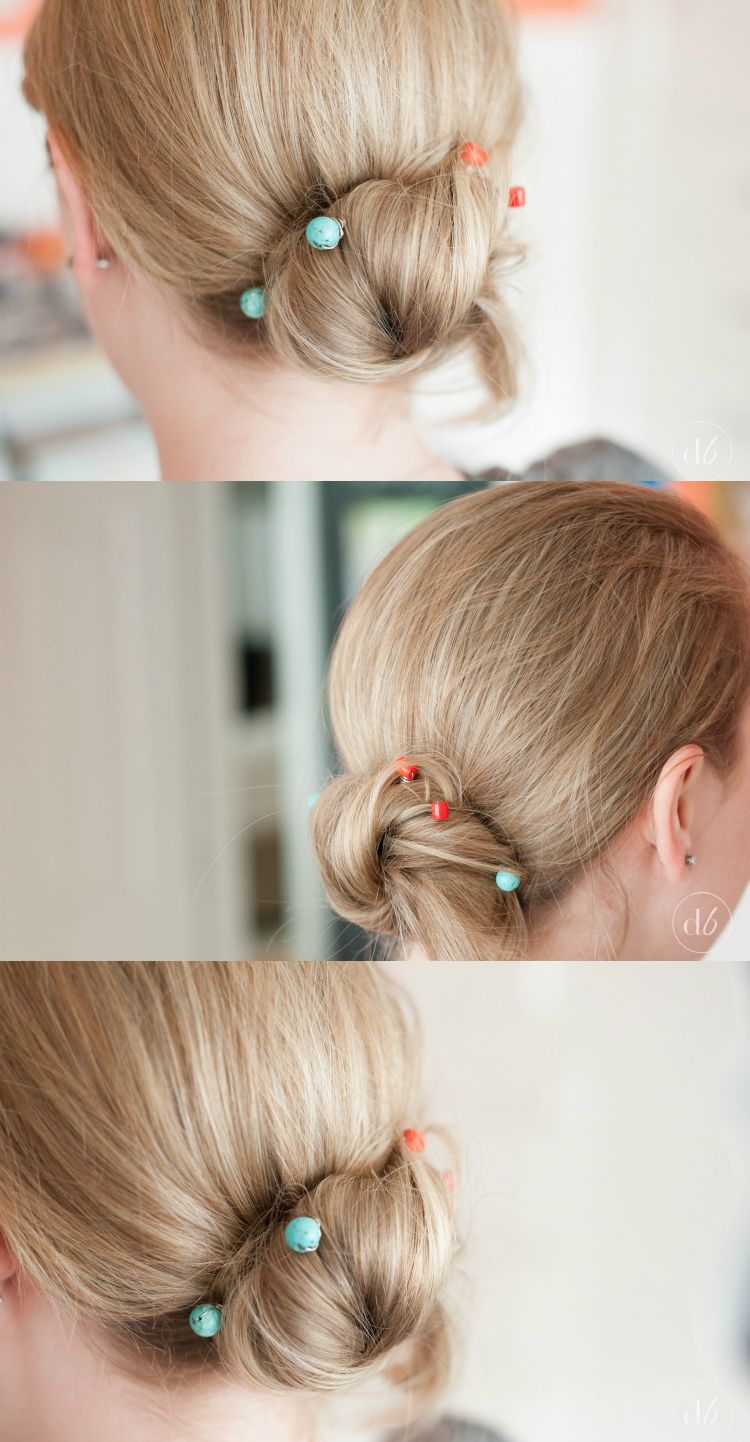
I just love how pretty they are and I know that I’ll be wearing these a lot with all the shindigs I’ll be going to this summer! Thanks so much to Susan again for having me along and I’ll see you next month! In the meantime, don’t be shy and come on over to Dwell Beautiful to say ‘hi!’ if you have the time!
Susan B
Latest posts by Susan B (see all)
- Free Printable 4th of July Word Search - July 2, 2026
- 4th of July Barbeque Ideas - June 28, 2026
- Best Luau Birthday Party - June 17, 2026


Thanks, I was looking for some last minute gifts for two friends and this is perfect. Also they will make great party favors for my granddaughters birthday next month. Great job!
I’m not easily imdsrseep. . . but that’s impressing me! 🙂
paulJuly 16, 2012Hey guys, I’m loving the podcast. I love hearing all the guests and enjoy hearing the variety of points of view. (Loved the recent show comparing English to American races!)I have a request: can you raise the recording volume a little bit? I often have a hard time hearing some of you when i’m playing the podcast through small speakers. I don’t have this problem with any other podcast I listen to.Thanks!Paul
I love this sweet project!
Hi, it seemed so easy and adorable but I did exactly what your instructions gave and twice used thinner wire to a bit thicker and both did not stay put on top of Bobby pin while twisting, it flopped around. What did I do wrong?
Omg, I need to let you know I did not give up, I believe I figured it out. Thank you for your creative craft.
I’m glad you figured out! Sometimes it takes a few tries to get something to work. Enjoy!