
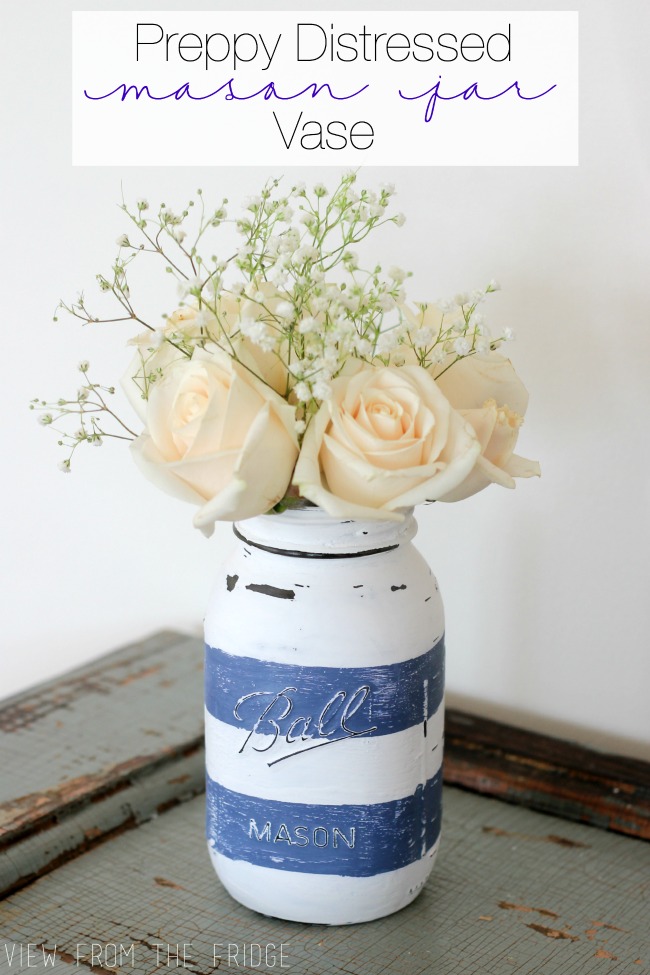
Preppy Distressed Mason Jar Vase
It’s the time of the year again when flowers bloom and spring is in the air. I have a quick and easy (and even a bit Spring-like) DIY project – a Preppy Distressed Mason Jar Vase!
Mason jar crafts and decor are still popular. Most of them are easy to make just like this distressed mason jar or this Mason Jar Terrarium!
Spring is honestly one of my favorite seasons.
I like decorating my space with a garden-like feel because that meditates my mind. Who wouldn’t, right? However, instead of using plant pots, I’d like it to be more aesthetically pleasing.
What I would like to share with you is this simple mason jar vase centerpiece that would fit all seasons!
If you’re as excited as me, here’s what you’ll need:
This post contains affiliate links. Read my full disclosure.
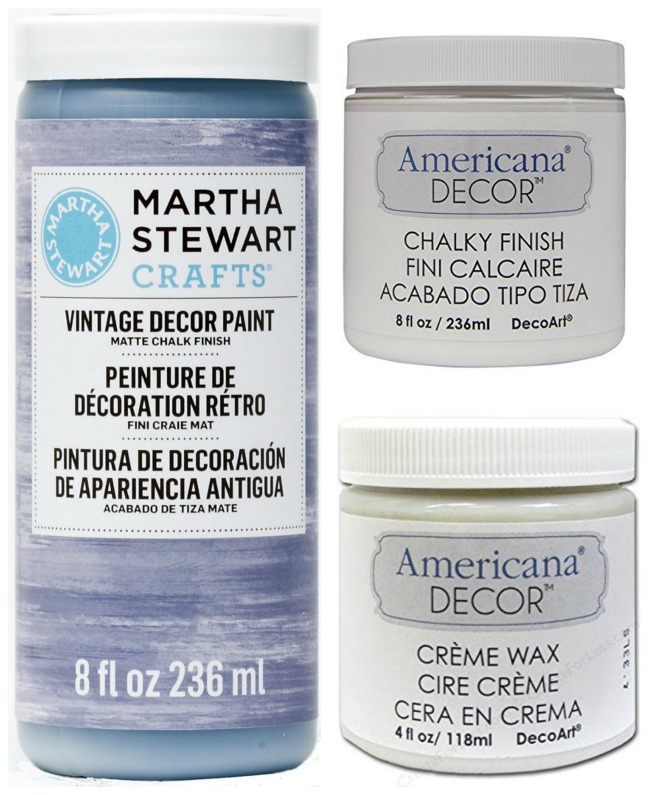
Distressed Mason Jar Vase Supplies
Martha Stewart Vintage Decor Paint in Sailor Blue – this paint will add that lively blue flair
American Decor Chalky Finish Paint in Everlasting – it will serve as the base paint for the mason jar.
Americana Decor Clear Wax – you will use this to seal and protect your finished piece.
Foam Paint Brush – for paint and wax application.
Painter’s Tape – this will help to create clean lines and protect areas from paint application.
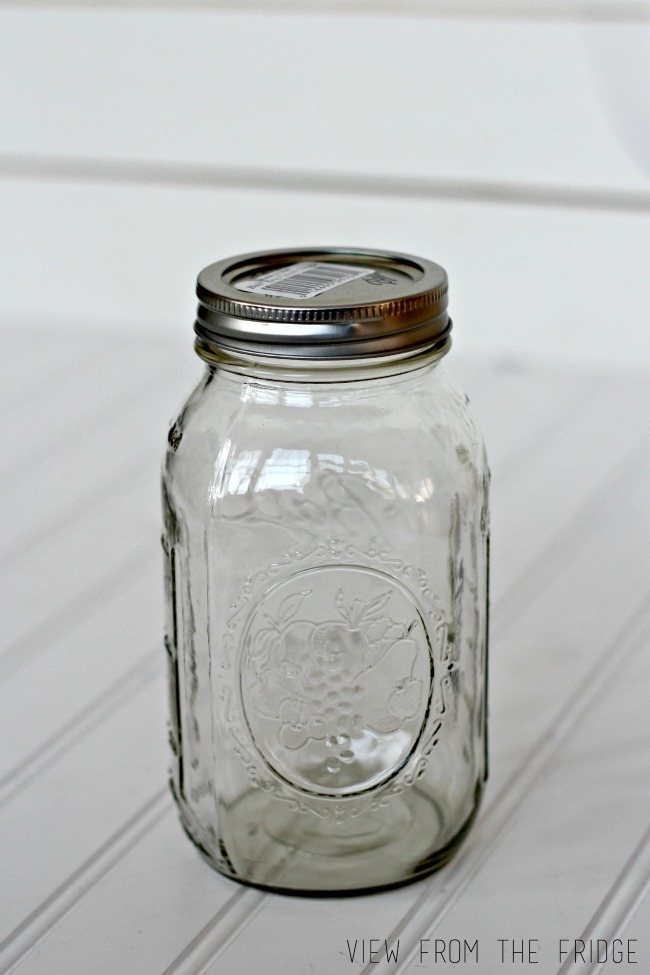
Clear Mason Jar – your canvas for creativity.
Sanding Block – to achieve that vintage and distressed look.
I just have a few reminders before proceeding…
Make sure that your workspace is well-ventilated. As you will be using paint and wax, this will help to dry it fast.
Decorating a Mason Jar
Let’s give this a stylish makeover!
Step 1
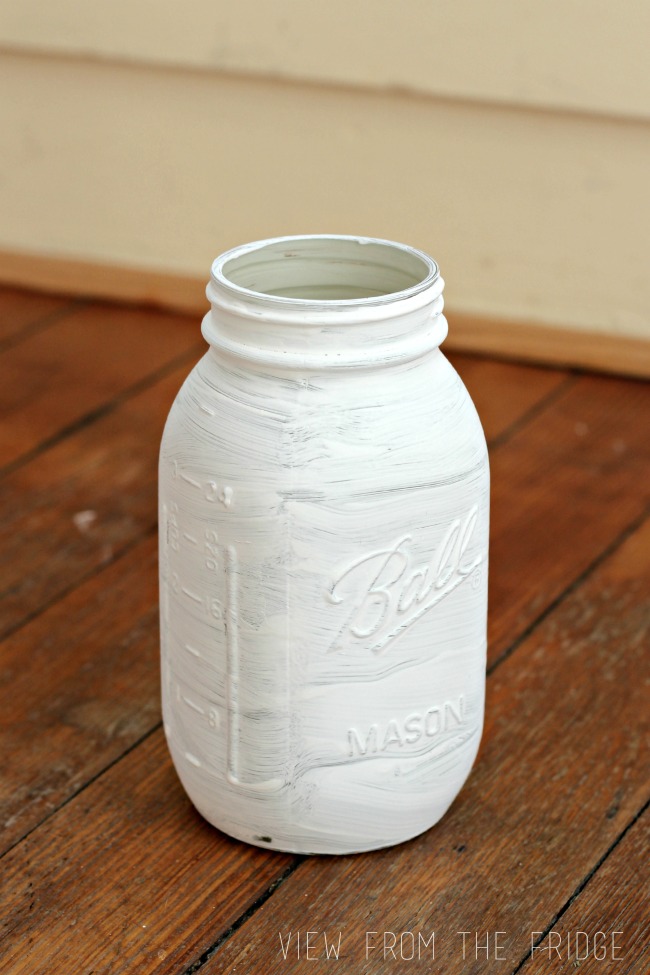
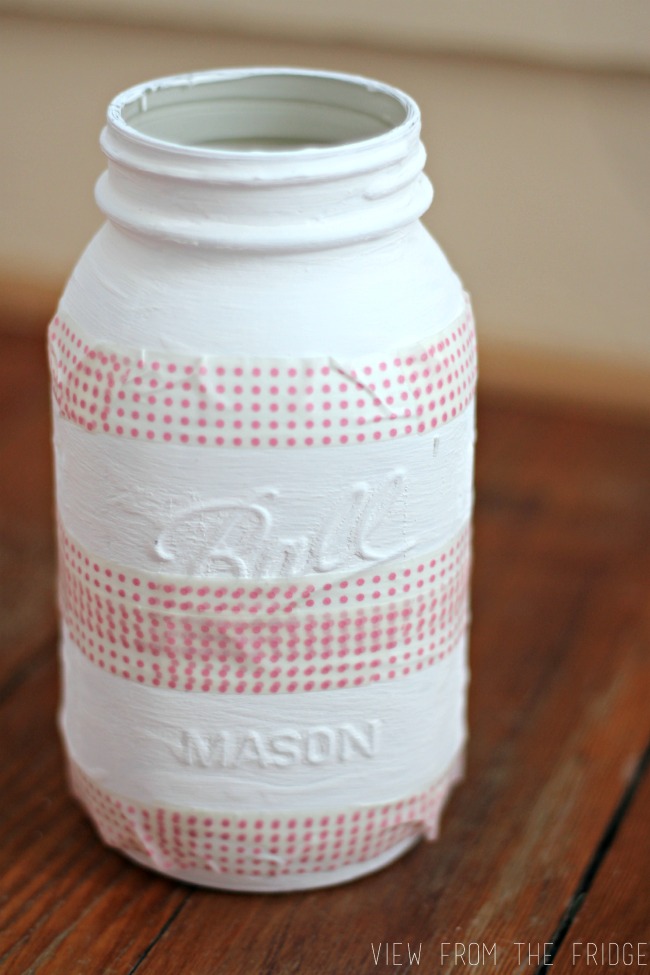
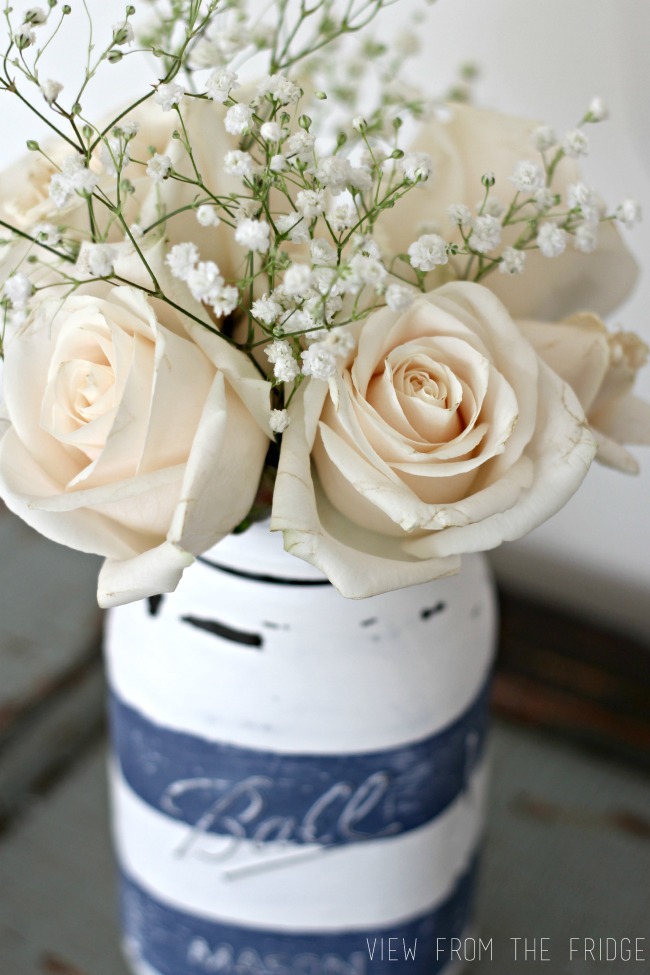
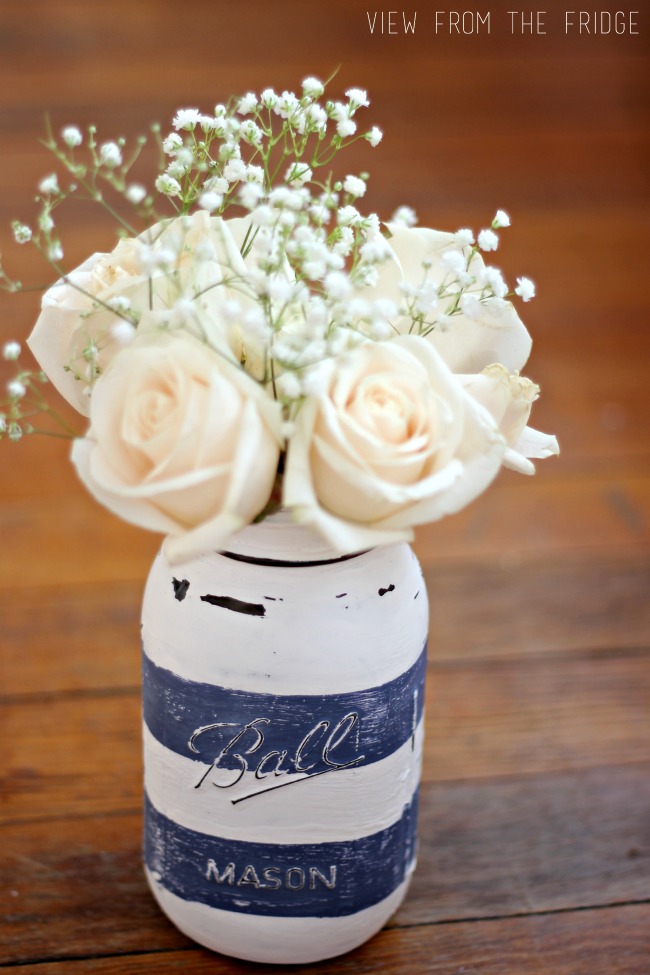
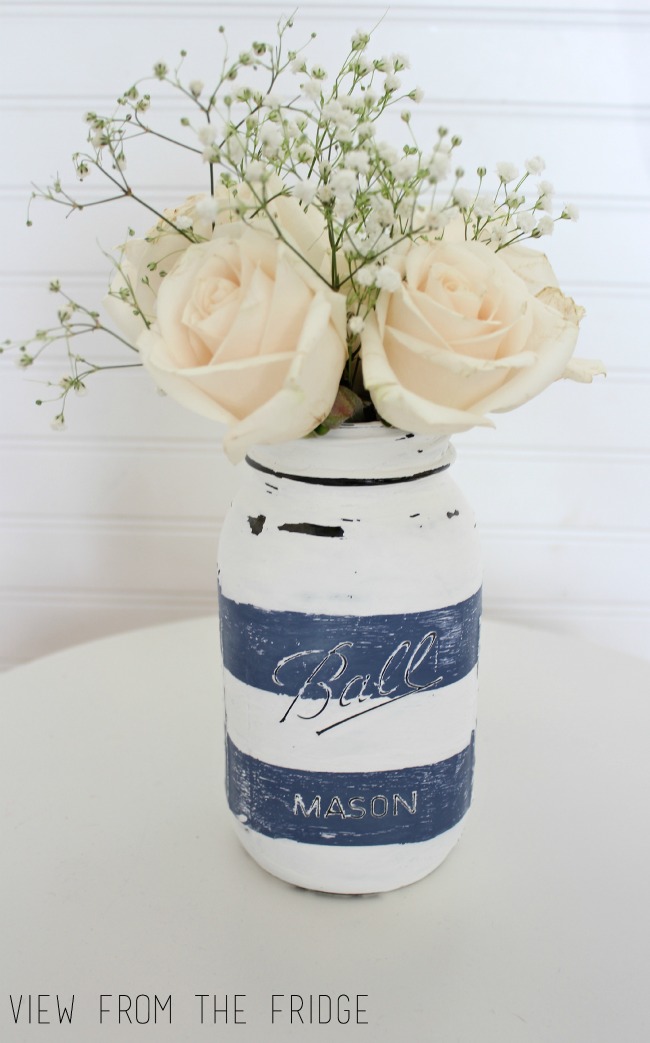
Start by thoroughly cleaning the surface of the mason jar to ensure proper adhesion of the paint. Then use a foam brush to apply two coats of white chalk paint to the outside.
Let it dry completely between coats.
Step 2
After the white paint dries, measure and mark off the desired width of your stripes around the jar using a ruler.
Then carefully stick painter’s tape, washi tape, or frog tape along these marks. Make sure that it is straight and evenly spaced.
Next, measure and tape off your stripes using painters tape, washi tape, or frog tape:
Step 3
After putting tape on for the stripes, use a foam brush to paint between the tape with the blue paint. Apply the paint evenly to cover the area completely.
Once you’ve painted all the stripes, let it sit and dry completely.
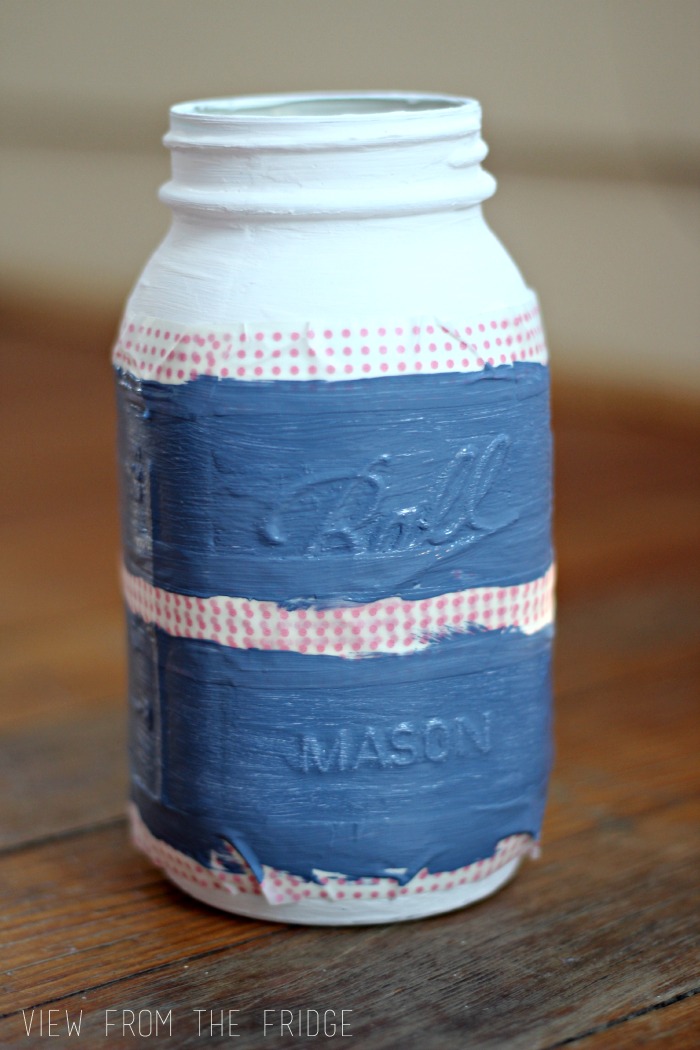
Then gently peel off the tape to reveal those clean blue lines!
Step 4
Using sandpaper or a sanding block, slightly rub it over the painted surface of the jar. Focus on areas that would naturally wear over time, like edges to create a subtle distressed look.
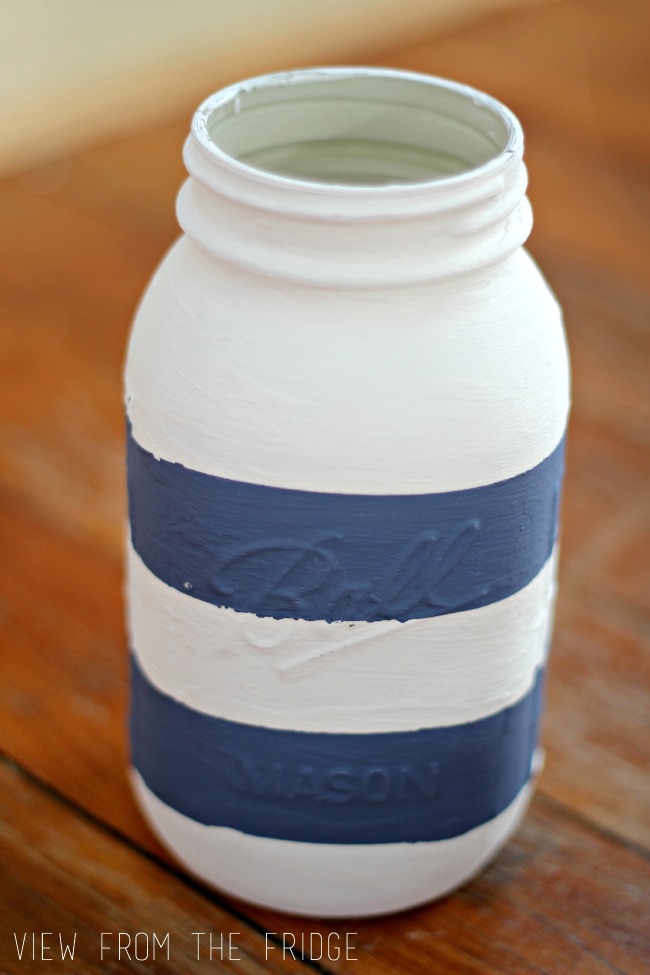
This technique enhances the depth of the paint giving the jar a vintage appearance.
Step 5
After distressing, it’s time to apply the creme wax.
Using a brush, gently rub the wax onto the painted surface of the jar.
This creme wax serves as a protective layer to the paint and enhances its overall vintage look. So if you want to keep the paint from chipping make sure that you apply the wax well!
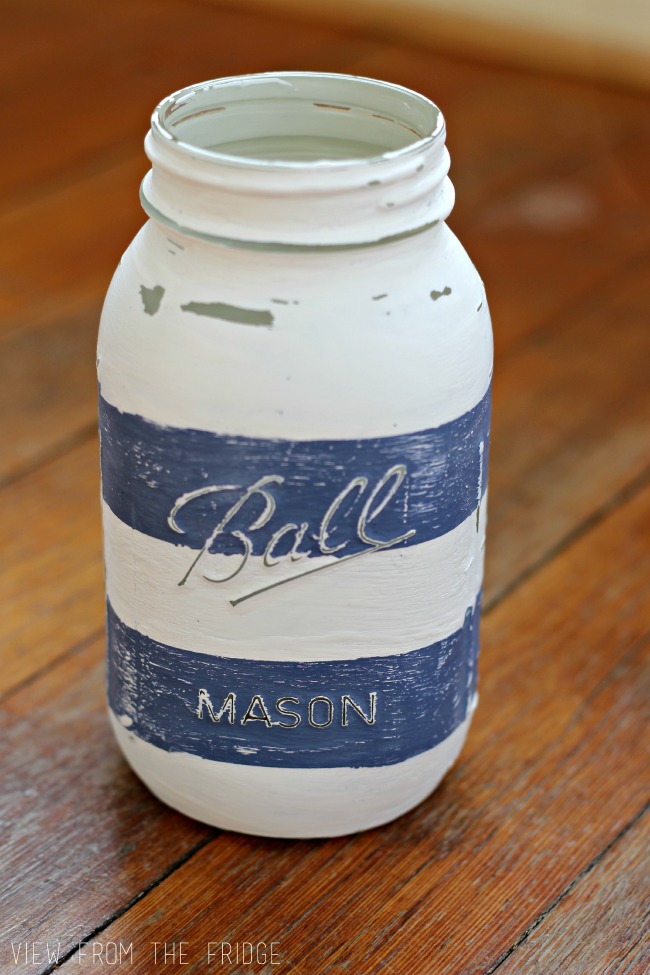
Allow the wax to dry completely.
Step 6
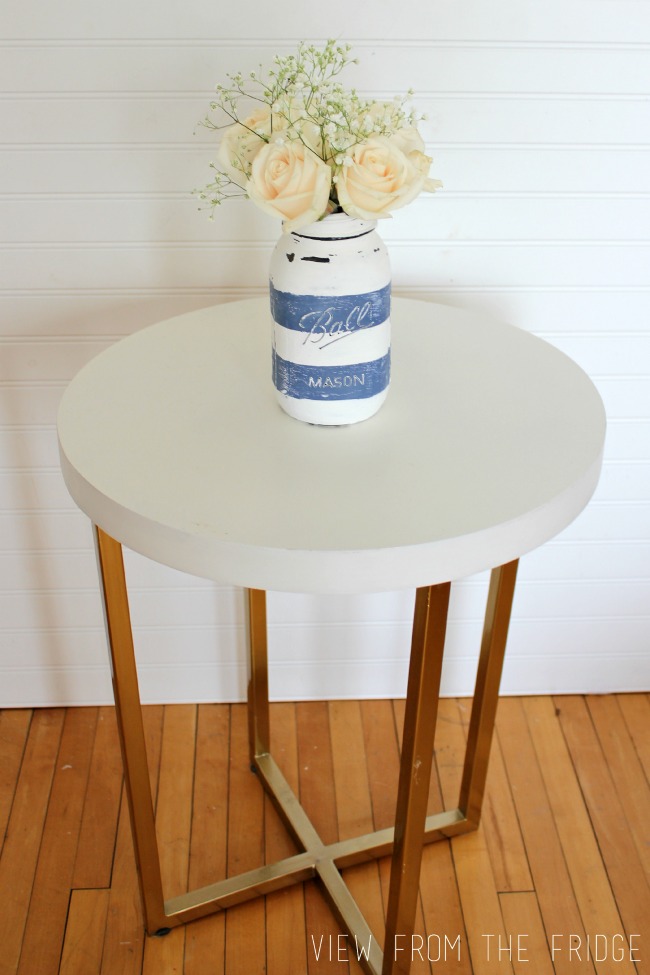
Once everything is dry, it’s time to add flowers.
Trim the stems to fit the jar, fill it with water, and arrange the flowers inside. Place it somewhere you want to add that extra elegant look. Of course, it’s a flower of choice!
Add this beautiful DIY mason vase anywhere in your home and enjoy or give it as a gift!
And as I’ve told you earlier, this craft fits various instances. For me, mason jar vases never go out of style!
I’ll tell you more below:
On what other occasions can I make a mason jar vase centerpiece?
The following are just some mason jar vase ideas, but you can play with your creativity.
Weddings – mason jar vases are great for holding flowers like roses that match the wedding’s style. They can be used as table centerpieces, aisle markers or hanging decorations.
Bridal Showers – once filled with flowers and greenery, it can add lovely decorations for your bride-to-be shower. On this occasion, you can use mason jar vases as table centerpieces or place them around the venue.
Graduation Parties – aside from flowers, you can actually put some of your school supplies. like pencils or academic awards to add that nostalgic feeling you had. add it along with some ribbons or graduation tassels for elegance.
Dinner Parties – adding a mason jar centerpiece to your gathering with friends brings a touch of sophistication to the table. Fill them with flowers like roses or lilies, arranged to complement the overall decor theme.
Outdoor Parties – picnic and BBQ parties are much more enjoyable when held in your own backyard. Why not try adding an extra cozy feel by using mason jar vases filled with flowers? Perfect while watching sunset.
You see how a single craft can level up any celebration by just decorating it yourself.
So why not give it a try at your next outdoor gathering or party?
This was an easy, quick, and fun craft to add some color to your Spring Decor! Save it to your craft Pinterest board or share it with a friend.

Susan B
Latest posts by Susan B (see all)
- The Best Orange Mango Jello Shots - April 21, 2024
- Cinco De Mayo Recipes - April 18, 2024
- Easy Mexican Desserts - April 17, 2024


This is too cute! I have a lake cabin and this would be a perfect addition! Thanks for the inspiration!
Thank you for the tutorial. I’m late getting into the game and some directions out there from long ago did not work. I’ve used this brand of chalk paint and even used a sample of Lowes paint to tint it but I was concerned as I felt mine was a bit see through. But I think it must be okay. Looks similar to yours which I love. Love the denim look of stripes! I pinned it to my jar ideas.
HI there! Visiting from Whimsy Wednesday. This looks so cute! Very creative and I love the stripes. Thanks for sharing!
I love this idea of the stripes. I will stop for mason jars. LOL! Thanks for the tutorial. Yours turned out fantastic.
I love the stripes too! Such a nautical feel. This idea would work well with some of the ideas I have for my new living room.Dropping in from Whimsy Wednesday:)
Love these! Such a pretty rustic vase!
I have been dying to paint some jars lately. Thanks for sharing this!
This is such a cute idea. You should link up at Family Joy Blog Link Up Party this week. The party is open until Wednesday @12PM MST. Check it out http://thinking-outside-the-pot.com/?p=2343
What a great idea. I just bought a french grain sack table runner for my kitchen table and a few of these will look great as a centerpiece!
I love the stripes, reminds me of Cornishware pottery form Cornwall in the UK which I love (I even have a pinterest board dedicated to it!)
So very pretty. It’s on must to do list.
I love repurposing jars, there are so many fun ways to dress them up. I love the distressed look and the blue stripes, it almost looks like denim wrapped around the jar. Turn
I absolutely love mason jar crafts! This came out really nice:) I’d love it if you shared this over at my link party http://www.twentysomethinginthe2010s.com/peace-love-link-up-001/
Pretty idea! Thanks for sharing it on the #HomeMattersParty
Such a pretty twist ! I have so many jars I could use this on!
Love the stripes and the colors are perfect for spring! Fantastic idea!
LOVE this! Seriously so cute and great color choices.
Thanks for linking up with the Best of the Blogosphere link up.
I live on a lake and I think these would be so cute in my house! Thanks for bringing this by Throwback Thursday!
Mollie
I really like Katie’s spring project. The colors are pretty. Pinned & shared.Thanks for sharing at the Inspiration Spotlight party!
This is so cute and so whimsical looking too! I love it!
Thanks for sharing (and for linking up to the #SHINEbloghop).
Wishing you a lovely evening.
xoxo
I’m going to do this to the mason jar I have with no lid! Thanks for the idea and for linking up at #SaucySaturdays.
I love all things Mason and what a simple and easy craft to make – Love it! and pinned it to my Mason Jar board so I can come back and give it a try. Thanks for sharing such a great idea!
Wow this is really cute and it seems easy enough even I can do it. Really like it for the 4th of July! Great idea. Can’t wait to head to the craft store
This is lovely! Such an inexpensive project too. I’m going to have to try this with some of my jars. I’ve spray painted some before but never brushed it on and given it a distressed look. I love the effect! This is being featured at our link party. http://www.thelifeofjenniferdawn.com/2016/05/12-handmade-ideas-for-mom-and-little.html