
Monogram Cutting Board
Hello! Happy July (already?!?)! It’s Katie from View From The Fridge back with a fun and thrifty project today … A Monogram Cutting Board.

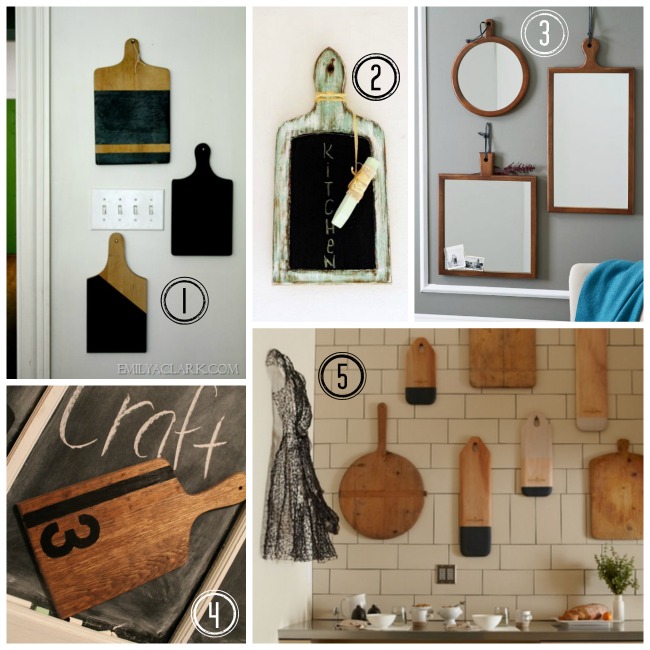
Looking back through my pins, apparently I’m drawn to decorating with cutting boards in the kitchen! Take a look at some of these great ideas I had come across in the past:
When ‘browsing’ Goodwill last week, I came across a plain ol’ cutting board for $1.99!
Side note here: I say ‘browsing’, but really, with three kids in tow, it was more like a quick perusal of the aisles, while bribing my two older boys to be good (probably with a promise of a treat), while bouncing up and down trying to keep Ben happy in the Baby Bjorn, all the while knowing at any second we may have to make a mad dash for the exit (possibly with 3 screaming boys). Relaxing, eh?
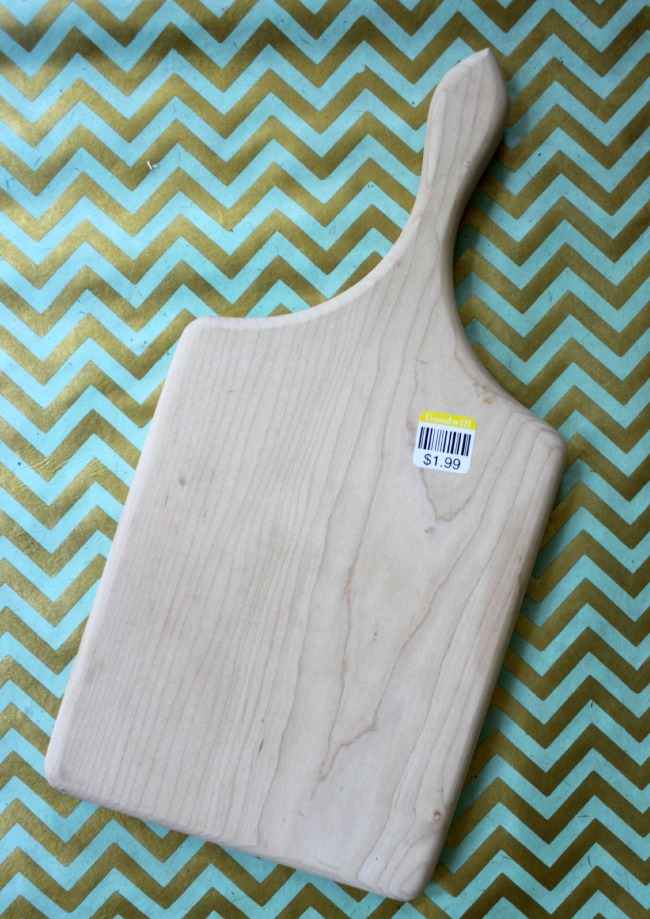
While I had not set out to find a cutting board to repurpose, when I had spotted this one … all those pins above popped back into my mind! An easy, simple, do-able project started forming in my head! Hooray!
While I would probably never buy a used cutting board at Goodwill to use as a cutting board (just not sure how to clean and sanitize it properly), it was the perfect size and shape to hang on the side of our kitchen cabinet as a fun piece of art! Now … for the makeover!
I decided to go with a color blocked look and a monogram.
SUPPLIES
Here’s what I used for the project:
- Cutting board (obviously)
- Drill and 1/4″ bit if your board doesn’t have a hole
- Grey spray paint
- White craft paint
- ‘S’ stencil
- Stenciling brush
- Embellishments (use whatever you like, here’s what I used): floral wire to add a little something to the handle and a ribbon to hang it!
EASY PROCESS
- First, I drilled a 1/4″ hole in the top of the handle so I could add a ribbon to hang the board.
- Next, I taped off a diagonal line with painters tape and covered the top portion of the board with a plastic bag.
- Using the grey spray paint, I painted the bottom portion of the board with one coat of grey paint.
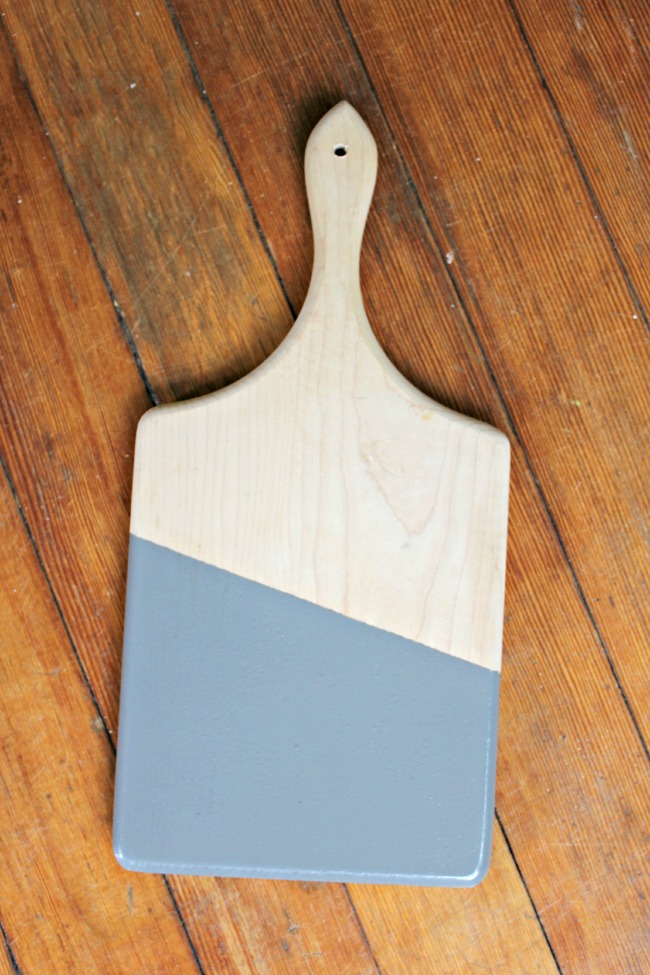
Tape off top portion (using painters tape and a plastic bag), and spray paint bottom section. - I let that dry overnight, and then applied my ‘S’ stencil with white craft paint and a stenciling brush.
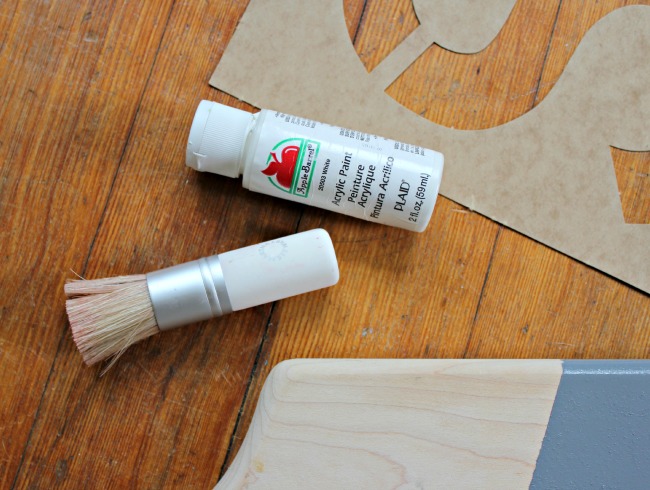
Stenciling brush, white craft paint, and ‘S’ stencil When stenciling, I always tape the bristles of my brush to prevent stray bristles from getting under the stencil:
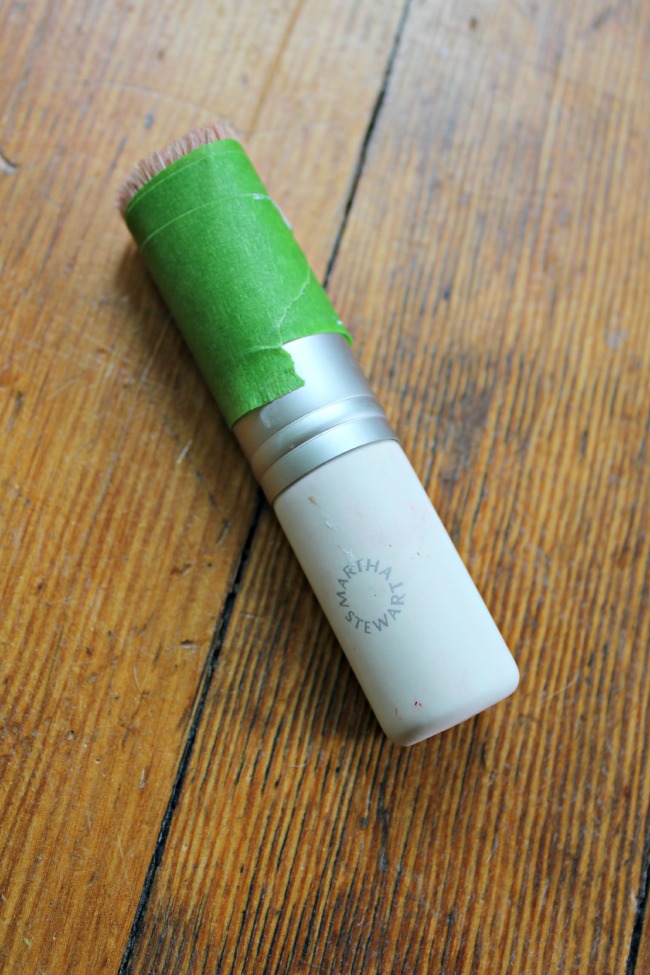
Wrap the stenciling brush in painters tape I then apply the paint to the board with a pounding motion (rather than traditional side to side brush strokes). This helps keep the paint inside the lines and prevents it from creeping under the stencil.
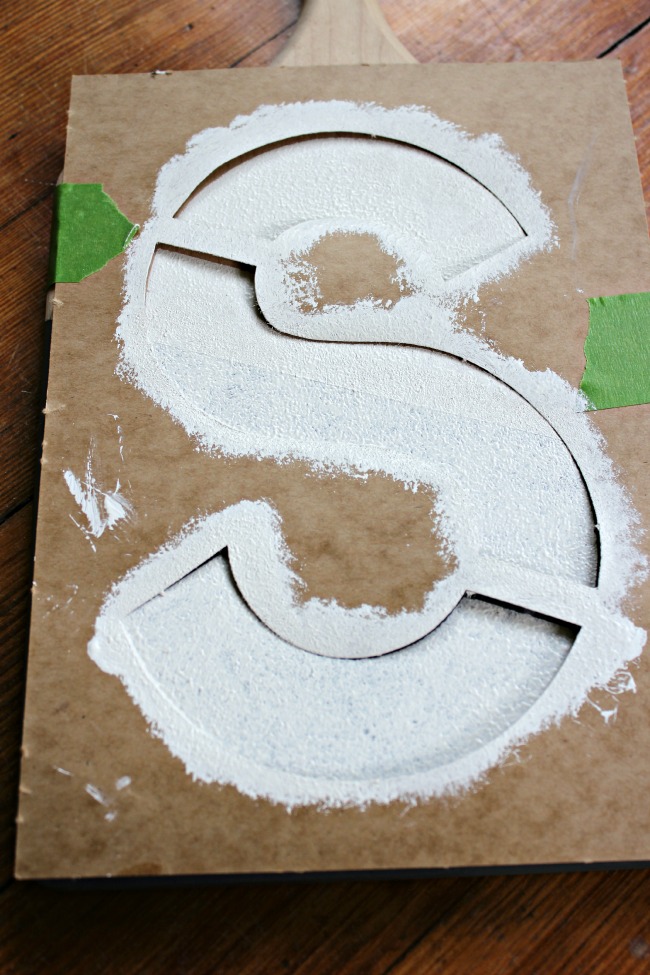
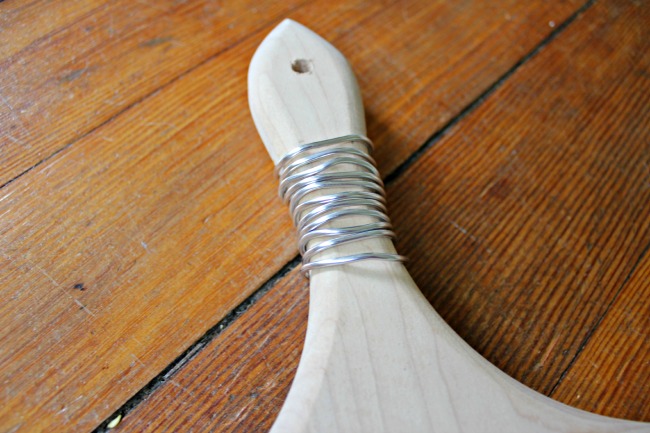
Using an up and down ‘pounding’ motion apply paint inside stencil - To add a little interest, I wrapped the handle with floral wire that I found in my ‘random supplies’ craft stash (you can find in the floral aisle of a craft store). Wrapping the handle with leather lacing would also be super cute!
A little floral wire for added interest - I threaded some black ribbon through the hole, tied a bow, and hung it up!

Finishing touch!

Perfect for the side of our kitchen cabinet:

Thanks so much for having me here today! I’ll be back next month, but I’d love for you to stop on over and say hello at View From The Fridge!
Facebook / Google+ / Pinterest / Twitter / Instagram
Susan B
Latest posts by Susan B (see all)
- Pineapple Upside Down Jello Shots - April 13, 2024
- The Best Graduation Table Decorations - April 12, 2024
- Simple Graduation Centerpieces With Free Printable - April 5, 2024
Love this idea Susan – I’m definitely pinning this! Thanks for the awesome tutorial too 🙂
Thanks for stopping by, Marie!! Glad you like the project! Hope you’re having a great week!!
XO,
Katie
Katie I’m so with you on the thrift store trips. I was the same way when Blake was little. Now I can’t take all three out on my own, they’ve turned crazy. Anyways back to the craft. love it!! You did such a great job and I really like how you showed all the other examples of how you can make it. Great job again Katie!
A great project! Your tutorial is easy to follow…. Bravo! Just popping in from Whimsy Wednesdays Link Party!
Best,
Brooke